David Payne:
Thanks Mike - I didn't want to quote in order to keep the forum at little smaller, but wanted to address the remove the stars comment, do something, then add the stars back in comment.
Yes, I am an advocate of that, but nowhere moreso than deconvolution. The main problem I had with deconvolution was ringing in the stars, sometimes despite the considerable effort to mask the stars beforehand. In addition, I found the deringing routines seemed to fight the deconvolution in nebulosity. What worked wonders for me, is to get my PSF, remove the stars, do the deconvolution with ringing correction turned off, and then add the stars back in. The deconvolution is truly fantastic in this scenario, and generally not many iterations are needed. Being judicious with the deconvolution iterations can also be helpful in avoiding background noise, as well as using all five scales in the wavelet regularization.
The drawbacks of this technique are that you can get some additional noise in the background (but NoiseX/MLT does a great job on this), and it doesn't actually do anything on the stars themselves - so you can use this to shrink/brighten stars, that BlurX can do. If you want to do this, then one can use BlurX on the stars only, or revert to the halo reduction methods taught by Horizons / incorporated into a script.
For RGB images I tend to add the stars back in right after deconvolution for stretching, possibly removing them again after non-linear. For NB, I will leave the stars out more often - so I can control the star appearance via independent stretching.
Thanks for the call-out.
Dave
I read this and had a lot of time on my hand to process "The Lost Galaxy" today. I followed all the GHS recipes I think with good results, but I did not do the PSF before BlurXterminator.... used the default estimation. I think it turned out alright (In terms of halos). I blur exterminated both the RGB and a pseudo L made up on the registered RGB sub stackes separately. This I subjected to HDMT, then added back to the RGB color.

NGC 4535 Lost Galaxy
Hi Jerry, Very nice work. Don't lose this one. I don't know how BlurXterminator gets its PSF. I was referring to deconvolution (the deconvolution process) where you have to supply the PSF, which you have to get from the stars. Needless to say you have to do this with a starry image, just apply the deconvolution process on the starless image to avoid any ringing. BlurX uses its AI to avoid ringing and likely uses a different method altogether. CS, Dave
|
You cannot like this item. Reason: "ANONYMOUS".
You cannot remove your like from this item.
Editing a post is only allowed within 24 hours after creating it.
You cannot Like this post because the topic is closed.
Copy the URL below to share a direct link to this post.
This post cannot be edited using the classic forums editor.
To edit this post, please enable the "New forums experience" in your settings.
David Payne:
I don't know how BlurXterminator gets its PSF. I was referring to deconvolution (the deconvolution process) where you have to supply the PSF, which you have to get from the stars. Needless to say you have to do this with a starry image, just apply the deconvolution process on the starless image to avoid any ringing. BlurX uses its AI to avoid ringing and likely uses a different method altogether. Part of what makes BlurX so effective is that use of AI allows it to process the image in tiled sections, so the PSF it uses for star correction/reduction is localized, and therefore more accurate. For non-stellar correction, though, the documentation advises not using the auto setting and putting in a PSF diameter (fwhm) measured for the whole image instead. Otherwise, if there aren't enough stars in a tile, the software will try to come up with a PSF from the non-stellar structure which won't be very accurate. Regarding the lack of ringing, I thought it likely that BX also pulls the stars out and works on stars and target independently, especially given the close association of BX and SX, but really just guessing...... EDIT: Not SOP, but I find in addition to the Amount setting, playing with the PSF diameter is another way of tweaking the amount of non-stellar deconvolution. Cheers, Scott
|
You cannot like this item. Reason: "ANONYMOUS".
You cannot remove your like from this item.
Editing a post is only allowed within 24 hours after creating it.
You cannot Like this post because the topic is closed.
Copy the URL below to share a direct link to this post.
This post cannot be edited using the classic forums editor.
To edit this post, please enable the "New forums experience" in your settings.
One of the things I like about GHS is avoiding destarring and then putting the stars back, which is another process full of pitfalls.
I seem to be having good luck using HDMT on a selected wavelet (s)…. here was 5&6. I am doing this on a pseudo L made up of all the registered individual RGB subs. This is (of course) brighter than R, G or B and seems to take to the HDMT reduction of brightness well…. my theory.
Then I apply the L to the (saturated) RGB color image.
|
You cannot like this item. Reason: "ANONYMOUS".
You cannot remove your like from this item.
Editing a post is only allowed within 24 hours after creating it.
You cannot Like this post because the topic is closed.
Copy the URL below to share a direct link to this post.
This post cannot be edited using the classic forums editor.
To edit this post, please enable the "New forums experience" in your settings.
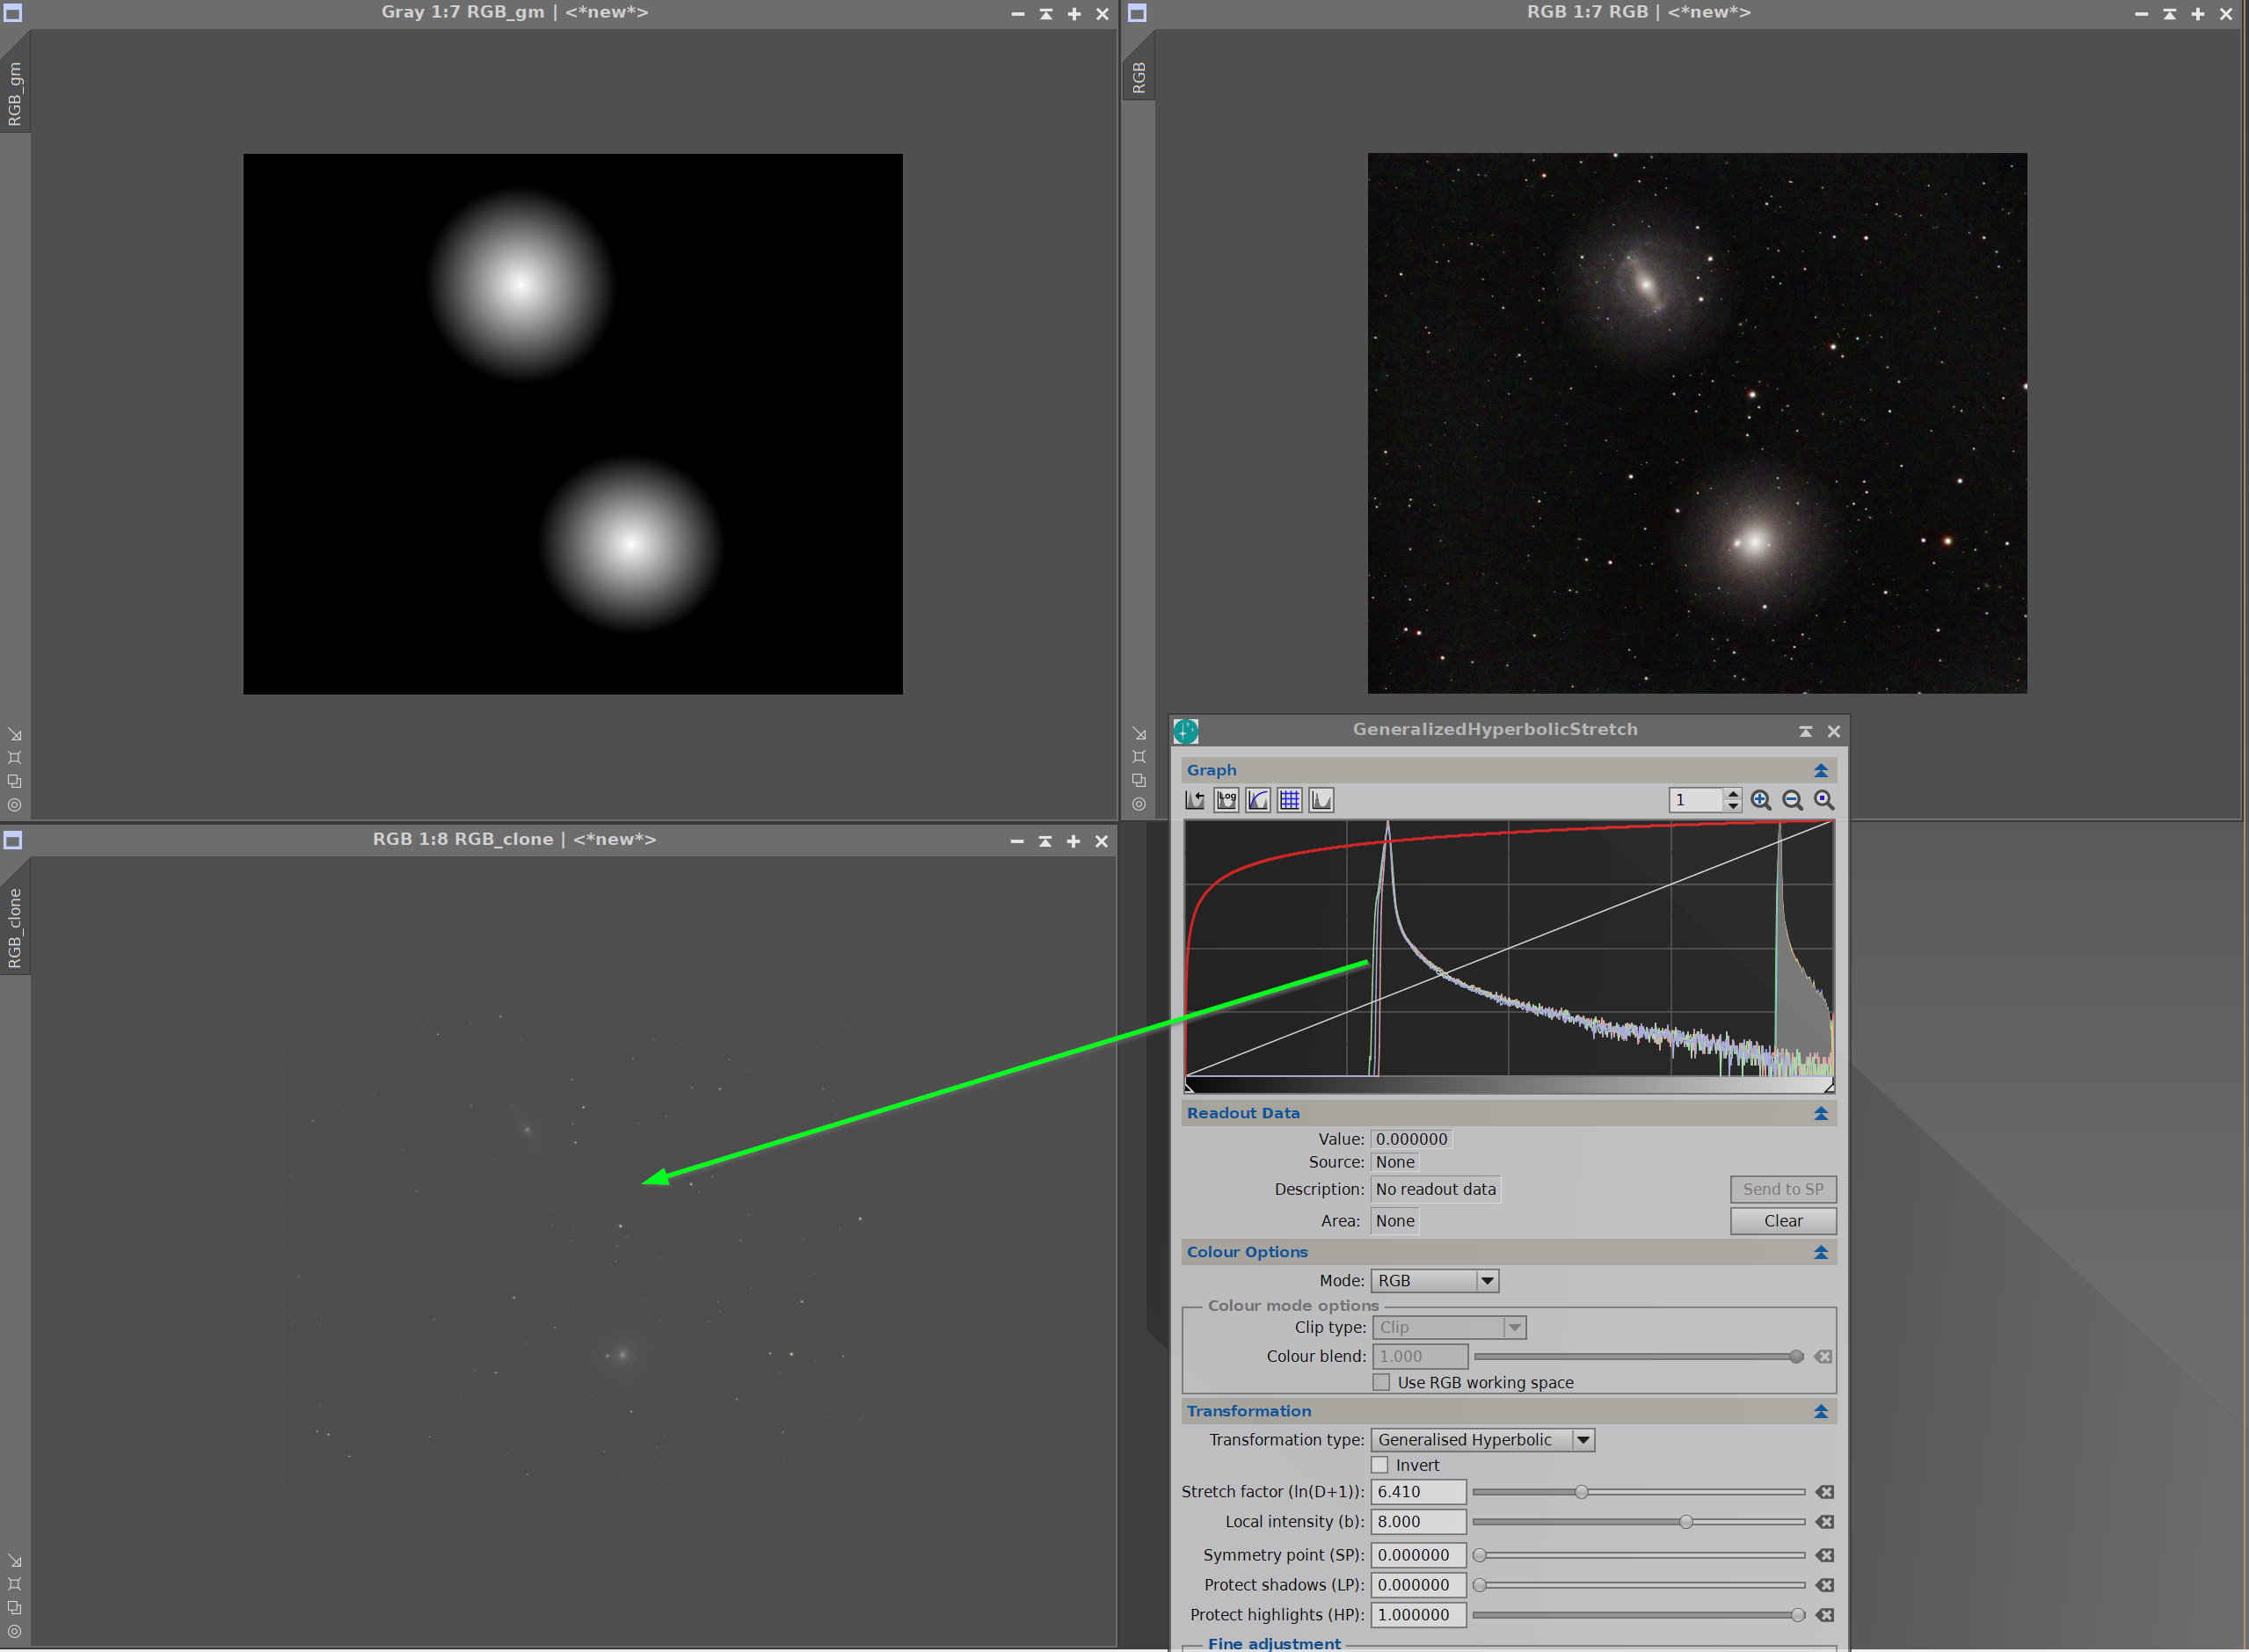
Well, here is a new challenge... the final result is on top after having to use a GAME mask to beat down the background.... the first stretch is on the bottom with the Green Arrow.  Set BlackPoint: 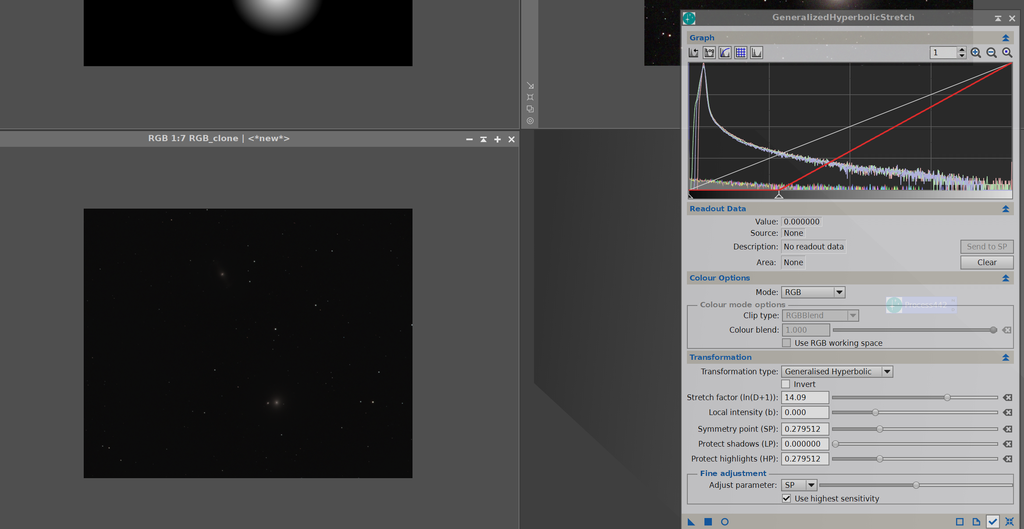 Second Stretch Still Looks Good:  But for the next stretch I get this and am sunk... need the mask... something is wrong here??? 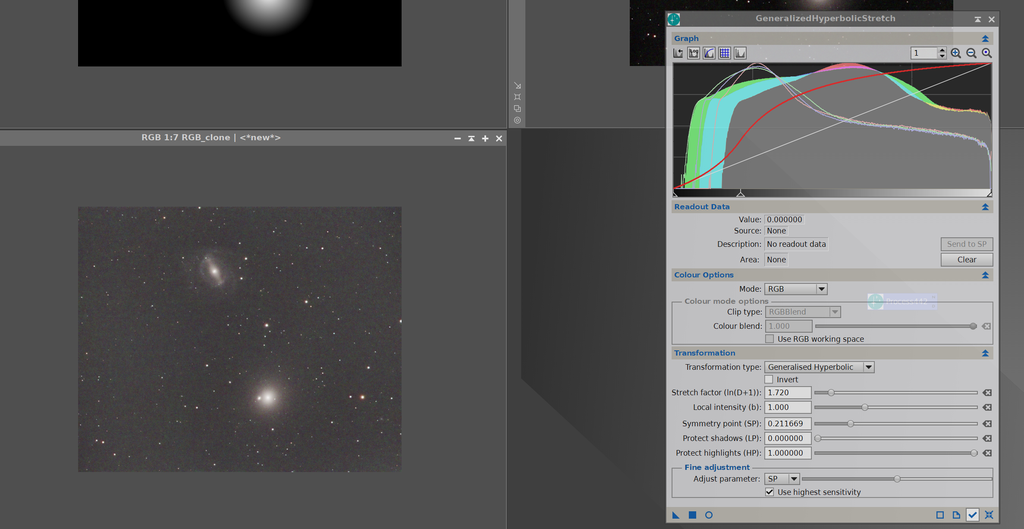 |
You cannot like this item. Reason: "ANONYMOUS".
You cannot remove your like from this item.
Editing a post is only allowed within 24 hours after creating it.
You cannot Like this post because the topic is closed.
Copy the URL below to share a direct link to this post.
This post cannot be edited using the classic forums editor.
To edit this post, please enable the "New forums experience" in your settings.
Hi Jerry,
The symmetry point for that third stretch looks like it is pretty close to the peak of the histogram - ie it is in the background - so you are adding contrast to the background noise and hence the result you are seeing. So, the first question is: what are you trying to achieve in that third stretch? If, for example, it is to bring out the dimmer parts of the galaxy - ie you want to be working close to those background values - then you might need a really surgical approach. Set SP at the dimmest value you want to reveal (make sure your data quality will support this choice!) then set LP a bit below that value and HP a bit above that value, then a pretty aggressive b value and bring in the D factor. You will need to juggle all values quite a bit to find the result you are looking for. I have used this approach when I have wanted to bring out IFN.
Let me know if that helps - or, if it was something else you were trying to achieve!
CS, Mike
|
You cannot like this item. Reason: "ANONYMOUS".
You cannot remove your like from this item.
Editing a post is only allowed within 24 hours after creating it.
You cannot Like this post because the topic is closed.
Copy the URL below to share a direct link to this post.
This post cannot be edited using the classic forums editor.
To edit this post, please enable the "New forums experience" in your settings.
Hi Jerry,
On your first stretch, SP wasn't set within your data, it was set to 0. This put a lot of contrast below your data and mainly shifted the histogram right, with little expansion. Then you corrected the black-point. These two combinations set up a very narrow histogram, leaving very little contrast in your data. Once again, on the second stretch, an SP was chosen to the left of the data, not at 0 this time, but largely to the left of the histogram, adding lots of contrast into your noise.
Finally, on the third stretch, and as Mike says, SP is still to the left of the histogram peak (which is now, obviously in the background). I would go back to the beginning and placing SP within the histogram, very close to the peak for the initial stretch.
Hope this helps,
Dave
|
You cannot like this item. Reason: "ANONYMOUS".
You cannot remove your like from this item.
Editing a post is only allowed within 24 hours after creating it.
You cannot Like this post because the topic is closed.
Copy the URL below to share a direct link to this post.
This post cannot be edited using the classic forums editor.
To edit this post, please enable the "New forums experience" in your settings.
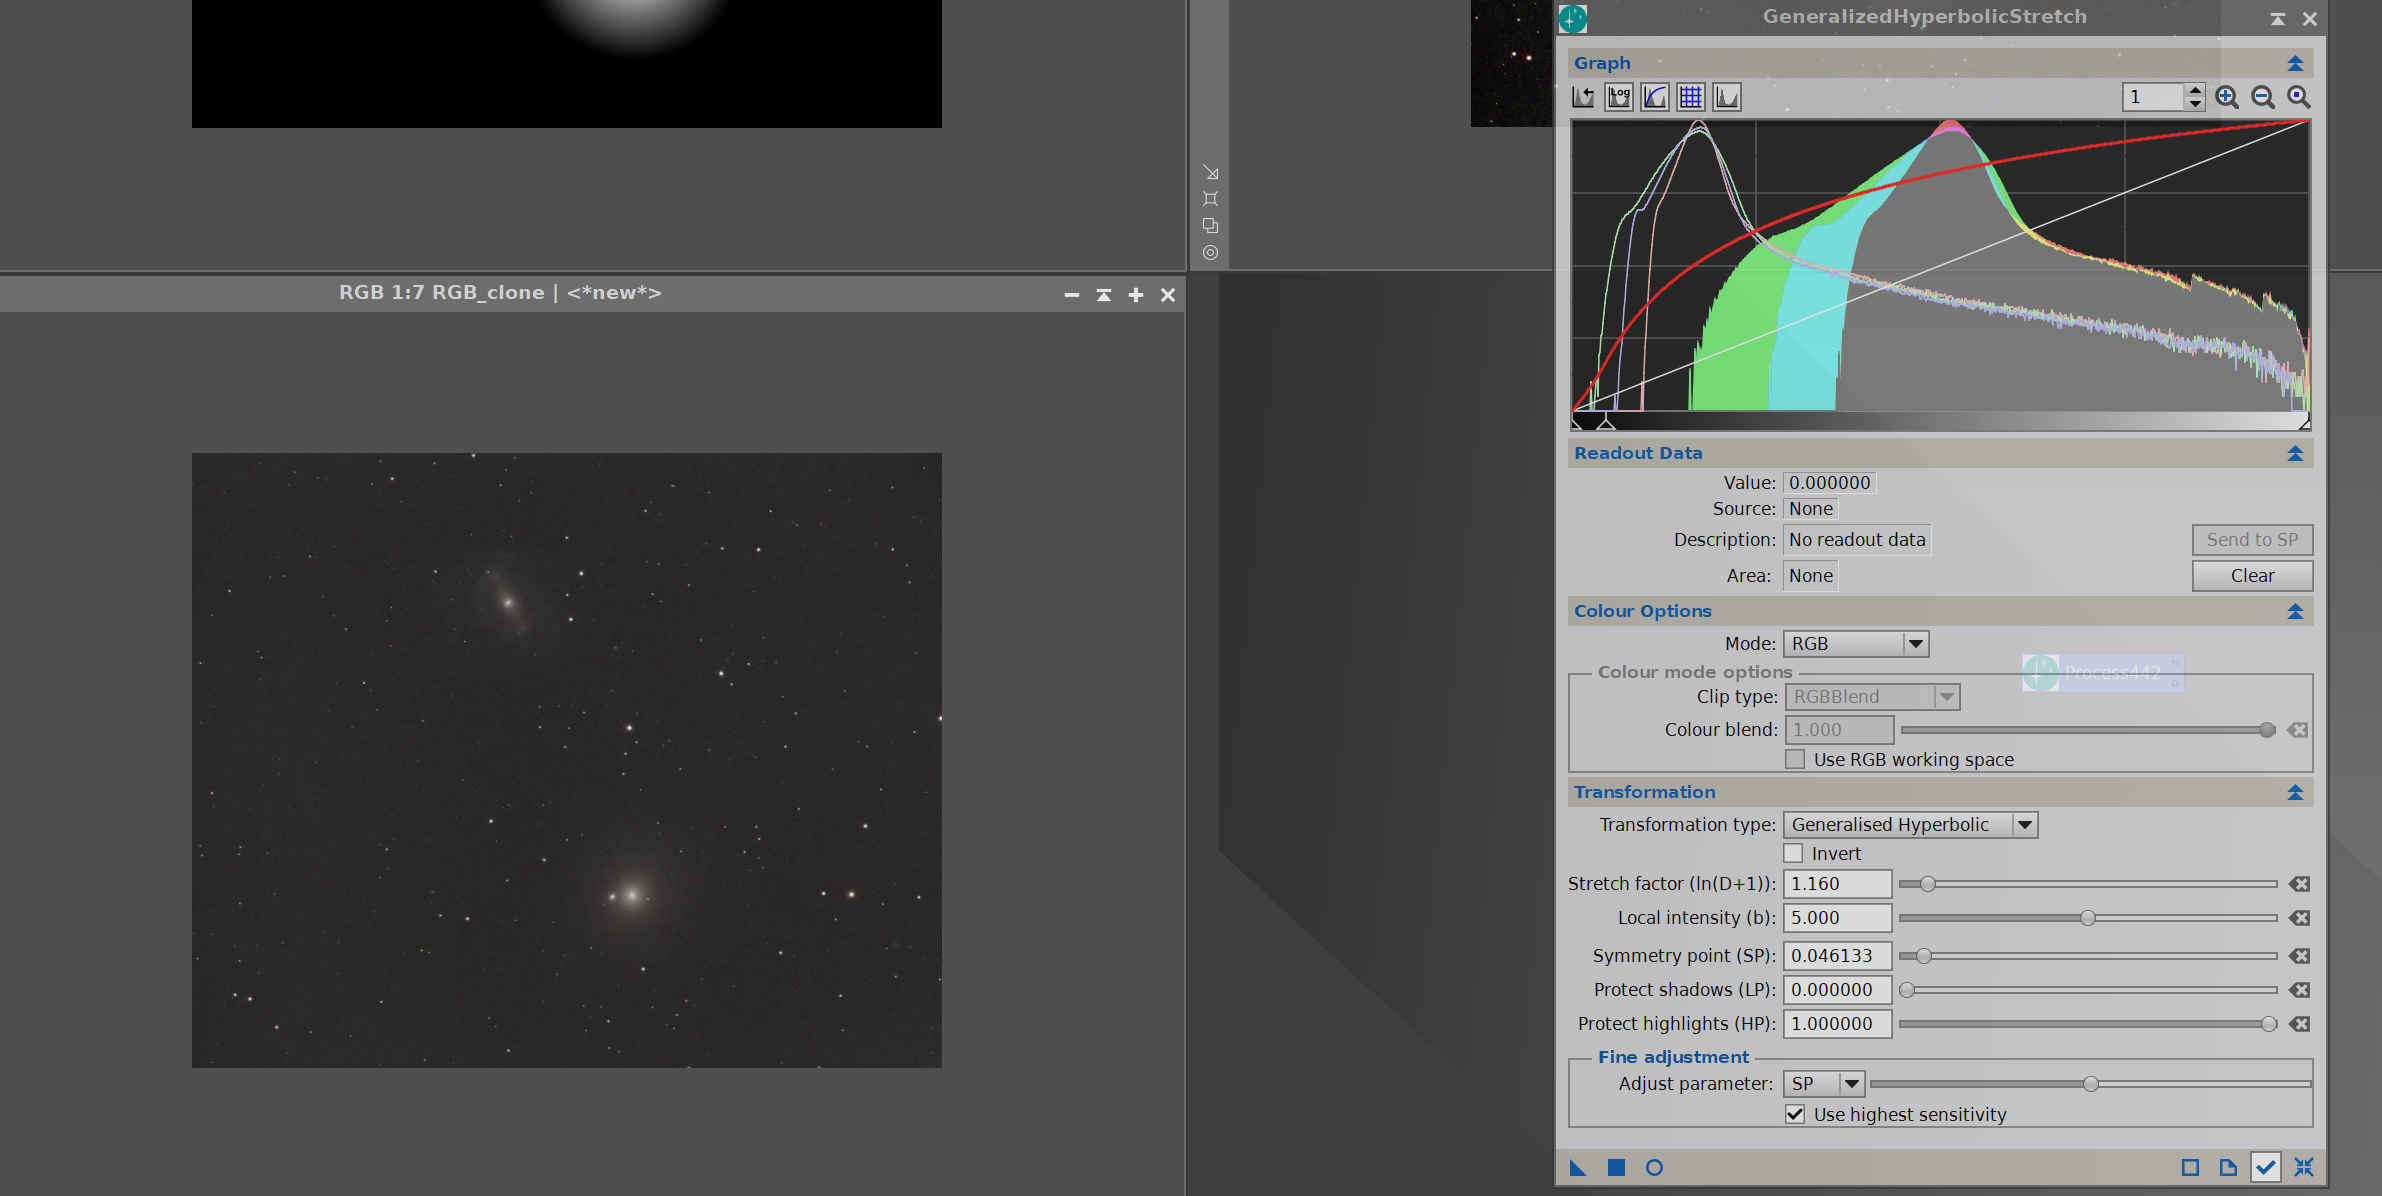
Thanks very much. I have suddenly tons of images to process and i would like to get it right. I probably need to follow a checklist using GHS as if I miss a button push I am up the creek. I have to remember to set the SP to the place I want the contrast,. I used to do that but have forgotten it. Seems like I (we) need a list of SOPs for GHS. Will be back with a revised image later today. I probably got another few dozen subs last night. Well, you were right. Here is the result taking the SP from one of the arms of the spiral. I then could adjust the SP with the slider to optimize the stretch. Think will need to do this a couple times.  Dark Point set: 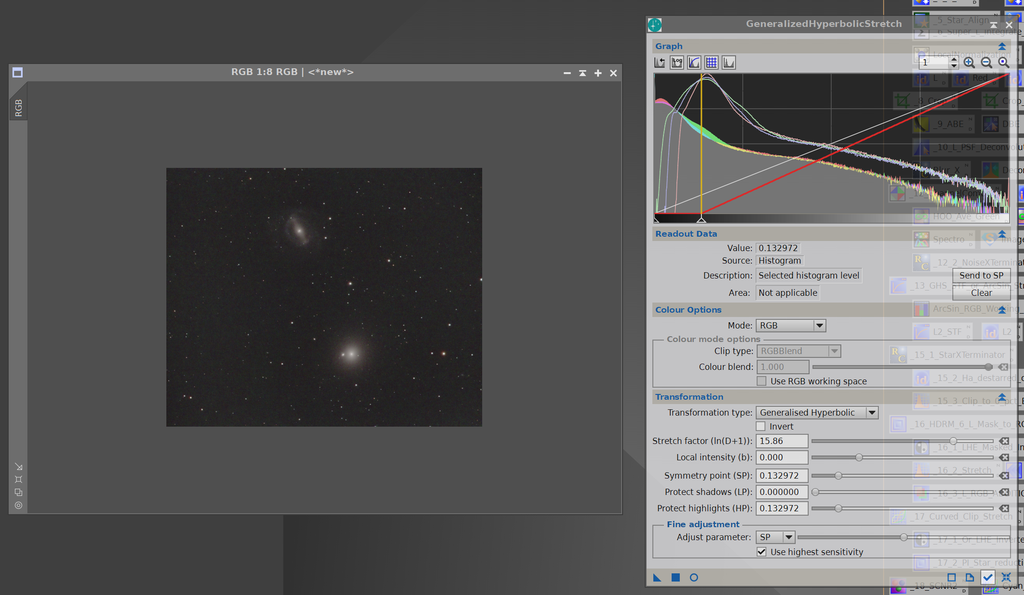 |
You cannot like this item. Reason: "ANONYMOUS".
You cannot remove your like from this item.
Editing a post is only allowed within 24 hours after creating it.
You cannot Like this post because the topic is closed.
Copy the URL below to share a direct link to this post.
This post cannot be edited using the classic forums editor.
To edit this post, please enable the "New forums experience" in your settings.
Thanks very much. I have suddenly tons of images to process and i would like to get it right. I probably need to follow a checklist using GHS as if I miss a button push I am up the creek. I have to remember to set the SP to the place I want the contrast,. Ha! You’re right about the checklist! Forgetting to switch to colours mode is number one for me, or protecting highlights when needed, but not entering the SP happens a lot too….. : ) Why not have the SP entered directly when choosing a point in the image? Is there a benefit to having it show in the graph but not be entered into the settings at the same time? Anyhow, now we’re just being greedy!…. : ) Thank you Dave and Mike for a truly game changing tool! Cheers, Scott
|
You cannot like this item. Reason: "ANONYMOUS".
You cannot remove your like from this item.
Editing a post is only allowed within 24 hours after creating it.
You cannot Like this post because the topic is closed.
Copy the URL below to share a direct link to this post.
This post cannot be edited using the classic forums editor.
To edit this post, please enable the "New forums experience" in your settings.
Scott Badger:
Thanks very much. I have suddenly tons of images to process and i would like to get it right. I probably need to follow a checklist using GHS as if I miss a button push I am up the creek. I have to remember to set the SP to the place I want the contrast,.
Ha! You’re right about the checklist! Forgetting to switch to colours mode is number one for me, or protecting highlights when needed, but not entering the SP happens a lot too….. : )
Why not have the SP entered directly when choosing a point in the image? Is there a benefit to having it show in the graph but not be entered into the settings at the same time?
Anyhow, now we’re just being greedy!…. : ) Thank you Dave and Mike for a truly game changing tool!
Cheers,
Scott I think you would be very frustrated if you had carefully refined your SP value then accidentally clicked on the image and lost it! Safer to stick with the current approach I think!
|
You cannot like this item. Reason: "ANONYMOUS".
You cannot remove your like from this item.
Editing a post is only allowed within 24 hours after creating it.
You cannot Like this post because the topic is closed.
Copy the URL below to share a direct link to this post.
This post cannot be edited using the classic forums editor.
To edit this post, please enable the "New forums experience" in your settings.
Mike Cranfield:
Scott Badger:
Thanks very much. I have suddenly tons of images to process and i would like to get it right. I probably need to follow a checklist using GHS as if I miss a button push I am up the creek. I have to remember to set the SP to the place I want the contrast,.
Ha! You’re right about the checklist! Forgetting to switch to colours mode is number one for me, or protecting highlights when needed, but not entering the SP happens a lot too….. : )
Why not have the SP entered directly when choosing a point in the image? Is there a benefit to having it show in the graph but not be entered into the settings at the same time?
Anyhow, now we’re just being greedy!…. : ) Thank you Dave and Mike for a truly game changing tool!
Cheers,
Scott
I think you would be very frustrated if you had carefully refined your SP value then accidentally clicked on the image and lost it! Safer to stick with the current approach I think! Good point! And exactly the kind of bumbling I'm so good at!..... : )
|
You cannot like this item. Reason: "ANONYMOUS".
You cannot remove your like from this item.
Editing a post is only allowed within 24 hours after creating it.
You cannot Like this post because the topic is closed.
Copy the URL below to share a direct link to this post.
This post cannot be edited using the classic forums editor.
To edit this post, please enable the "New forums experience" in your settings.
Scott Badger:
Thanks very much. I have suddenly tons of images to process and i would like to get it right. I probably need to follow a checklist using GHS as if I miss a button push I am up the creek. I have to remember to set the SP to the place I want the contrast,.
Ha! You’re right about the checklist! Forgetting to switch to colours mode is number one for me, or protecting highlights when needed, but not entering the SP happens a lot too….. : )
Why not have the SP entered directly when choosing a point in the image? Is there a benefit to having it show in the graph but not be entered into the settings at the same time?
Anyhow, now we’re just being greedy!…. : ) Thank you Dave and Mike for a truly game changing tool!
Cheers,
Scott I need some guidance about when to switch to color mode in the first place. My recall is that in the videos you do an RGB stretch first then color mode.... at a bit of a loss.... there. I have been playing with selection of that SP point and it is very tricky in my light polluted skys... think I better move.
|
You cannot like this item. Reason: "ANONYMOUS".
You cannot remove your like from this item.
Editing a post is only allowed within 24 hours after creating it.
You cannot Like this post because the topic is closed.
Copy the URL below to share a direct link to this post.
This post cannot be edited using the classic forums editor.
To edit this post, please enable the "New forums experience" in your settings.
I’m all ears too… I generally just stick with colors mode. Before switching to GHS, I used arcsinh a lot but often found the results to be oversaturated. If that were the case I’d do an initial partial stretch with arcsinh and then finish with Histogram Transformation. GHS colors mode seems like a good middle ground.
Cheers,
Scott
|
You cannot like this item. Reason: "ANONYMOUS".
You cannot remove your like from this item.
Editing a post is only allowed within 24 hours after creating it.
You cannot Like this post because the topic is closed.
Copy the URL below to share a direct link to this post.
This post cannot be edited using the classic forums editor.
To edit this post, please enable the "New forums experience" in your settings.
Please forgive me if I start with a bit of theory.
If r, g, b are the red green and blue channel values for a given pixel, Saturation can be defined as (max(r, g, b) - min(r, g, b))/max(r, g, b), or equivalently:
1 - min(r, g, b)/max(r, g, b ), or 1 - min/max, for short
If, by stretching, we increase min by proportionately more than max, the fraction (min/max) will get bigger; therefore the saturation (1 - min/max) will get smaller.
This shows that if we stretch the minimum r, g, b value proportionately more than the maximum r, g, b value we will reduce saturation.
Now think what happens in your first strong stretch - this will increases smaller values proportionately more than larger values - ie it is intrinsically going to reduce saturation. This is exactly what we see when we use histogram stretch, and GHS in RGB mode, for this initial stretch.
So, what do we do? The GHS Colour mode averages the r, g and b values and calculates the proportionate stretch that would apply for that average value. It then applies that same proportionate increase to all three channels. In that way min and max (using the notation above) both increase by the same proportion and the saturation is therefore unchanged by the stretch.
So, in answer to the question, I would suggest that the initial stretch is where you would use the Colour mode.
For subsequent stretches, where the SP is probably set somewhere in the mid values, the shape of the transformation curve will be very different and you won't have the same issue of smaller values being stretched proportionately more than larger values - in fact often the reverse may well be true. Having said that for these subsequent stretches, typically the amount of stretch will be much less severe so the issue is much less in any case. So, in practice, it generally matters far less whether you use Colour or RGB mode for these later stretches. But generally I revert to RGB for them.
Note that sometimes using the GHS Colour mode can result in an image that is more saturated than suits your own taste. If this is the case you can use the Colour blend slider to get a mix of Colour mode and RGB mode stretches.
Sorry for the rather long answer but I hope that helps.
CS, Mike
|
You cannot like this item. Reason: "ANONYMOUS".
You cannot remove your like from this item.
Editing a post is only allowed within 24 hours after creating it.
You cannot Like this post because the topic is closed.
Copy the URL below to share a direct link to this post.
This post cannot be edited using the classic forums editor.
To edit this post, please enable the "New forums experience" in your settings.
Mike Cranfield:
Sorry for the rather long answer but I hope that helps. Don't be!!...and thank you! I've noticed that colour vs rgb mode doesn't make a lot of difference after the initial stretch, and now I know why! Cheers, Scott
|
You cannot like this item. Reason: "ANONYMOUS".
You cannot remove your like from this item.
Editing a post is only allowed within 24 hours after creating it.
You cannot Like this post because the topic is closed.
Copy the URL below to share a direct link to this post.
This post cannot be edited using the classic forums editor.
To edit this post, please enable the "New forums experience" in your settings.
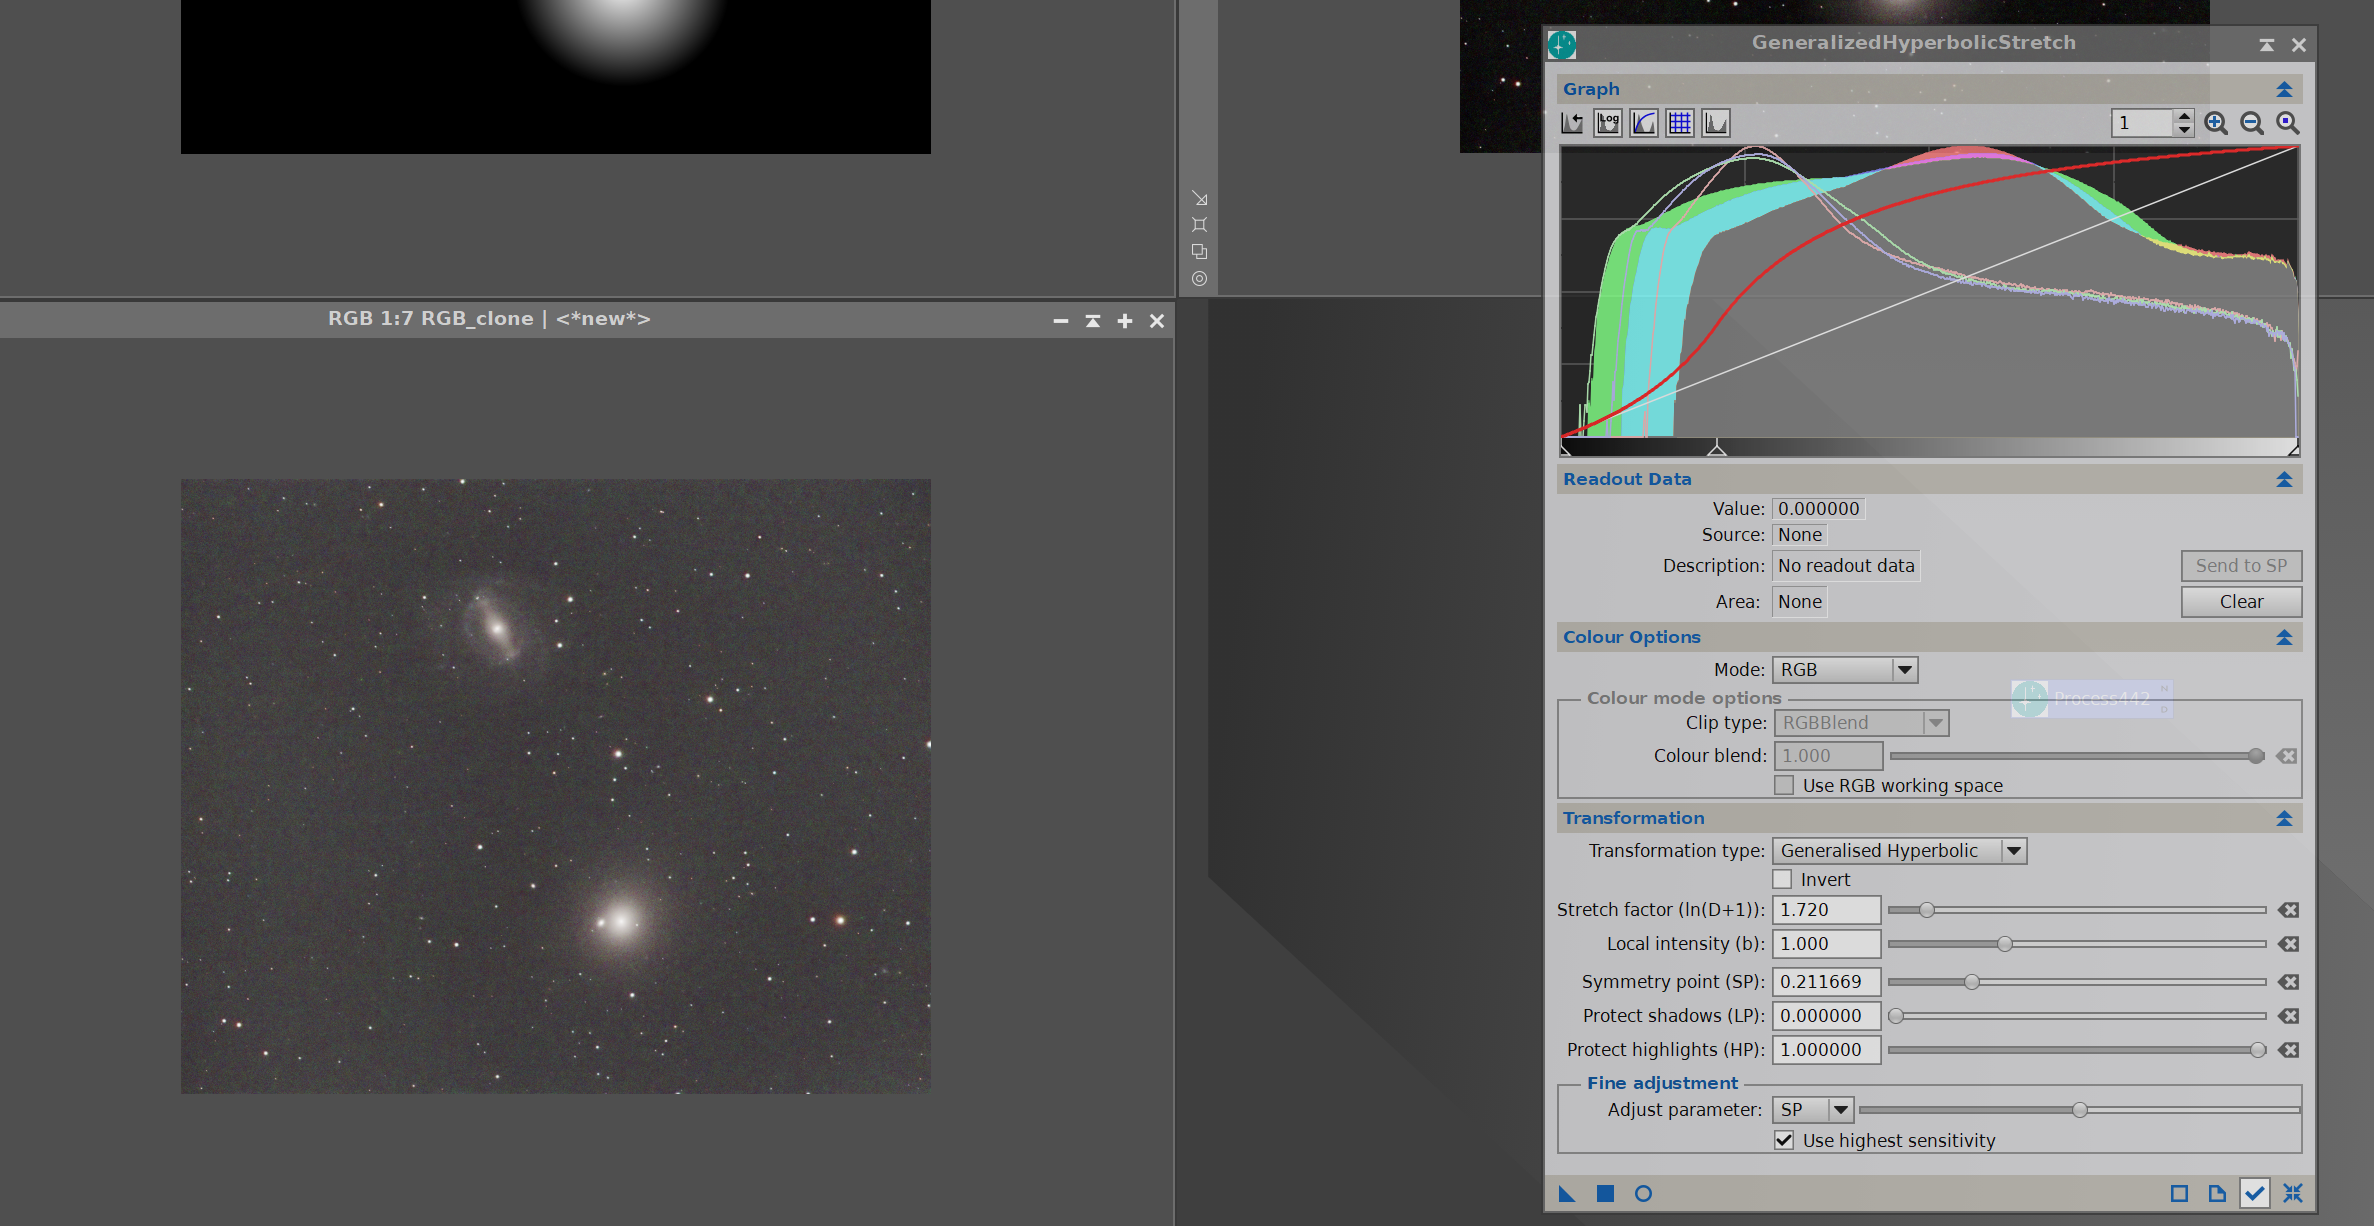
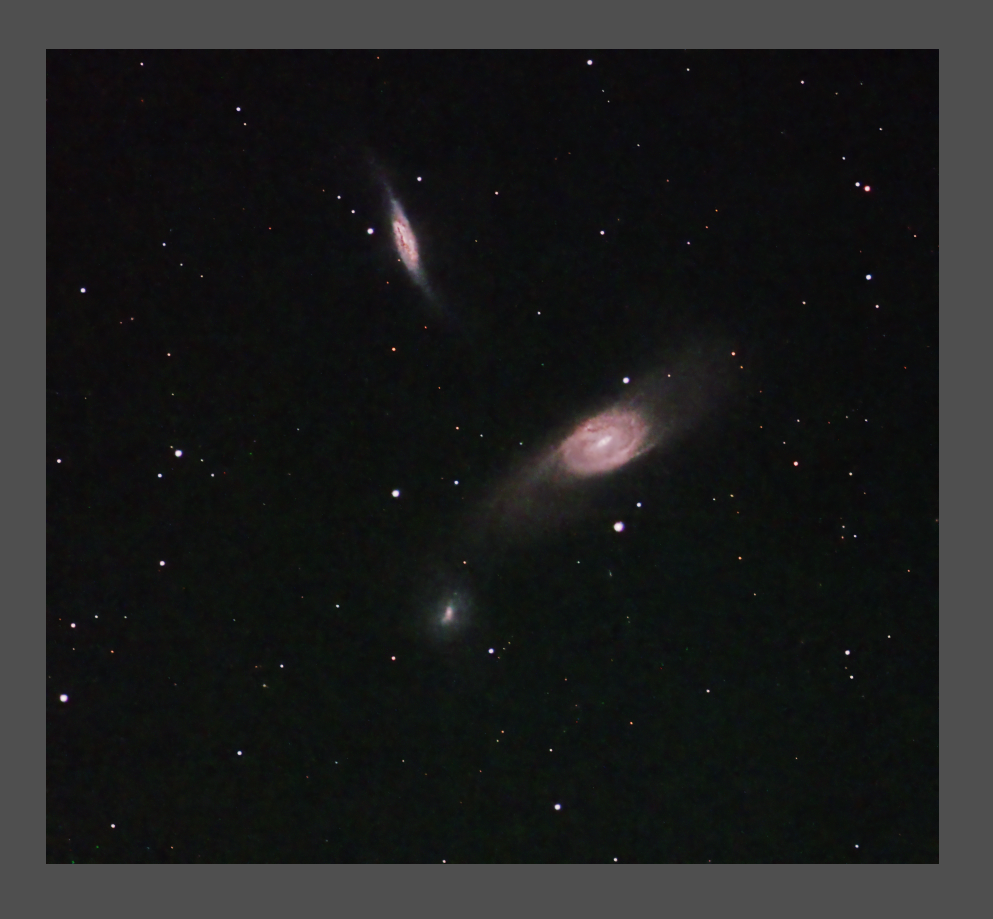
I love MATH. Makes a lot of sense, only at my age have to hear it 2-3 times before in sinks in. Here is the Virgo Trio with the COLOR stretch first... all the difference in the world... may have to tone it back. I lost some of the tendrils of the galaxies along the way but that is another issue. BTW image scale = 0.27 with the new C11   |
You cannot like this item. Reason: "ANONYMOUS".
You cannot remove your like from this item.
Editing a post is only allowed within 24 hours after creating it.
You cannot Like this post because the topic is closed.
Copy the URL below to share a direct link to this post.
This post cannot be edited using the classic forums editor.
To edit this post, please enable the "New forums experience" in your settings.
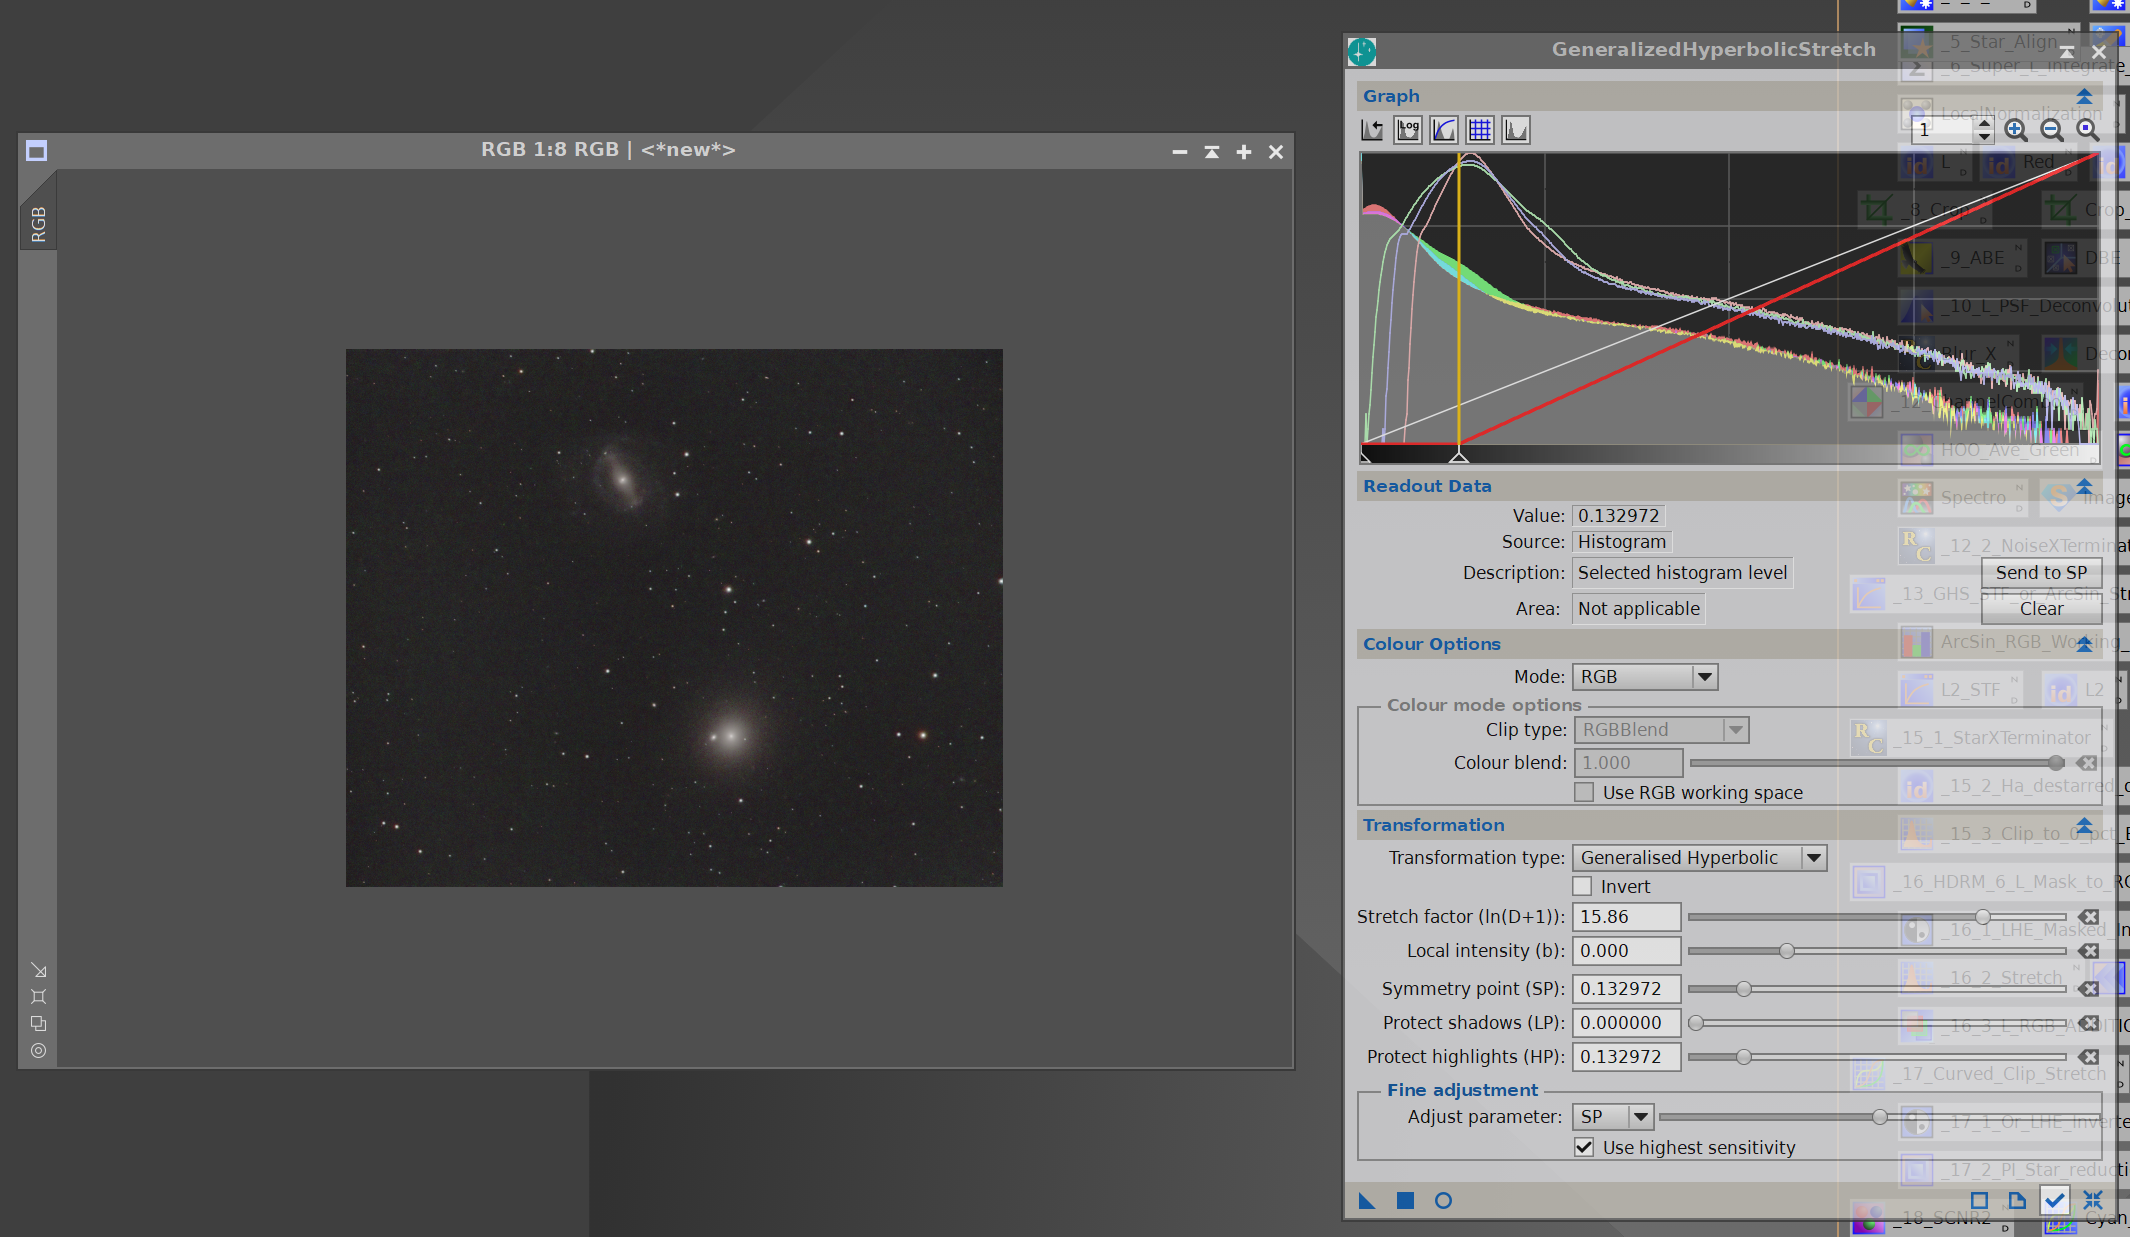
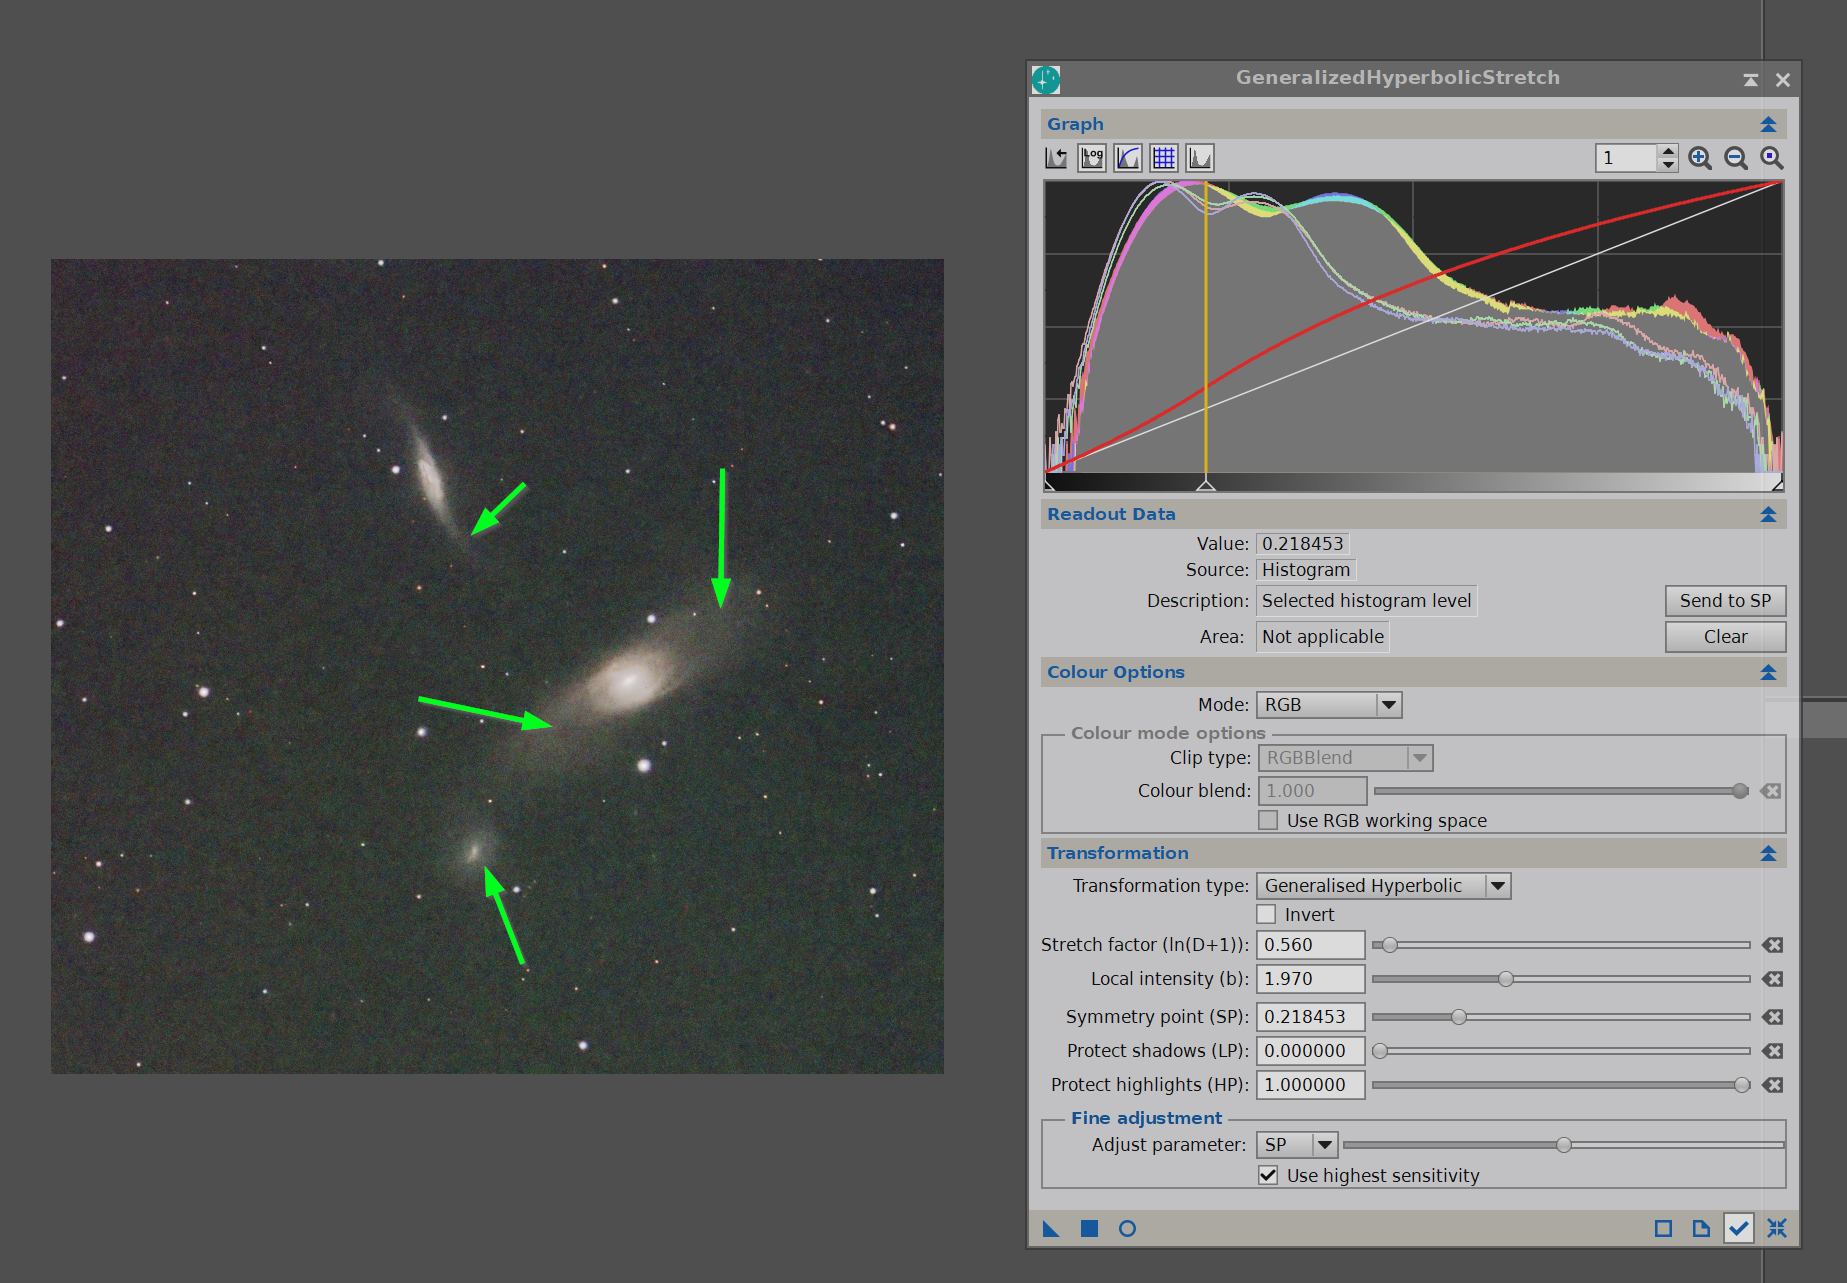
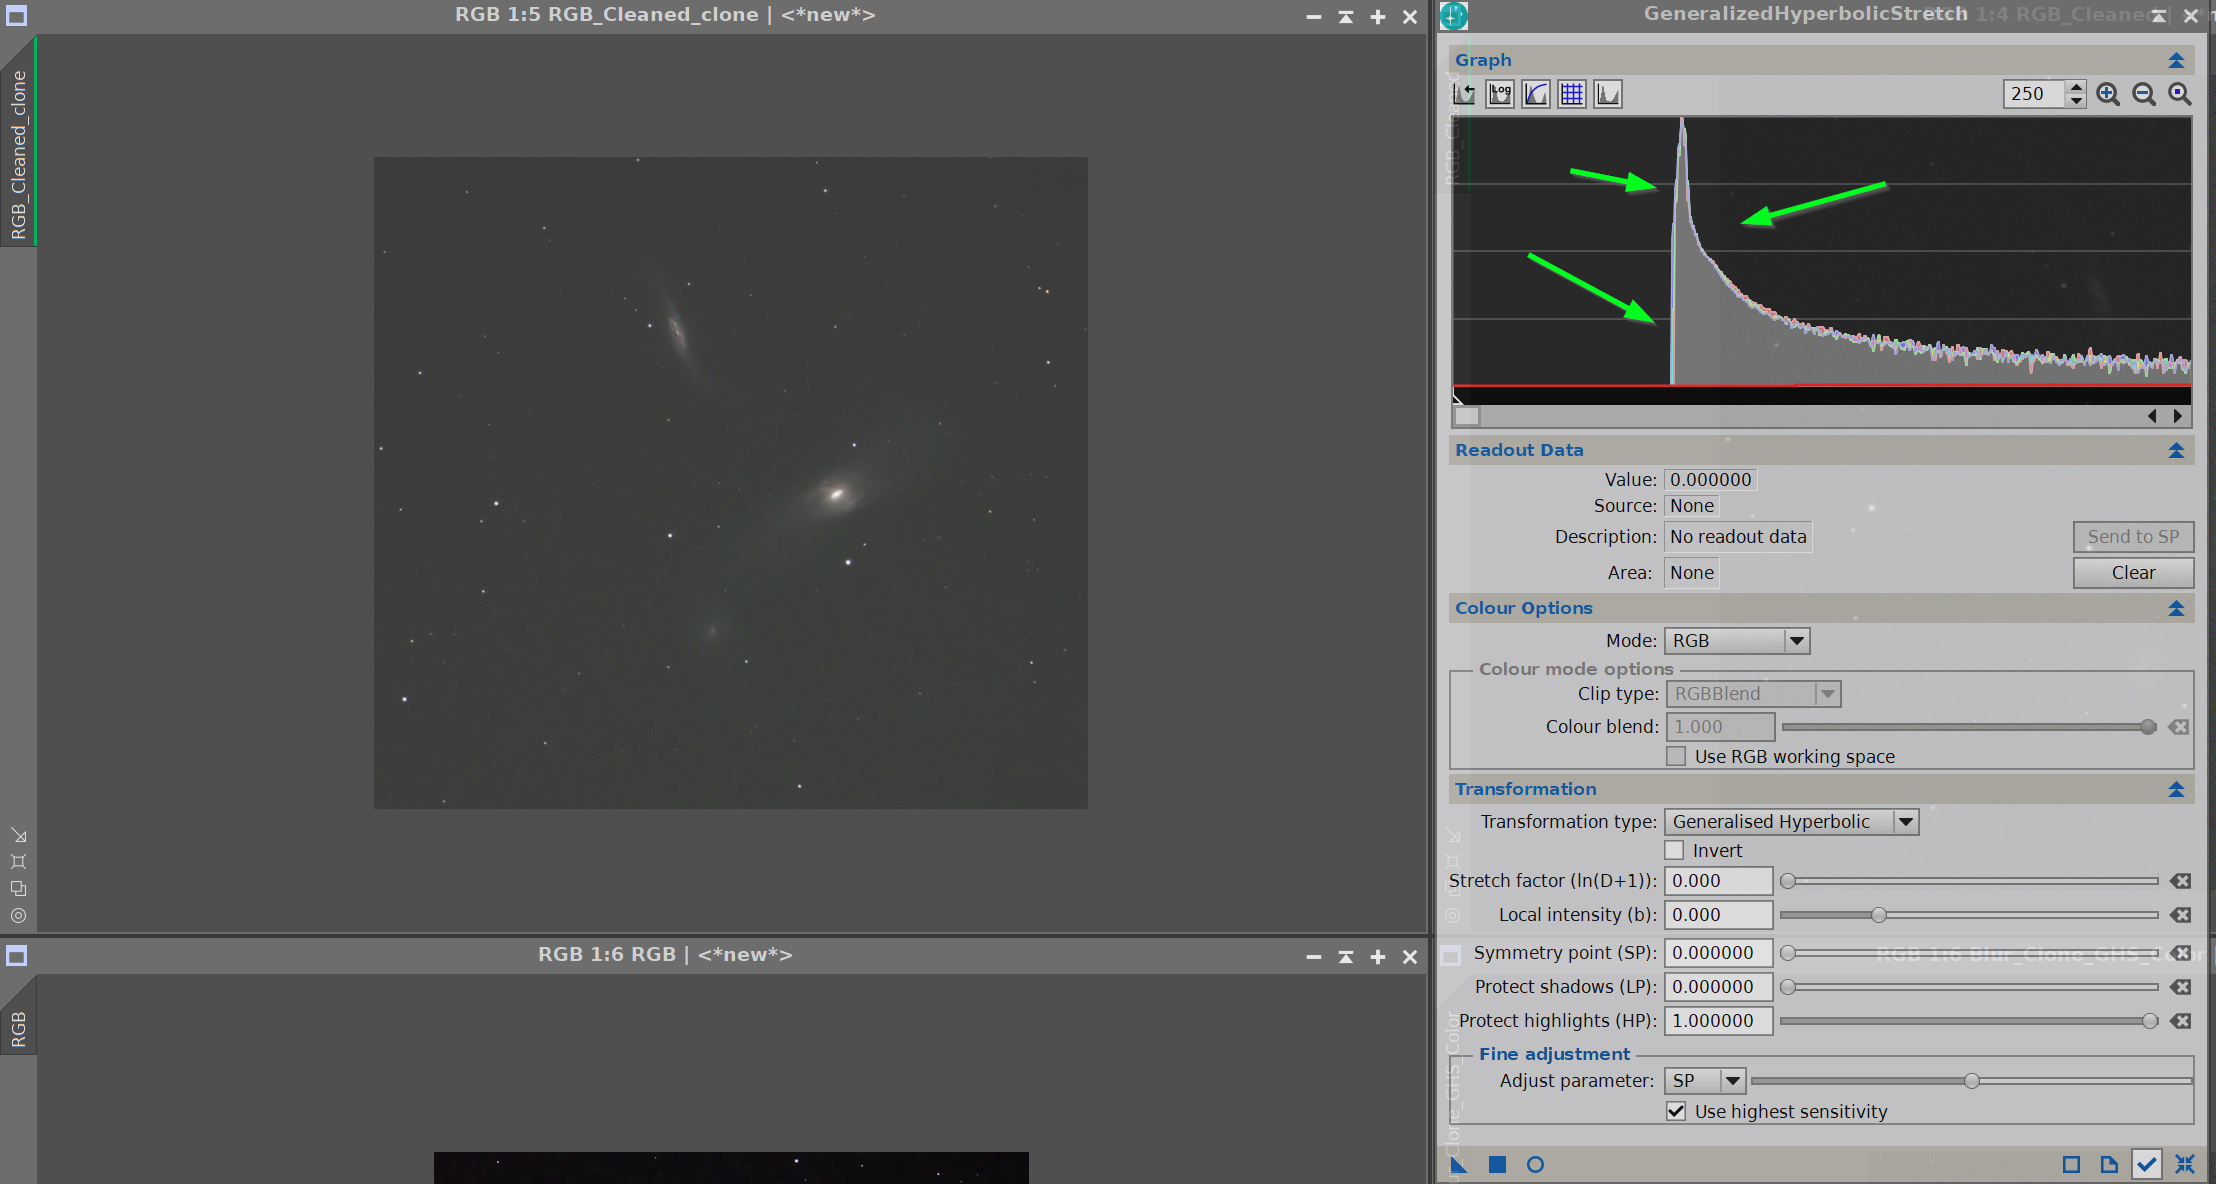
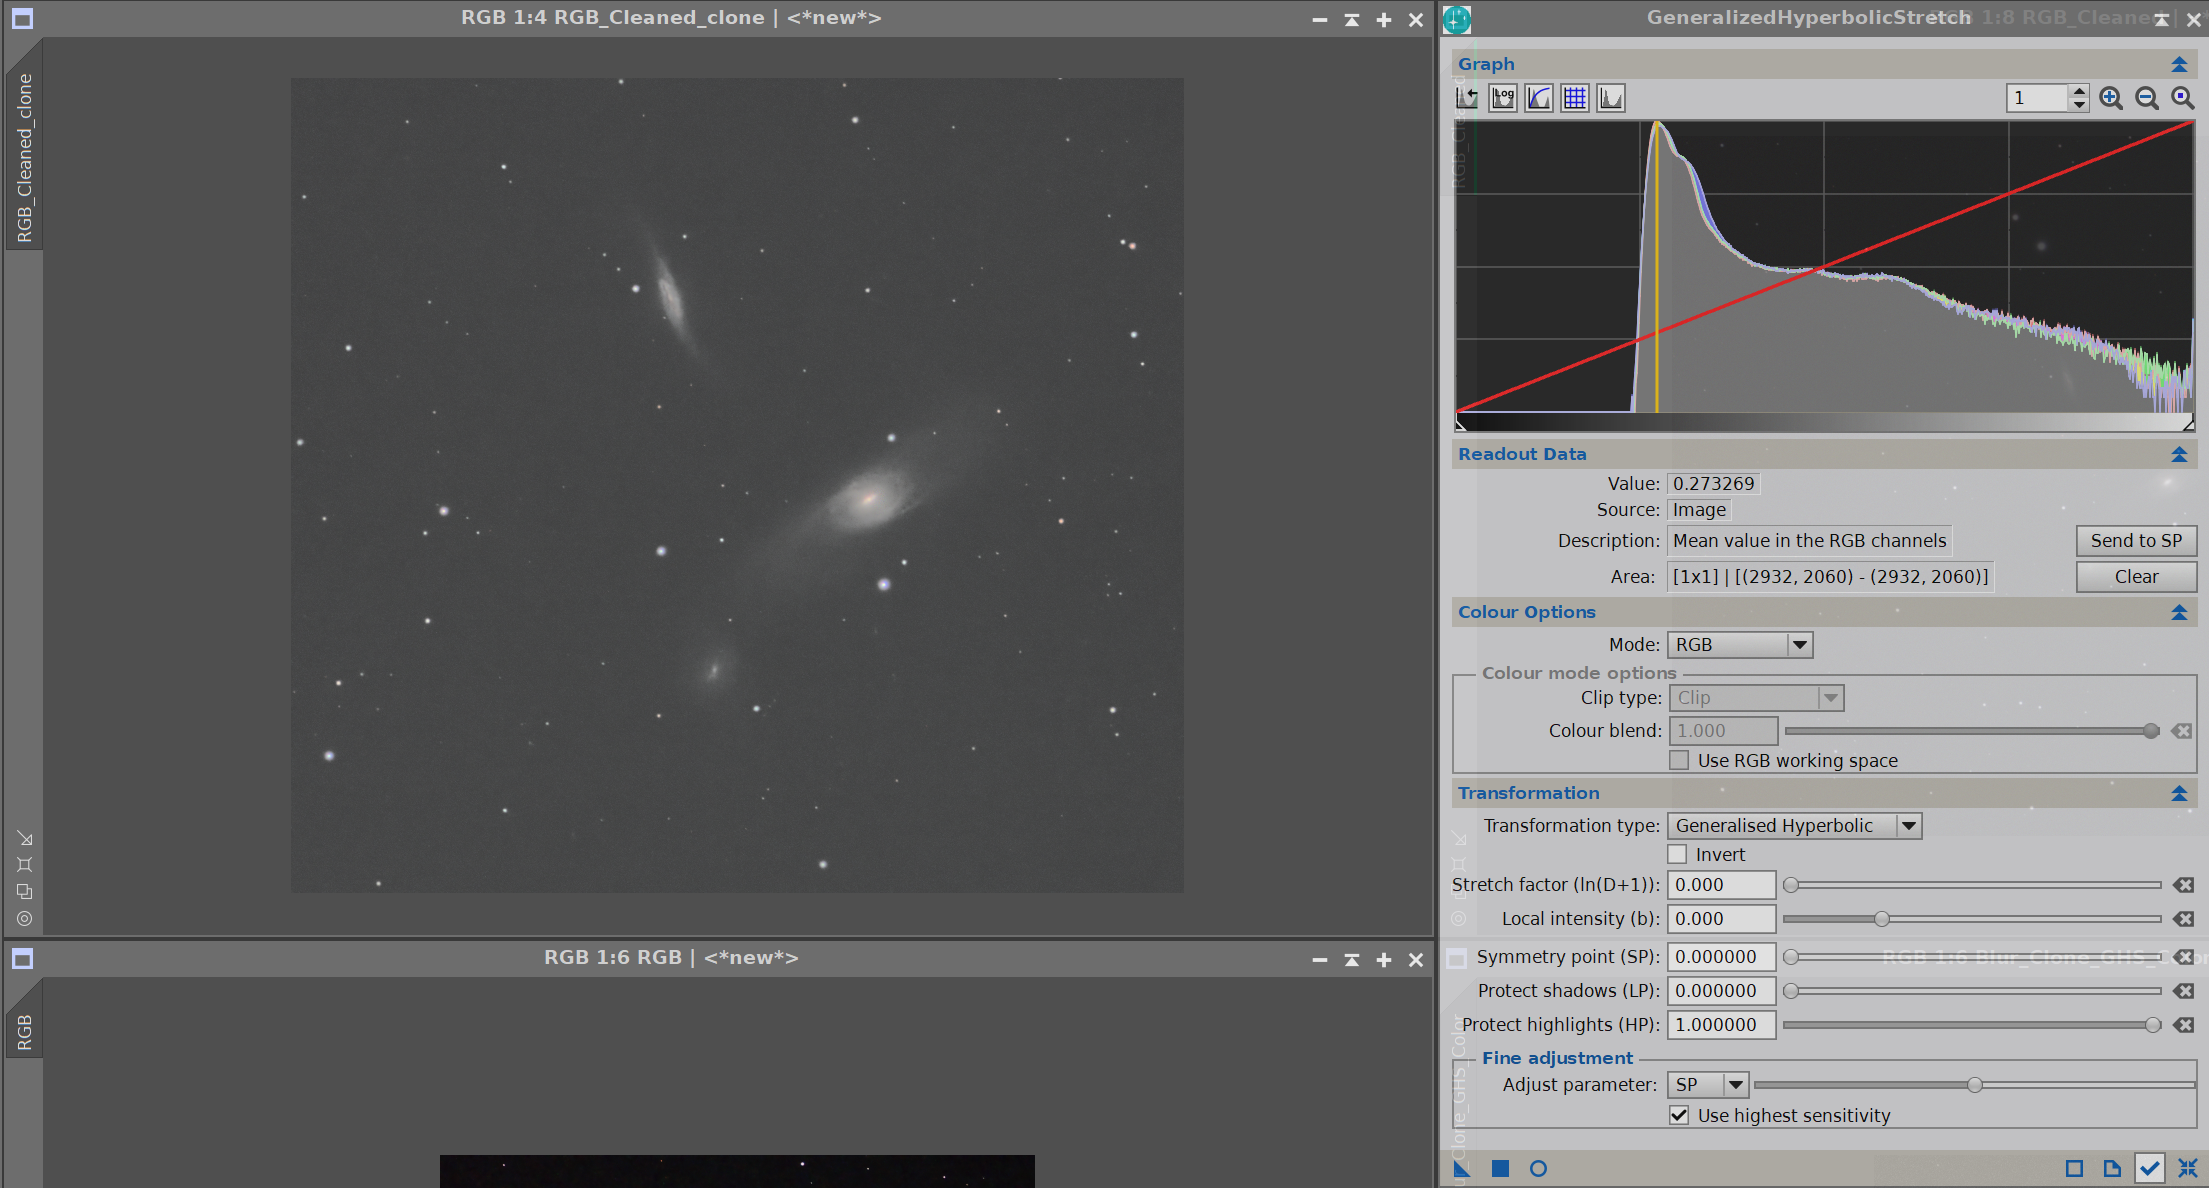
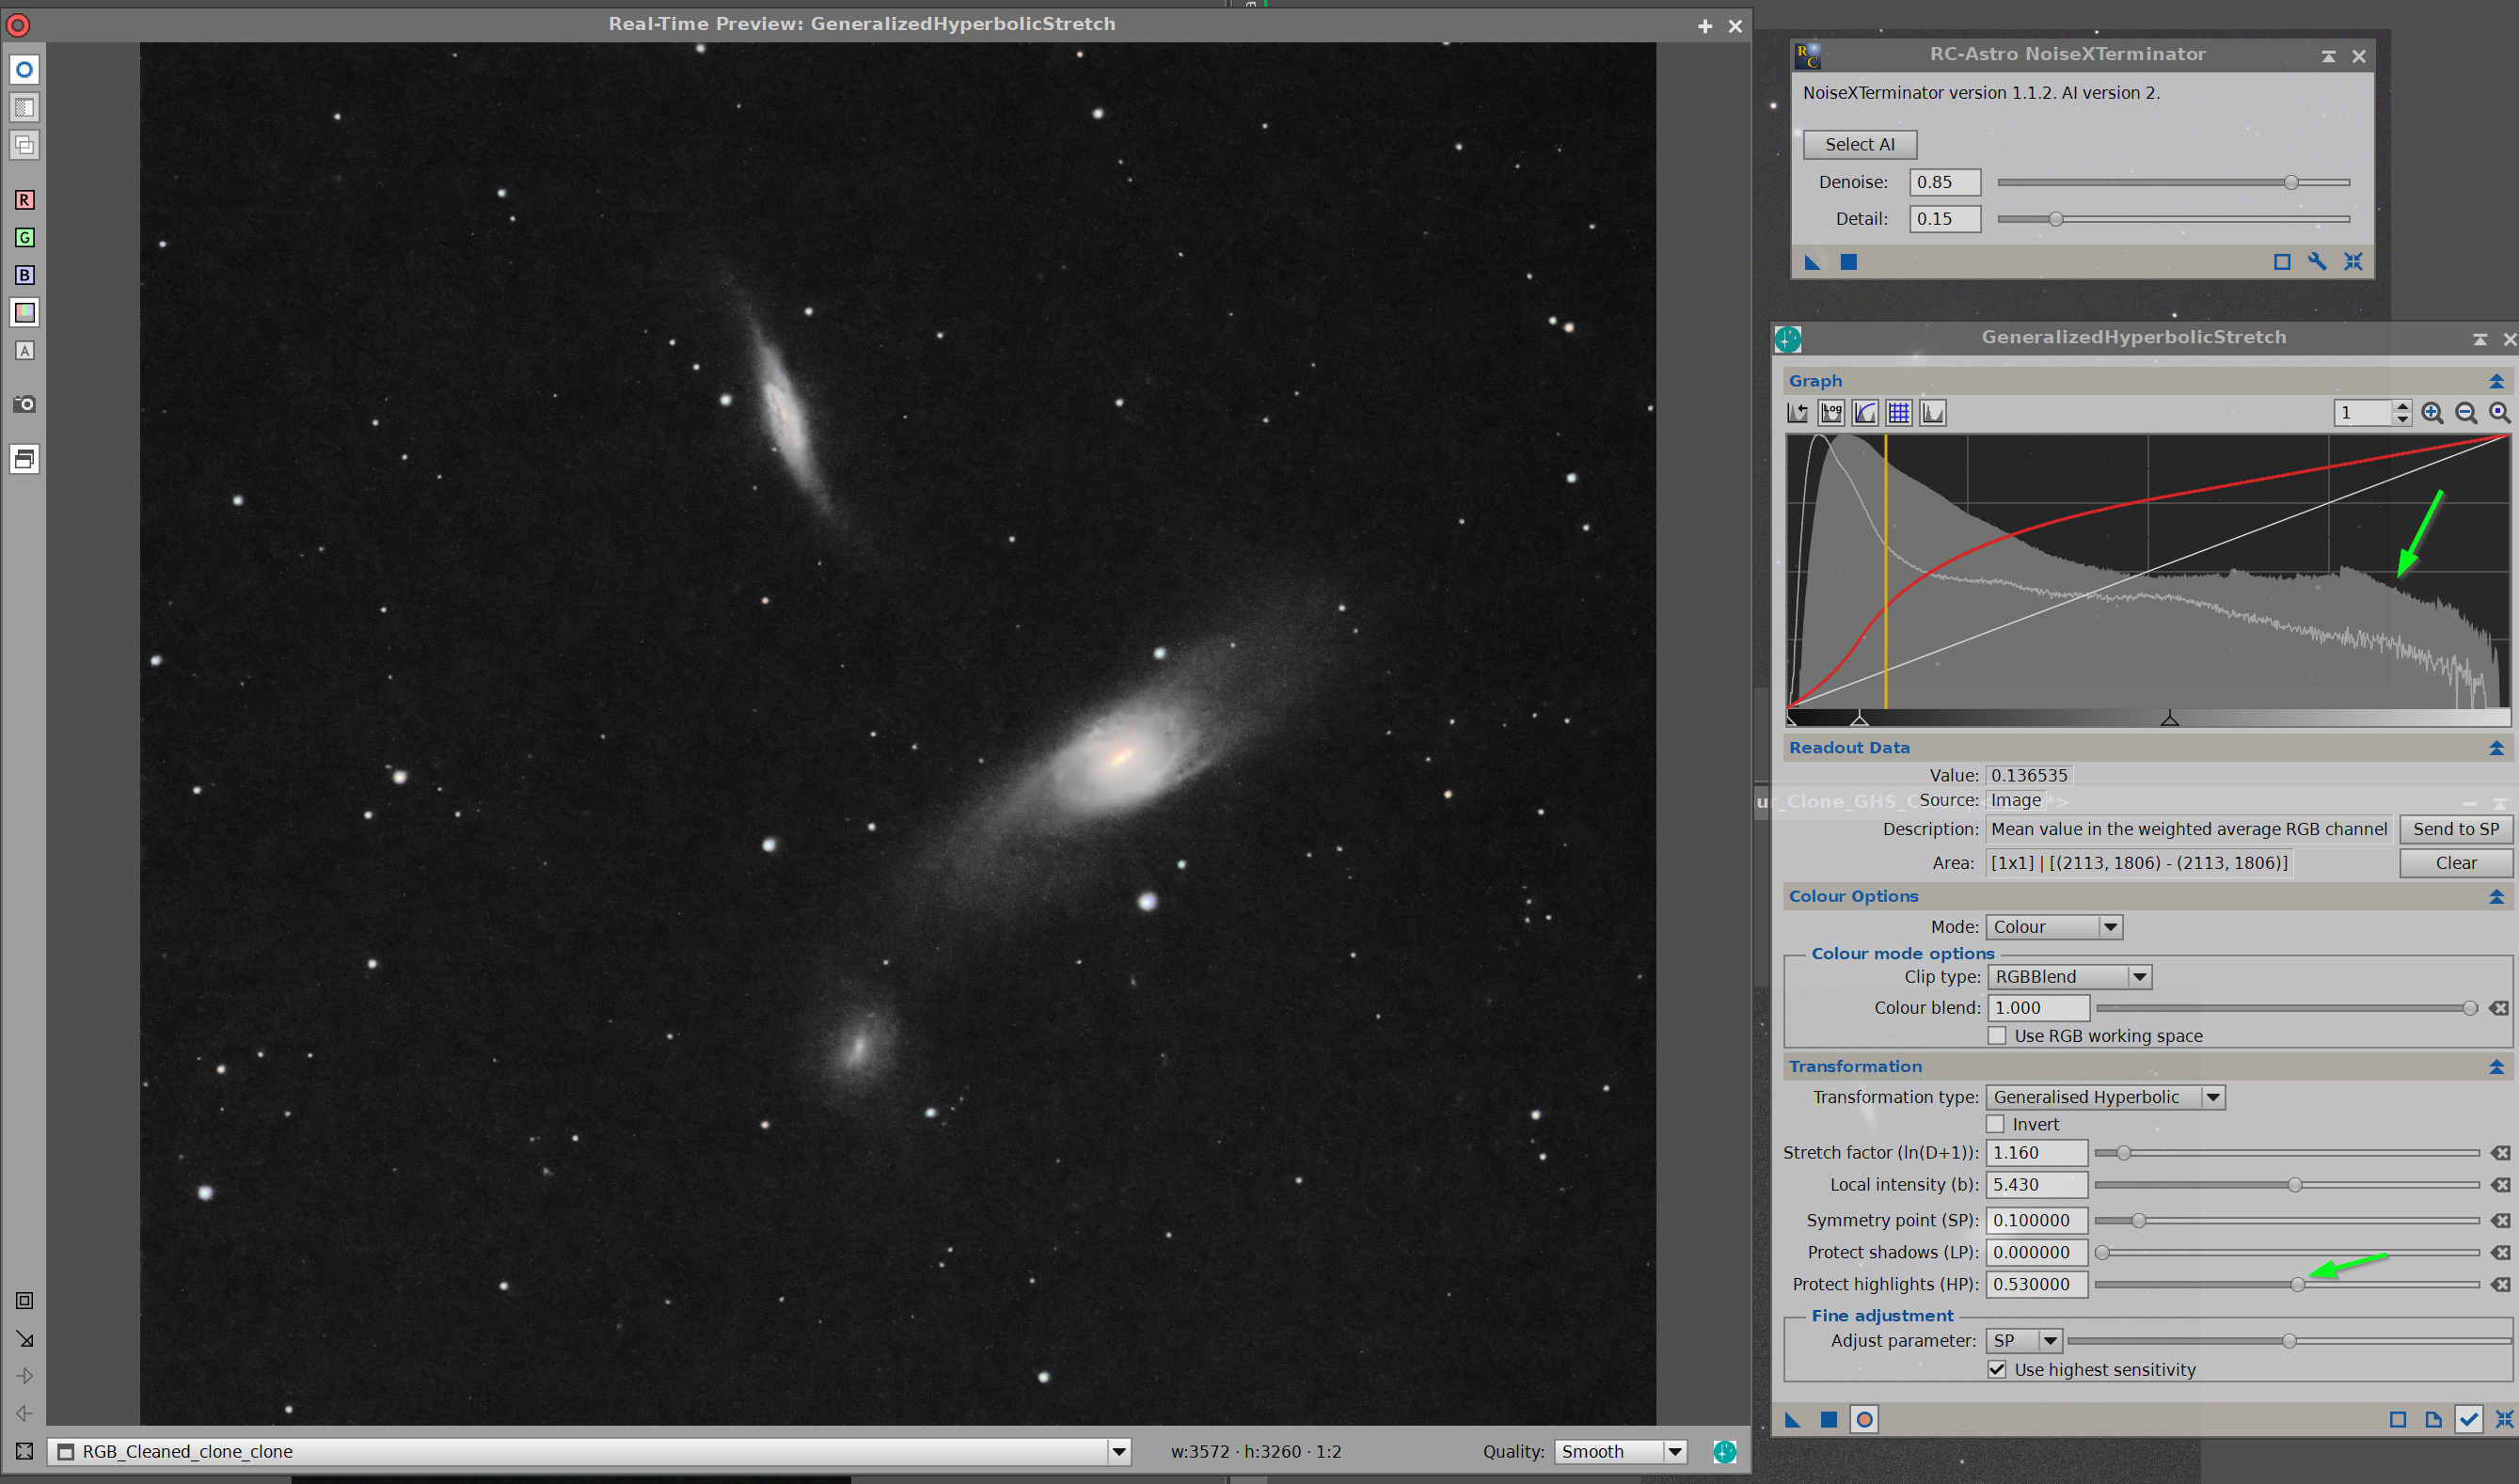
Hi Guys, Have read and reread instructions and want to show a few screen shots of what happens to me especially after BlurX and StarX. This shows what I am trying to highlight... these are around 30 good subs each of RGB (excuse the log saga): First best shot to show there is a signal. 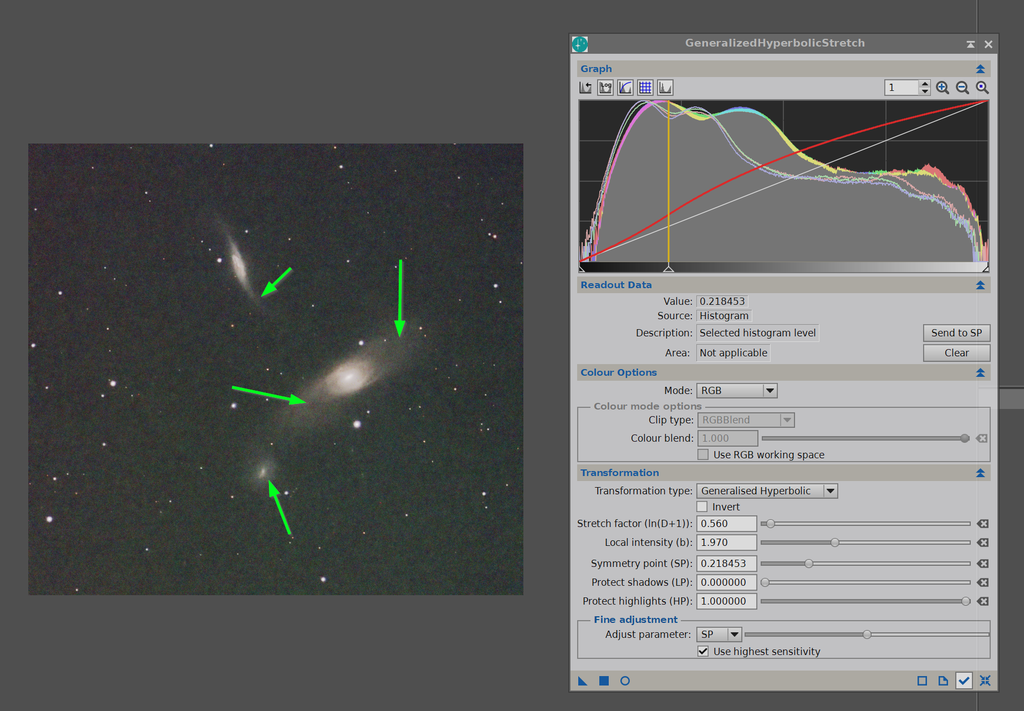 Original before any stretch (Note histogram): 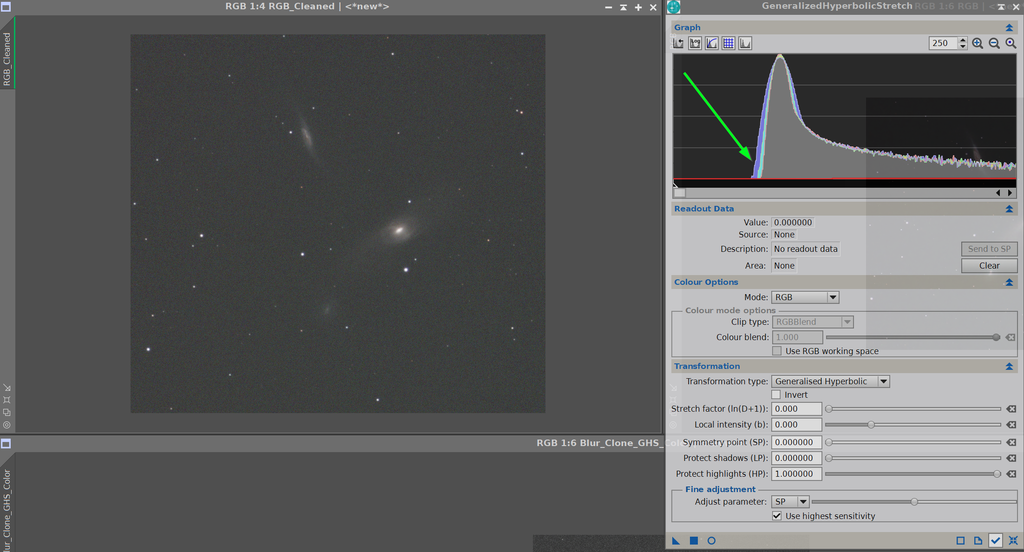 Note what happens with BlurX applied, left side of histogram truncated:  Now here is NoiseX applied on top (truncated histogram even more): 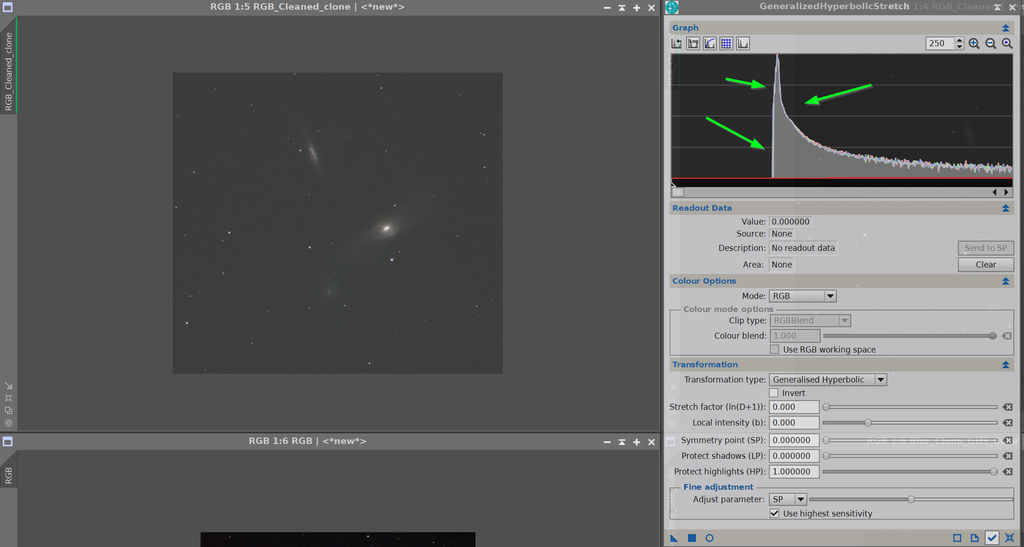 Now back to the original with GHS applied with carefully selected SP... no LP HP adjustments:  Applied: 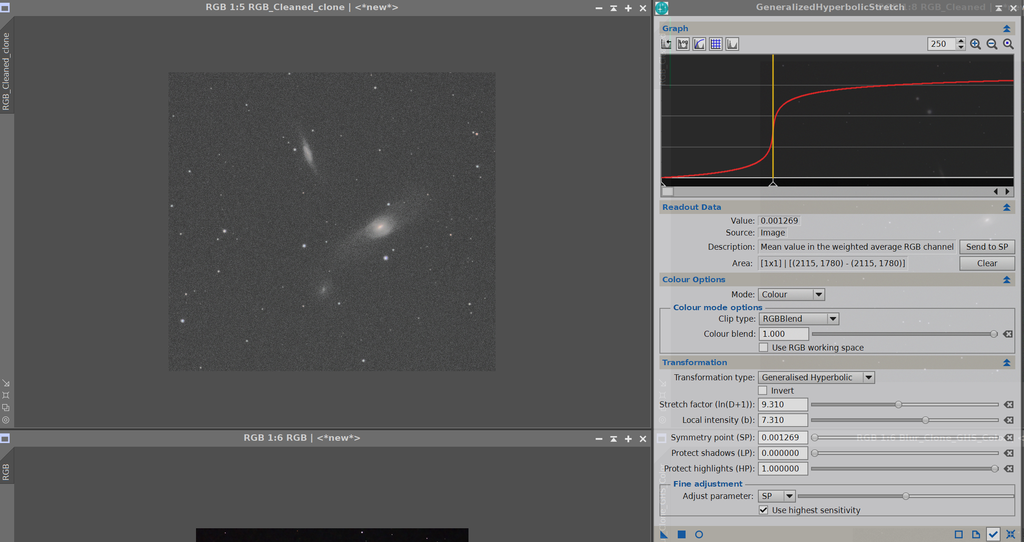 BlurX and NoiseX applied after GHS:  Going to stop here for comments, but think am getting somewhere on a set of steps.
|
You cannot like this item. Reason: "ANONYMOUS".
You cannot remove your like from this item.
Editing a post is only allowed within 24 hours after creating it.
You cannot Like this post because the topic is closed.
Copy the URL below to share a direct link to this post.
This post cannot be edited using the classic forums editor.
To edit this post, please enable the "New forums experience" in your settings.
Interesting, Jerry. It only makes sense that NoiseX would truncate and narrow. If there is only noise, and the noise is removed then the pixels should be the same value/brightness. Ill have to think about the rest….
Cheers,
Dave
|
You cannot like this item. Reason: "ANONYMOUS".
You cannot remove your like from this item.
Editing a post is only allowed within 24 hours after creating it.
You cannot Like this post because the topic is closed.
Copy the URL below to share a direct link to this post.
This post cannot be edited using the classic forums editor.
To edit this post, please enable the "New forums experience" in your settings.
The Blur XTerminator histogram truncation is, I believe, a known issue with BXT (see this thread on CloudyNights). Russ Croman is aware of the issue and I believe he is planning on improving this in a forthcoming release. It is still, I believe, preferable to apply BXT before stretching as the stretching process will alter star PSFs which are fundamental to the deconvolution applied by BXT.
|
You cannot like this item. Reason: "ANONYMOUS".
You cannot remove your like from this item.
Editing a post is only allowed within 24 hours after creating it.
You cannot Like this post because the topic is closed.
Copy the URL below to share a direct link to this post.
This post cannot be edited using the classic forums editor.
To edit this post, please enable the "New forums experience" in your settings.
David Payne:
Interesting, Jerry. It only makes sense that NoiseX would truncate and narrow. If there is only noise, and the noise is removed then the pixels should be the same value/brightness. Ill have to think about the rest....
Cheers,
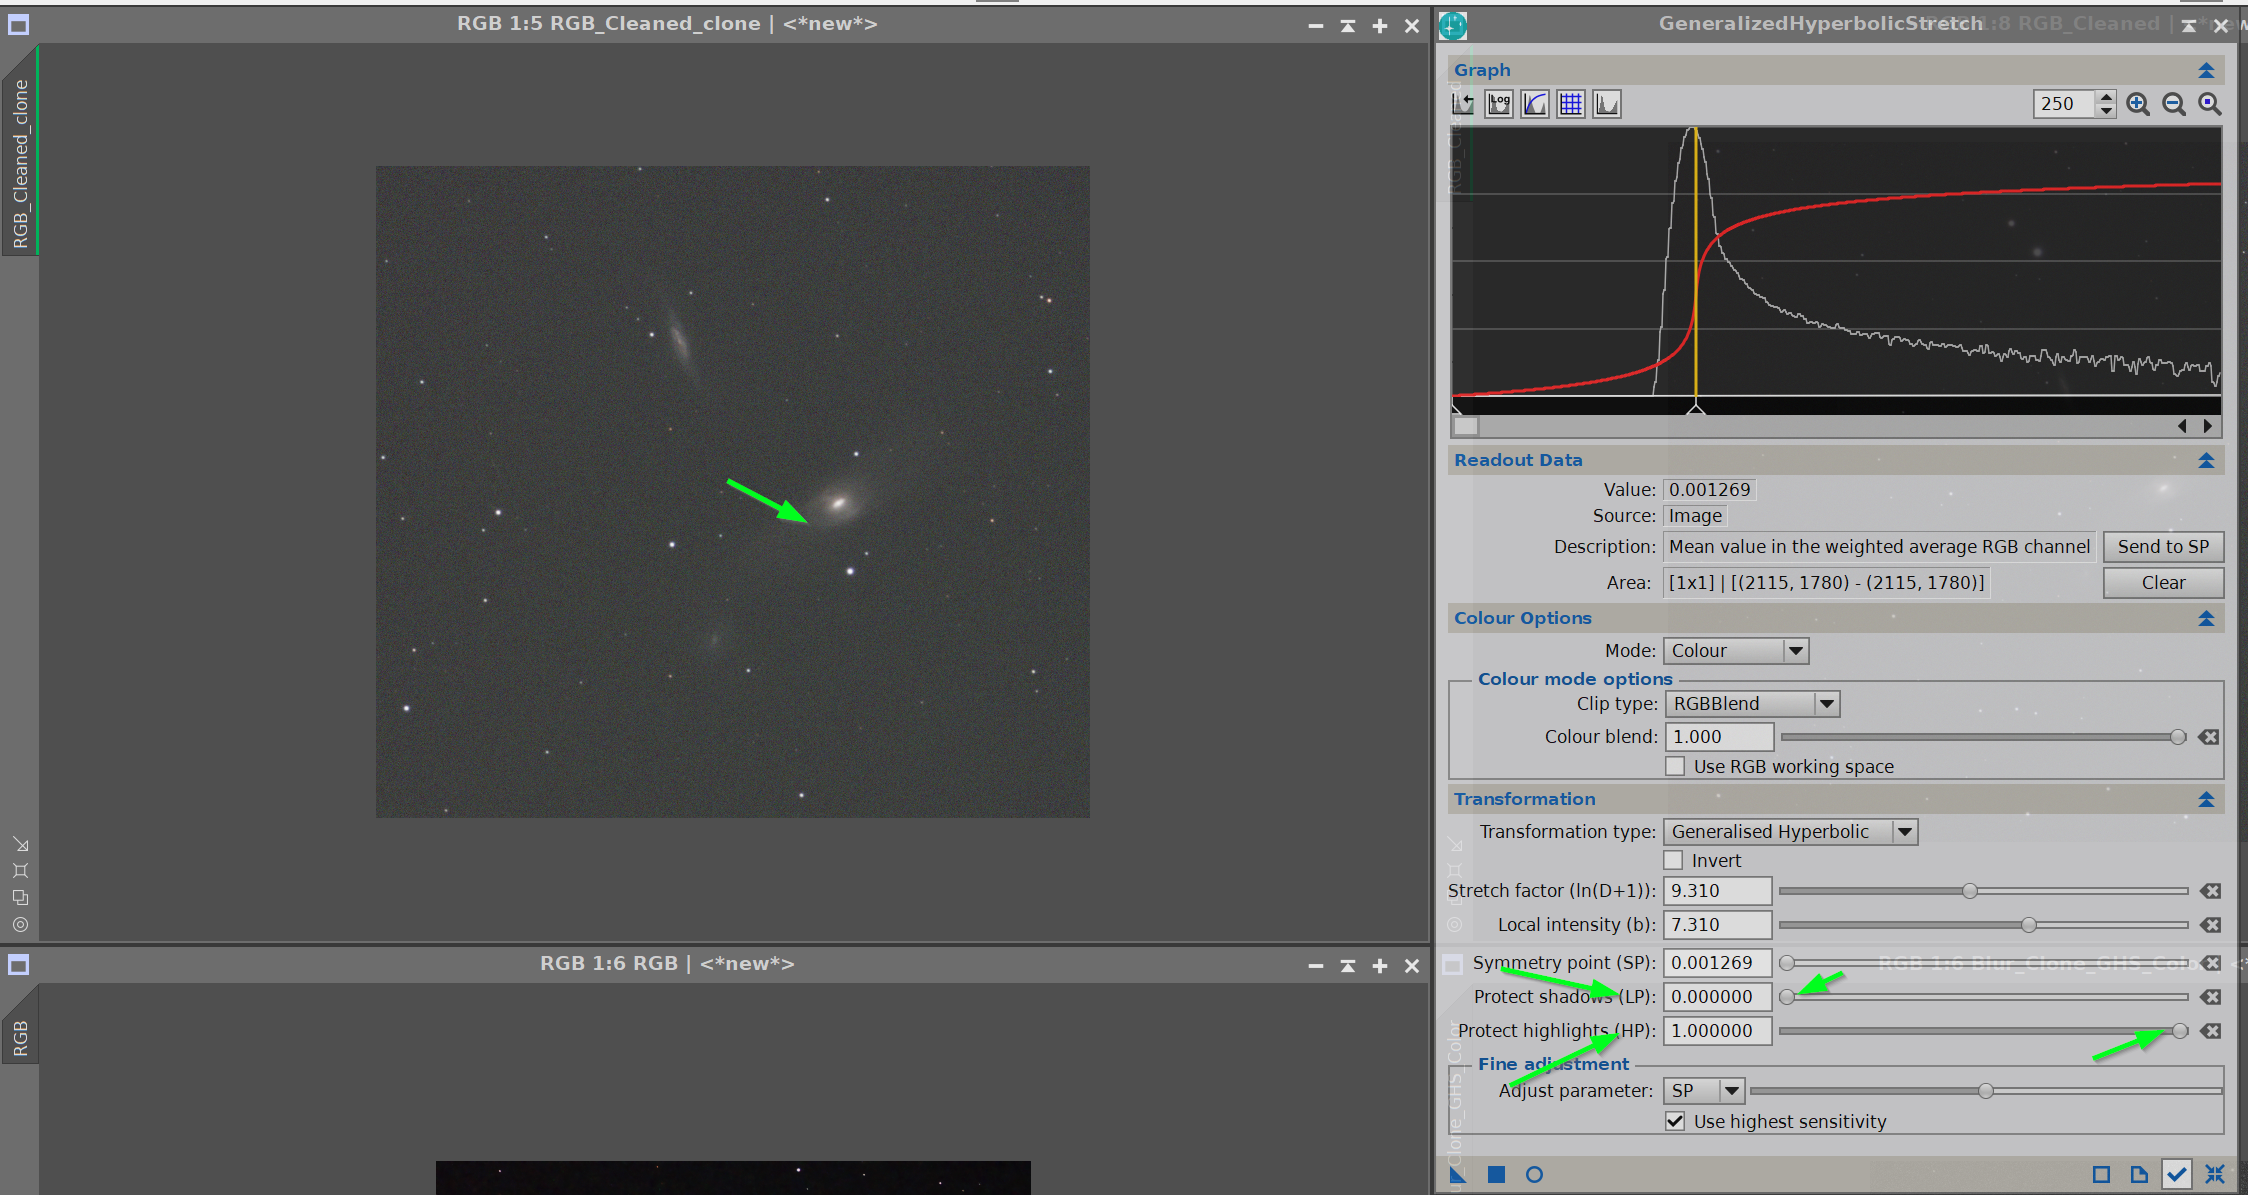
Dave Yeah, thought best to put some data up for discussion. I see Mike's comment on the necessity of using BlurX first. But I was struck at the cliff-like drop-off. Will look at the CN thread. Perhaps do the BlurX first, then GHS before you take the noise out for fear of losing subtle nebulosity, then noise reduce after GHS. Clearly need to make the first stretch in the Color Mode. My final version is anything but final as I think I lost detail in the cores of the galaxies perhaps due to the early application of NoiseX. There has to be an algorithm that makes sense, in most cases. What I did here was BlurX (deconvol in linear); First Color GHS; NoiseX; Fine tuning (not so fine) in GHS: 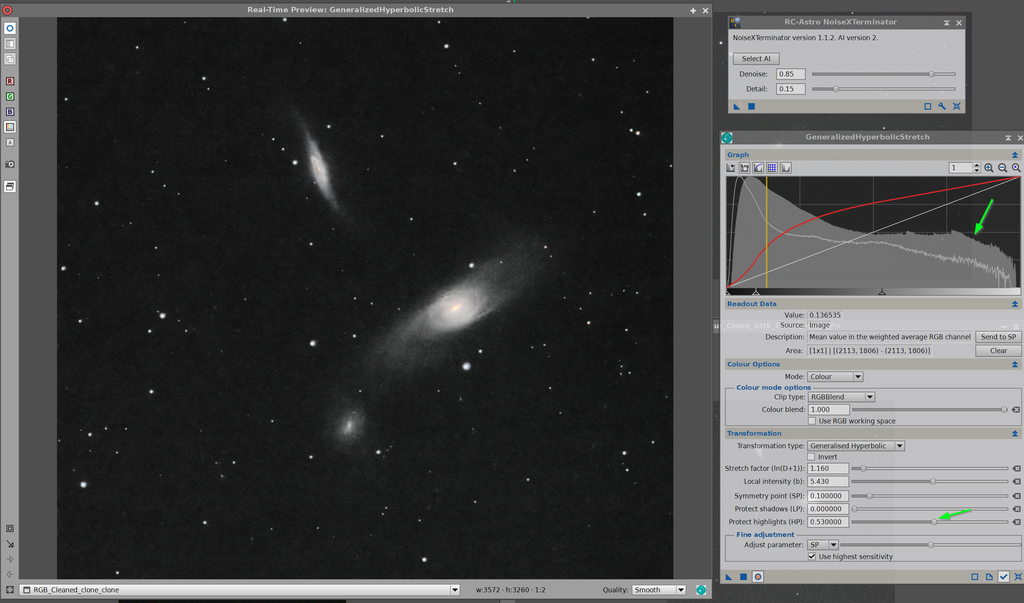 |
You cannot like this item. Reason: "ANONYMOUS".
You cannot remove your like from this item.
Editing a post is only allowed within 24 hours after creating it.
You cannot Like this post because the topic is closed.
Copy the URL below to share a direct link to this post.
This post cannot be edited using the classic forums editor.
To edit this post, please enable the "New forums experience" in your settings.
I see Mike's comment on the necessity of using BlurX first. But I was struck at the cliff-like drop-off. Will look at the CN thread. Perhaps do the BlurX first, then GHS before you take the noise out for fear of losing subtle nebulosity, then noise reduce after GHS. FWIW, when I've applied NoiseX before stretching, the auto-stretch is often......not pretty. Not sure if that's to be expected, or an indication of some issue, but I now do a small initial stretch, then NoiseX at about 60%, finish the stretch, and if needed another round of NX. Cheers, Scott
|
You cannot like this item. Reason: "ANONYMOUS".
You cannot remove your like from this item.
Editing a post is only allowed within 24 hours after creating it.
You cannot Like this post because the topic is closed.
Copy the URL below to share a direct link to this post.
This post cannot be edited using the classic forums editor.
To edit this post, please enable the "New forums experience" in your settings.
Mike Cranfield:
The Blur XTerminator histogram truncation is, I believe, a known issue with BXT (see this thread on CloudyNights). Russ Croman is aware of the issue and I believe he is planning on improving this in a forthcoming release. It is still, I believe, preferable to apply BXT before stretching as the stretching process will alter star PSFs which are fundamental to the deconvolution applied by BXT. Absolutely, Mike. In fact, its the law in many states.  |
You cannot like this item. Reason: "ANONYMOUS".
You cannot remove your like from this item.
Editing a post is only allowed within 24 hours after creating it.
You cannot Like this post because the topic is closed.
Copy the URL below to share a direct link to this post.
This post cannot be edited using the classic forums editor.
To edit this post, please enable the "New forums experience" in your settings.
David Payne:
Interesting, Jerry. It only makes sense that NoiseX would truncate and narrow. If there is only noise, and the noise is removed then the pixels should be the same value/brightness. Ill have to think about the rest....
Cheers,
Dave Mmmhhh, that’s what denoising should do. Replace extreme pixels with a somehow interpolated value from the neighbouring pixels. As a result the distribution gets sharper, the FWHM is decreasing. With background noise it should look like truncation, you will miss the extremer darker and brighter pixels. Or did I miss something? CS Markus P.S. Many thanks to Mike for this great tool and I learn a lot following this discussion. It seems it will make great change to my workflow. I am just trying to use it on M81/M82 to get the IFN and good contrast in the galaxies…first approach looks promising.
|
You cannot like this item. Reason: "ANONYMOUS".
You cannot remove your like from this item.
Editing a post is only allowed within 24 hours after creating it.
You cannot Like this post because the topic is closed.
Copy the URL below to share a direct link to this post.
This post cannot be edited using the classic forums editor.
To edit this post, please enable the "New forums experience" in your settings.
Markus Figel:
David Payne:
Interesting, Jerry. It only makes sense that NoiseX would truncate and narrow. If there is only noise, and the noise is removed then the pixels should be the same value/brightness. Ill have to think about the rest....
Cheers,
Dave
Mmmhhh, that’s what denoising should do. Replace extreme pixels with a somehow interpolated value from the neighbouring pixels. As a result the distribution gets sharper, the FWHM is decreasing. With background noise it should look like truncation, you will miss the extremer darker and brighter pixels. Or did I miss something?
CS
Markus
P.S. Many thanks to Mike for this great tool and I learn a lot following this discussion. It seems it will make great change to my workflow. I am just trying to use it on M81/M82 to get the IFN and good contrast in the galaxies…first approach looks promising. Hi Markus I am glad you are finding GHS useful and thanks for your kind comments - GHS is very much a collaborative effort between myself and @David Payne. CS, Mike
|
You cannot like this item. Reason: "ANONYMOUS".
You cannot remove your like from this item.
Editing a post is only allowed within 24 hours after creating it.
You cannot Like this post because the topic is closed.
Copy the URL below to share a direct link to this post.
This post cannot be edited using the classic forums editor.
To edit this post, please enable the "New forums experience" in your settings.
Mike Cranfield:
Markus Figel:
David Payne:
Interesting, Jerry. It only makes sense that NoiseX would truncate and narrow. If there is only noise, and the noise is removed then the pixels should be the same value/brightness. Ill have to think about the rest....
Cheers,
Dave
Mmmhhh, that’s what denoising should do. Replace extreme pixels with a somehow interpolated value from the neighbouring pixels. As a result the distribution gets sharper, the FWHM is decreasing. With background noise it should look like truncation, you will miss the extremer darker and brighter pixels. Or did I miss something?
CS
Markus
P.S. Many thanks to Mike for this great tool and I learn a lot following this discussion. It seems it will make great change to my workflow. I am just trying to use it on M81/M82 to get the IFN and good contrast in the galaxies…first approach looks promising.
Hi Markus
I am glad you are finding GHS useful and thanks for your kind comments - GHS is very much a collaborative effort between myself and @David Payne.
CS, Mike Thanks to both of you, great work!
|
You cannot like this item. Reason: "ANONYMOUS".
You cannot remove your like from this item.
Editing a post is only allowed within 24 hours after creating it.
You cannot Like this post because the topic is closed.
Copy the URL below to share a direct link to this post.
This post cannot be edited using the classic forums editor.
To edit this post, please enable the "New forums experience" in your settings.
Hi, Yeah, seems you may need to start with BlurX and then go back and forth between GHS and NoiseX. Noise seems to come back after each stretch. I went out of control a bit on this one testing color saturation. I am going to collect more data.  |
You cannot like this item. Reason: "ANONYMOUS".
You cannot remove your like from this item.
Editing a post is only allowed within 24 hours after creating it.
You cannot Like this post because the topic is closed.
Copy the URL below to share a direct link to this post.
This post cannot be edited using the classic forums editor.
To edit this post, please enable the "New forums experience" in your settings.