SW CQ350 - Possible Damage Sky-Watcher CQ350 · Matthew Proulx · ... · 30 · 886 · 6

Philippe_G 0.90
...
· 
·  Share link
  1. the lower end stop adjusting allen screws (gear ON/engaged)
  2. the upper end stop adjusting allen screws (gear OFF/disengaged)
  3. the allen screw that maintins the floating assembly tight AFTER adjusting play
  4. In the middle, the 4 allen screws to tune the play (but they are already described by Skywatcher)


CQ350adjustingscrews.jpg
Edited ...
Like
battleriverobservatory 6.06
Topic starter
...
· 
·  Share link
Philippe Germon:
There are more than 4 allen screws.
There are also 2 allen end stop screws for the lower (wg/w ON) position and 2 allen screws for blocking and maintaining the floattng assembly - how could I say? - tighly.
if those 2 last screws are not adjusted, then the floating assembly is floating when gears are engaged. Then the mount can't guide cause the floating assembly is...floating.
So, there is no precision.

Adjustting the play is made of 8 screws.

*** 
 Touching the other screws wasn't necessary in my case. Everything else was tight and as it should be. I was able to adjust up and down engaging the gears as much or as little as I liked. Can make it grind all day in any position if I want. That's not the issue here. Once locked down there's no "floating". Video proves that.
Edited ...
Like
battleriverobservatory 6.06
Topic starter
...
· 
·  Share link
Philippe Germon:
  1. the lower end stop adjusting allen screws (gear ON/engaged)
  2. the upper end stop adjusting allen screws (gear OFF/disengaged)
  3. the allen screw that maintins the floating assembly tight AFTER adjusting play
  4. In the middle, the 4 allen screws to tune the play (but they are already described by Skywatcher)


CQ350adjustingscrews.jpg


You shouldn't have to adjust those other screws though. You can get mesh as little or as much as you need just moving the 4 in a row. I see no reason to adjust the other screws. Just use feeler gauges on each side to keep it the same.


Screenshot_20240815-233707~2.png
Edited ...
Like
MaksPower 1.20
...
· 
·  Share link
Phillippe,

Looking at your photos am I correct in thinking the disk of the RA worm wheel is bolted to the body casing so that it cannot rotate  ?

Is the worm wheel a full 360 degree disk ? I suspect the declination wheel is not a full 360 degrees.

Another thought I had was to disassemble it completely, remove the worm wheel, and machine a friction clutch so that if the mount or scope hits something the clutch will slip. 

It appears there is space for this, although it would require some precision.
Edited ...
Like
Philippe_G 0.90
...
· 
·  Share link
@MaksPower  :

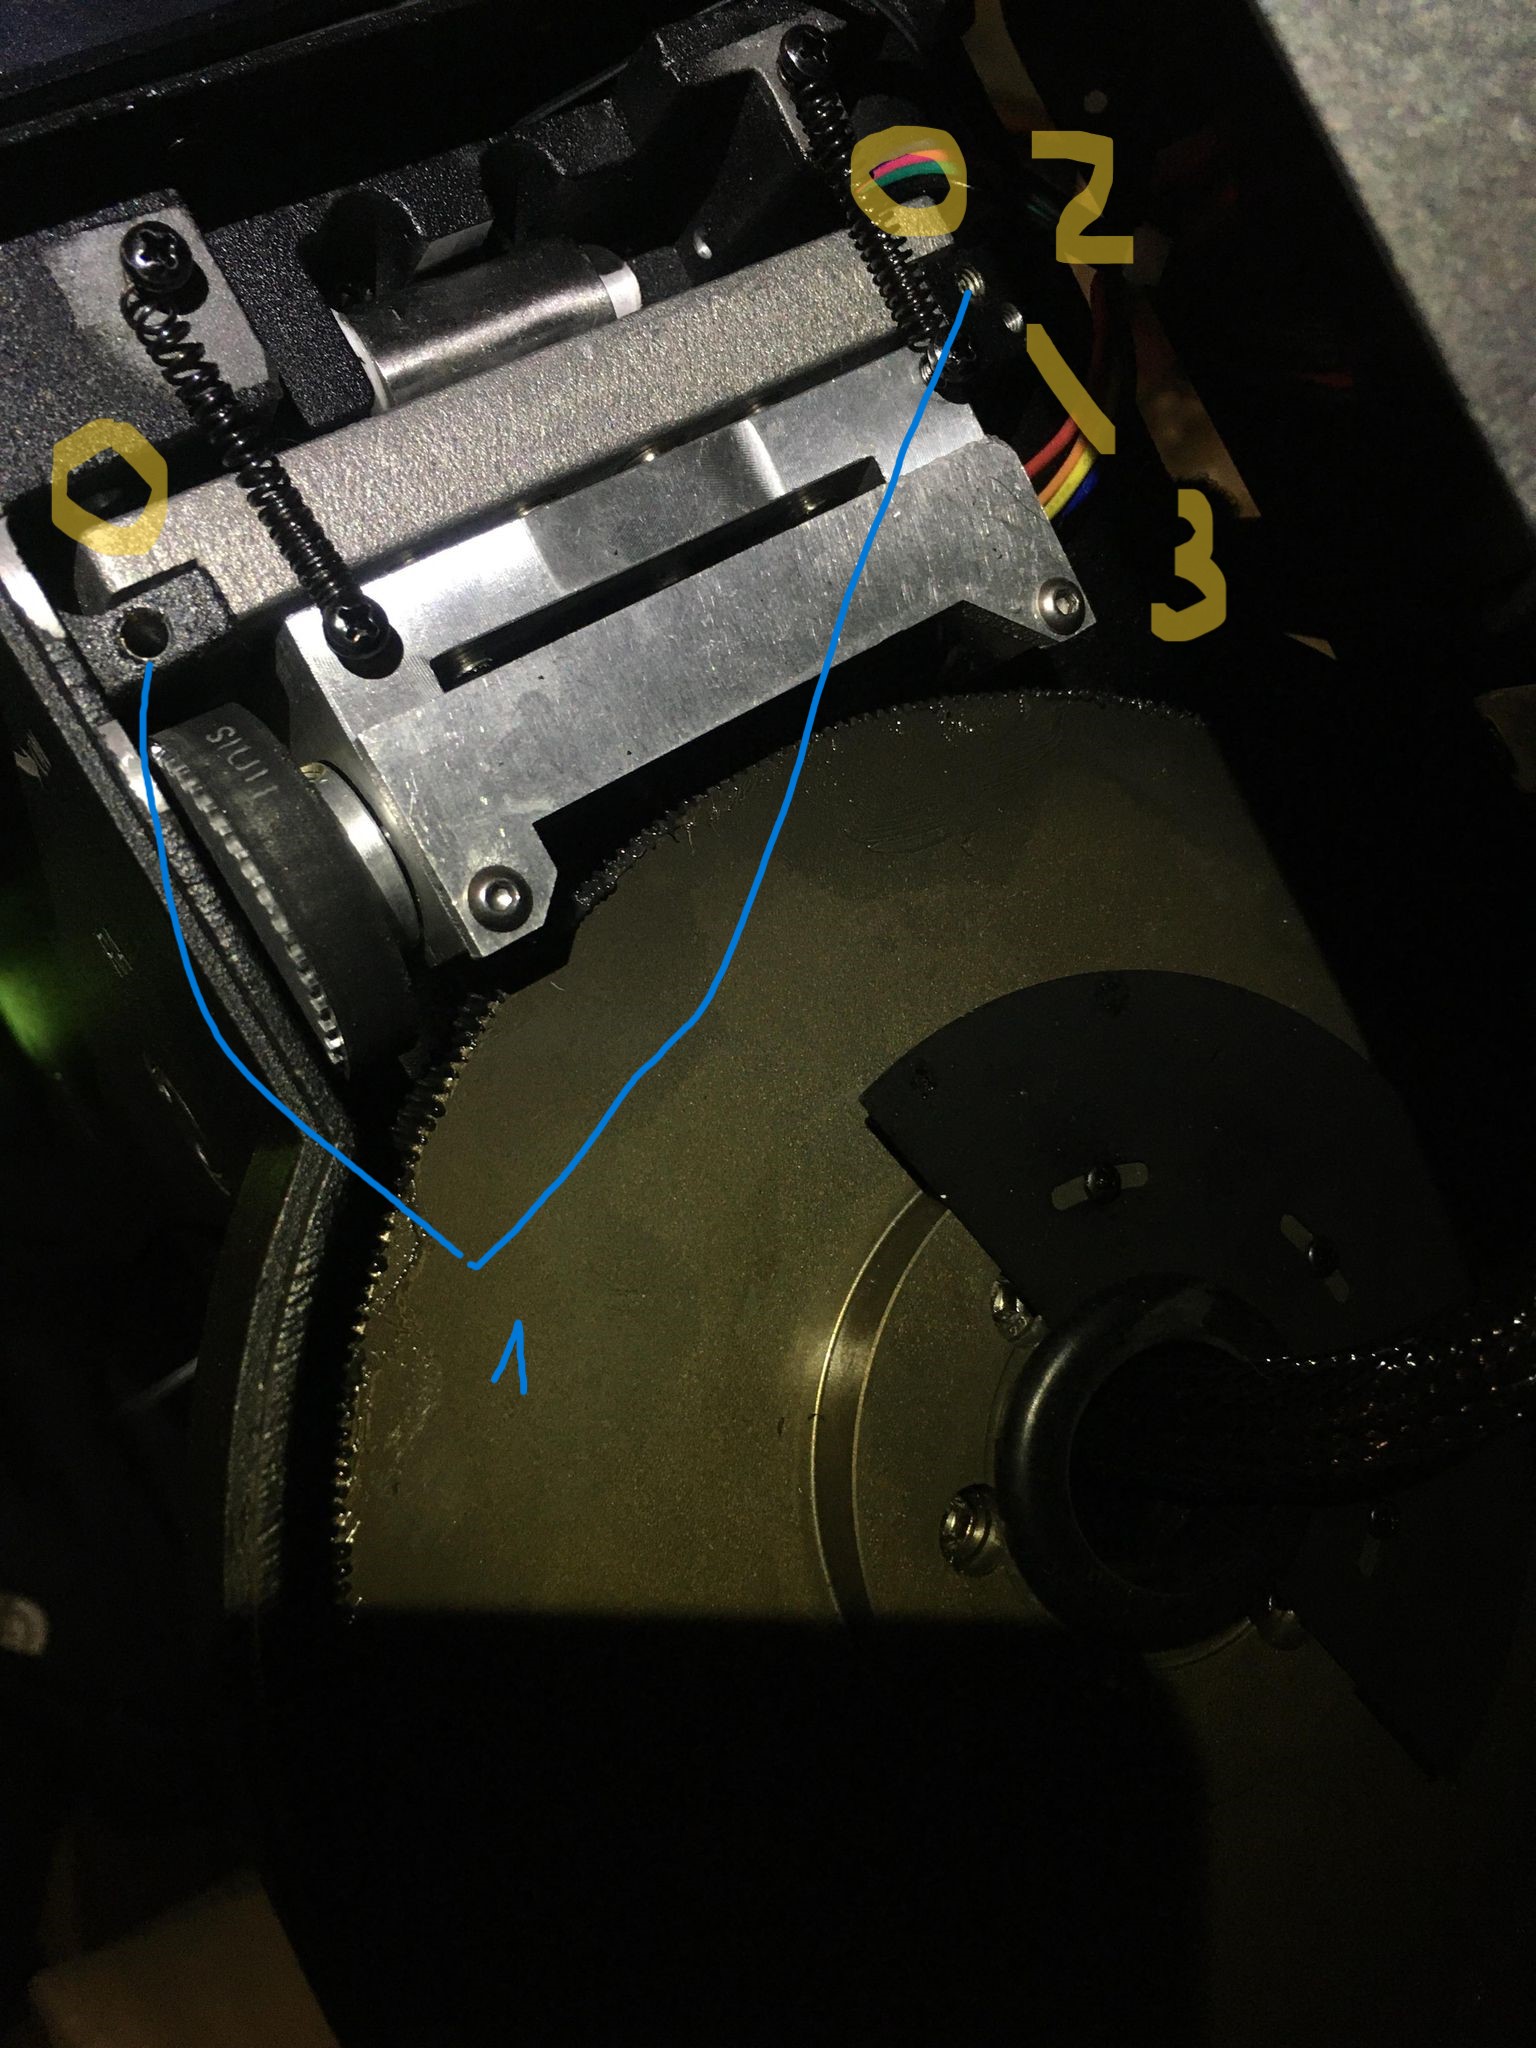
Yes, the RA disc is bolted on axis. As the sadlle on Dec axis.
The assembly looks like a motor's flywheel attached to crank.

For DSI, I use NINA and GS Server.
No skymap sofware : NINA is piloting the pointing, astrometry, centering in DSI.

NEVER the Skywatcher app or driver. The app allows to goto a planet/coordinates but it planted me the mount in end stop twice. Then, never again.

For planetary, I use the hand controller or GS server piloted by Sharpcap.
With GS server, I manually copy the Ra/Dec coordinates of the planet from SkySafari and send the mount to point with GS Server.
And sometimes, with the hand controller. Never use both HV and Driver.

Using the mount this way, end stop accident never happend again.

A security clutch system? I don't know.

The mount is god in many points, but it has this problem.

@Matthew Proulx :

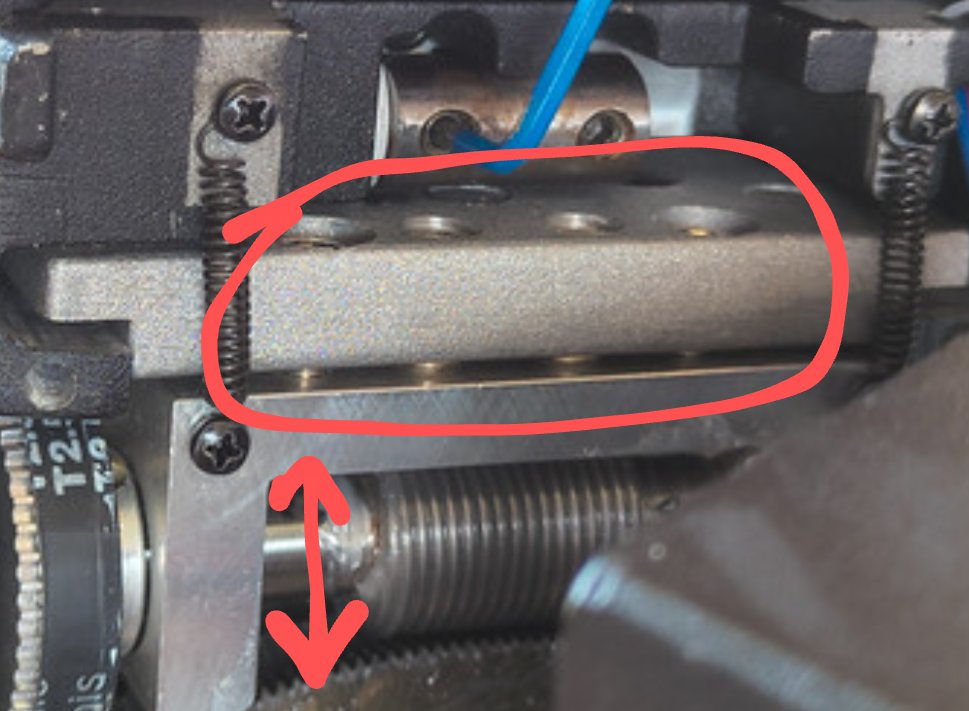
Well, in fact, the upper end stop are perpendicular to the floating assembly.
The lower end stop are angled.
So, sometimes, after "accident", when re-tuning the play, you need to re adjusting the low end screws. Don't ask me why : it's only my return on experience.

Because what appears is that after tuning the wheel play (sometimes), the floating assembly is not tigh and is floating when engaged.
The low ends screws are like "centering"  because of opposite angle and the tightening screw, then is maintaining the floating assembly tigh.

The tuning on this mount is complex and each part of the tunig is "interactive". So, sometimes, you have to do a lot come and back like :
- "This one is good? Oh ok."
- "Now let's check the other one."
- "Ok, back to the first."

And back and forth...

Out of the box, mine was guiding at 0.65".
Now currently between 0.40" and 0.55".
Best at 0.37" for 4 hours long.
No matter OAG @f10 or Guiding scope @f1,9. Same results.
IR 850 filter help to filter turbulence. Barlow lens, too. Both for guiding scope.
On hyperstar system with guide scope, I have 741 mm guiding scope focal and 555 mm focal length on C11.
This to compensate the "I follow the vibrating sky" tendency of this mount.
Like
MaksPower 1.20
...
· 
·  1 like
·  Share link
Philippe I use ASIAir Plus to operate the mount.

I’m using an ASI2600 MC DUO so the guide camera is integral with the main camera. This guiding uses the main scope which is either my 250/3000mm Maksutov (0.25 arcsec/poxel) or 165/900mm Mak Newtonian (0.83 arcsec/pixel).  

The 250mm mak is my favourite scope - it has been absolutely trouble free and is as easy to use as shooting with a small refractor.

In average seeing guiding is around 0.5 arcsec rms, though in very good seeing it has guided at 0.2 arcsec rms for about 90 minutes.

I have ordered an Arduino Nano BLE to make a device to sense the mount orientation with accelerometers and cut the power before it hits anything. I think this is the easiest way to prevent the mount from destroying the gears.
Edited ...
Like
 
Register or login to create to post a reply.