Hi all,
Have a quick question here regarding gradient correction with narrowband data!!
In my workflow I use the gradient correction tool in PI to sort the background very early on and out of curiosity I check the “Generate gradient model” or whatever it called so I can see what has been removed!!
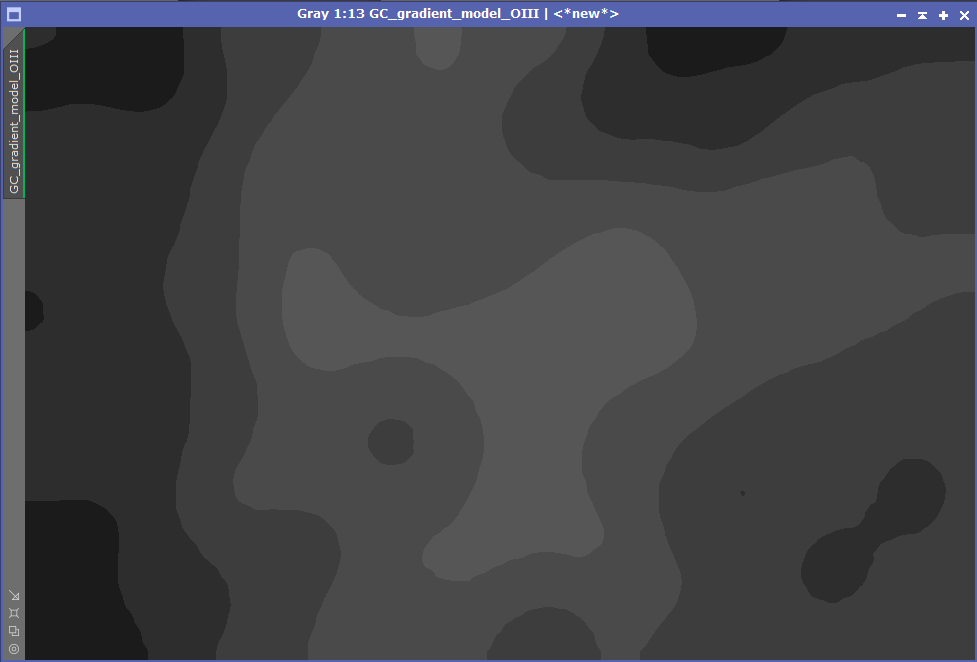
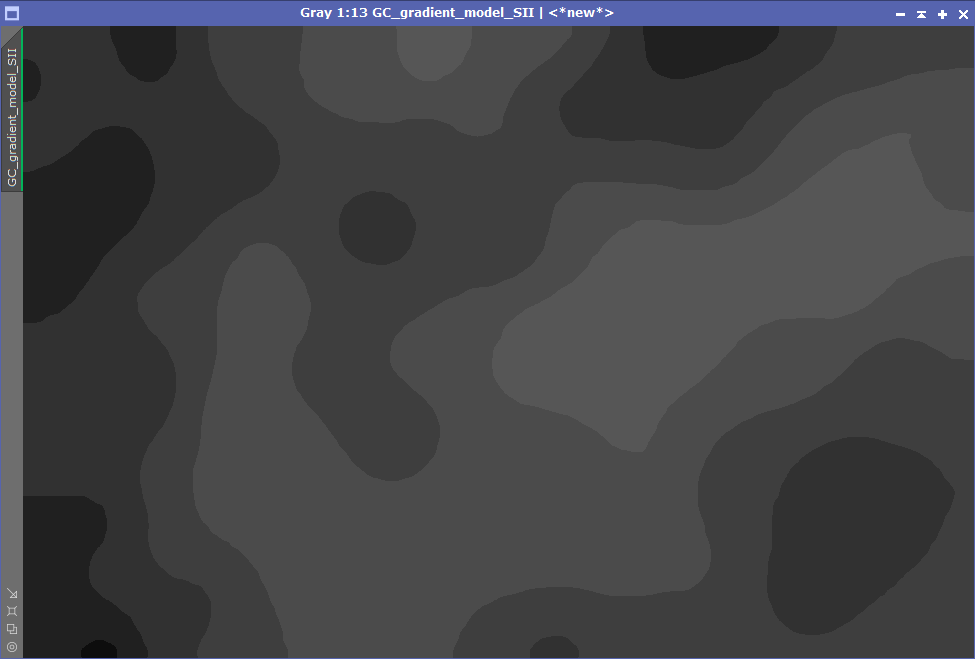
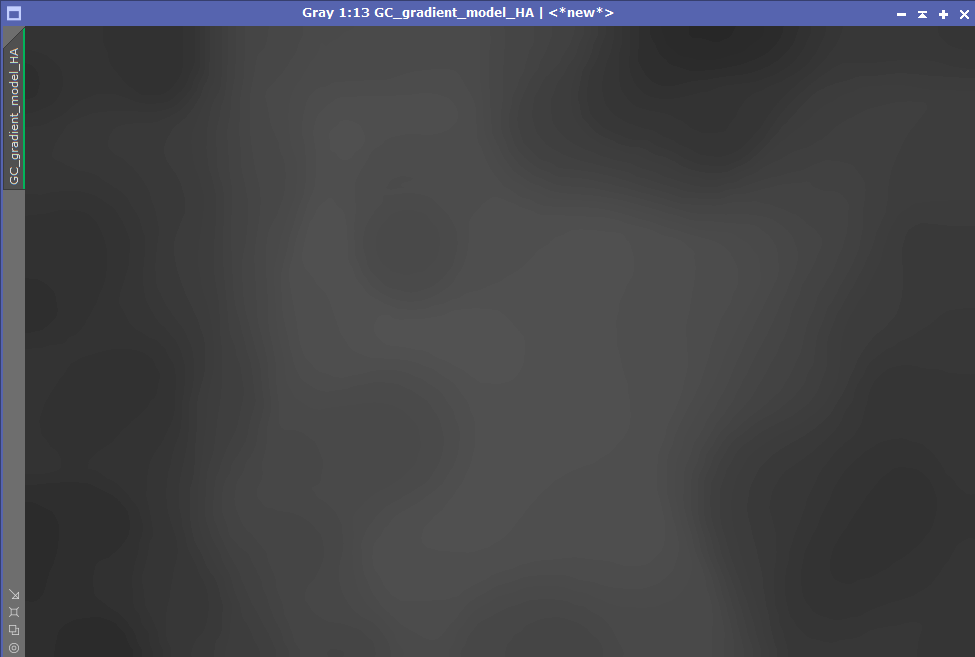
What I have noticed is in the extracted gradients images, my Ha data appears to be nice a smooth whereas my Oii and Sii have have harsh and pixelated gradient contour lines!! The same Gradient Correction settings are used for all 3 images!!
So my question is this, does this indicate I need more Oiii and Sii integration time or is it just something that’s normal??
Cheers all and clear skies
|
You cannot like this item. Reason: "ANONYMOUS".
You cannot remove your like from this item.
Editing a post is only allowed within 24 hours after creating it.
You cannot Like this post because the topic is closed.
Copy the URL below to share a direct link to this post.
This post cannot be edited using the classic forums editor.
To edit this post, please enable the "New forums experience" in your settings.
I don't use the Gradient Correction tool in PI. I use the Seti Astro Auto-DBE script and I love the way it works. It's free, maybe try it out and see if you get the same results…
Benjamin
|
You cannot like this item. Reason: "ANONYMOUS".
You cannot remove your like from this item.
Editing a post is only allowed within 24 hours after creating it.
You cannot Like this post because the topic is closed.
Copy the URL below to share a direct link to this post.
This post cannot be edited using the classic forums editor.
To edit this post, please enable the "New forums experience" in your settings.
Benjamin DeHaven:
I don't use the Gradient Correction tool in PI. I use the Seti Astro Auto-DBE script and I love the way it works. It's free, maybe try it out and see if you get the same results...
Benjamin Hi Benjamin, I do have SETI’s scripts installed, though I didn’t quite like the auto DBE results that much Cheers, Sam
|
You cannot like this item. Reason: "ANONYMOUS".
You cannot remove your like from this item.
Editing a post is only allowed within 24 hours after creating it.
You cannot Like this post because the topic is closed.
Copy the URL below to share a direct link to this post.
This post cannot be edited using the classic forums editor.
To edit this post, please enable the "New forums experience" in your settings.
You could also try the latest AI model in GraXpert. It's free so why not give it a try. That said, I agree that integration time on the weaker bands probably is the issue with these weaker emissions.
|
You cannot like this item. Reason: "ANONYMOUS".
You cannot remove your like from this item.
Editing a post is only allowed within 24 hours after creating it.
You cannot Like this post because the topic is closed.
Copy the URL below to share a direct link to this post.
This post cannot be edited using the classic forums editor.
To edit this post, please enable the "New forums experience" in your settings.
You could also try the latest AI model in GraXpert. It's free so why not give it a try. That said, I agree that integration time on the weaker bands probably is the issue with these weaker emissions. Haven’t had much luck with graXpert either!! I think I might try get another couple nights worth of data on the weaker emissions and try again see what happens
|
You cannot like this item. Reason: "ANONYMOUS".
You cannot remove your like from this item.
Editing a post is only allowed within 24 hours after creating it.
You cannot Like this post because the topic is closed.
Copy the URL below to share a direct link to this post.
This post cannot be edited using the classic forums editor.
To edit this post, please enable the "New forums experience" in your settings.
What gradients are you seeing? If all 3 (GC, GX, and ADBE) arent getting good results what are you seeing in your image? Moreover what are you expecting it to look like after gradient removal, maybe it is real structure you are thinking is gradient, or possibly bad flat calibration leading to uncorrecting artifacts.
|
You cannot like this item. Reason: "ANONYMOUS".
You cannot remove your like from this item.
Editing a post is only allowed within 24 hours after creating it.
You cannot Like this post because the topic is closed.
Copy the URL below to share a direct link to this post.
This post cannot be edited using the classic forums editor.
To edit this post, please enable the "New forums experience" in your settings.
Franklin Marek:
What gradients are you seeing? If all 3 (GC, GX, and ADBE) arent getting good results what are you seeing in your image? Moreover what are you expecting it to look like after gradient removal, maybe it is real structure you are thinking is gradient, or possibly bad flat calibration leading to uncorrecting artifacts. When I finish work I’ll upload the extracted gradient images!!
|
You cannot like this item. Reason: "ANONYMOUS".
You cannot remove your like from this item.
Editing a post is only allowed within 24 hours after creating it.
You cannot Like this post because the topic is closed.
Copy the URL below to share a direct link to this post.
This post cannot be edited using the classic forums editor.
To edit this post, please enable the "New forums experience" in your settings.
What I observed is that the grainier appearance of Oiii and Sii images, compared to Ha, is often really caused by the different auto stretch factor rather than by an actual snr difference. Gradient correction does impact that.
In fact, I recently checked an Ha and Sii integration of the same target, where the Sii one looked much grainier than the Ha after gc, and the Ha's SNR was reported as 37.5db vs the Sii one at 39.6db…
All that changes and averages out once you combine the channels and normalize them - at least, it typically does for me…
|
You cannot like this item. Reason: "ANONYMOUS".
You cannot remove your like from this item.
Editing a post is only allowed within 24 hours after creating it.
You cannot Like this post because the topic is closed.
Copy the URL below to share a direct link to this post.
This post cannot be edited using the classic forums editor.
To edit this post, please enable the "New forums experience" in your settings.
What I observed is that the grainier appearance of Oiii and Sii images, compared to Ha, is often really caused by the different auto stretch factor rather than by an actual snr difference. Gradient correction does impact that.
In fact, I recently checked an Ha and Sii integration of the same target, where the Sii one looked much grainier than the Ha after gc, and the Ha's SNR was reported as 37.5db vs the Sii one at 39.6db...
All that changes and averages out once you combine the channels and normalize them - at least, it typically does for me... Ahhhh yes I’m with ya!! That makes sense, different images means different auto stretch factors Gradient correction was done straight after Dynamic crop which was the first step!! I need to collect more Sii and Oiii data and maybe a little more Ha then I can be really picky with what frames I use to stack for a better image!! How do you check the apparent snr of the images??
|
You cannot like this item. Reason: "ANONYMOUS".
You cannot remove your like from this item.
Editing a post is only allowed within 24 hours after creating it.
You cannot Like this post because the topic is closed.
Copy the URL below to share a direct link to this post.
This post cannot be edited using the classic forums editor.
To edit this post, please enable the "New forums experience" in your settings.
Sam Badcock:
How do you check the apparent snr of the images?? Heh, I expect you could receive dozens of different answers to that question... @Franklin Marek surely knows better than I do. I personally use (sparingly) a little PI script which you can easily find through some google-ing: From the script itself: * Estimation of the signal-to-noise ratio function: * * SNR(f,g) = E(f^2) / E((f - g)^2) * * where f is a distribution function, g is a sample, and E(.) is the expected value of the argument. * * The denominator is the mean square error, which we approximate with the variance of the noise.
|
You cannot like this item. Reason: "ANONYMOUS".
You cannot remove your like from this item.
Editing a post is only allowed within 24 hours after creating it.
You cannot Like this post because the topic is closed.
Copy the URL below to share a direct link to this post.
This post cannot be edited using the classic forums editor.
To edit this post, please enable the "New forums experience" in your settings.
The easiest is Script->ImageAnalysis->SNR
|
You cannot like this item. Reason: "ANONYMOUS".
You cannot remove your like from this item.
Editing a post is only allowed within 24 hours after creating it.
You cannot Like this post because the topic is closed.
Copy the URL below to share a direct link to this post.
This post cannot be edited using the classic forums editor.
To edit this post, please enable the "New forums experience" in your settings.
Franklin Marek:
The easiest is Script->ImageAnalysis->SNR Yes, that's what I was referring to; but it doesn't come with PI by default anymore.
|
You cannot like this item. Reason: "ANONYMOUS".
You cannot remove your like from this item.
Editing a post is only allowed within 24 hours after creating it.
You cannot Like this post because the topic is closed.
Copy the URL below to share a direct link to this post.
This post cannot be edited using the classic forums editor.
To edit this post, please enable the "New forums experience" in your settings.
Franklin Marek:
The easiest is Script->ImageAnalysis->SNR Hi Franklin, Awesome mate thank you, found the script worked like a charm!! How reliable is it or is it more of an indication?? CS - Sam
|
You cannot like this item. Reason: "ANONYMOUS".
You cannot remove your like from this item.
Editing a post is only allowed within 24 hours after creating it.
You cannot Like this post because the topic is closed.
Copy the URL below to share a direct link to this post.
This post cannot be edited using the classic forums editor.
To edit this post, please enable the "New forums experience" in your settings.
It is a hollistic look at your image for stellar snr. If you want to determine say the oiii signal to noise in a small patch you will have to do it manually. Sample a small lets say 5x5 grid where signal exists and another nearby patch with no signal. Then subtract the median of the non signal area off the signal area to remove the sky pedestal. Now the median of the normalized signal area is the signal. Then you need to determine the noise in the non signal area, variance is a good indicator since photon shot noise is not normal and follows a poisson distribution. Finally you take that normalized signals median divided by the noise. So the script just gives a single value for the whole image, which is great for quick comparisons between two images, but if you want to find the actual SNR of an object you need to do the above since SNR will vary across the entire image. think about it, some parts of the image dont have any signal and signal will be highest in the brightest part of your object. SNR is a dynamic measure that varies across your whole image. Still looking forward to see what those gradients look like  |
You cannot like this item. Reason: "ANONYMOUS".
You cannot remove your like from this item.
Editing a post is only allowed within 24 hours after creating it.
You cannot Like this post because the topic is closed.
Copy the URL below to share a direct link to this post.
This post cannot be edited using the classic forums editor.
To edit this post, please enable the "New forums experience" in your settings.
Franklin Marek:
If you want to determine say the oiii signal to noise in a small patch you will have to do it manually. Sample a small lets say 5x5 grid where signal exists and another nearby patch with no signal. Then subtract the median of the non signal area off the signal area to remove the sky pedestal. Now the median of the normalized signal area is the signal. Then you need to determine the noise in the non signal area, variance is a good indicator since photon shot noise is not normal and follows a poisson distribution. Finally you take that normalized signals median divided by the noise. Sounds like this would make a great SetiAstro script, just sayin'...
|
You cannot like this item. Reason: "ANONYMOUS".
You cannot remove your like from this item.
Editing a post is only allowed within 24 hours after creating it.
You cannot Like this post because the topic is closed.
Copy the URL below to share a direct link to this post.
This post cannot be edited using the classic forums editor.
To edit this post, please enable the "New forums experience" in your settings.
I have had a lot of difficulty using gradient correction on faint targets with extensive nebulosity accross the field. It seems to work best for me when I have discrete bright LRGB target like a galaxy or a Planetary nebula. But otherwise have not had much success without destroying faint details in a nebula.
Graxpert works well. Unless I had a very complex gradient, usually increasing smoothing factor to 1 helps keep the gradient model simple and reduces effects on any bright structures.
|
You cannot like this item. Reason: "ANONYMOUS".
You cannot remove your like from this item.
Editing a post is only allowed within 24 hours after creating it.
You cannot Like this post because the topic is closed.
Copy the URL below to share a direct link to this post.
This post cannot be edited using the classic forums editor.
To edit this post, please enable the "New forums experience" in your settings.
Franklin Marek:
Still looking forward to see what those gradients look like *Hi Franklin, Have attached screenshots of the auto STF views of the gradients, the stretched gradients and the gradient correction settings!! As mentioned above by @Rostokko I think it's just a case of different auto stretch factors being applied but the actual stretched gradient images have nice smooth contour lines!! My latest image of NGC6188 has 13 hours of total integration time (same files these gradients came from) but I found and ran the SNR script on the final image out of curiosity and have attached a screenshot of that!! Is there an "ideal" minimum SNR value to go for?? I do understand that it's the average apparent SNR over the whole image CS - Sam GradientCorrection Settings Apparent SNR values for final image 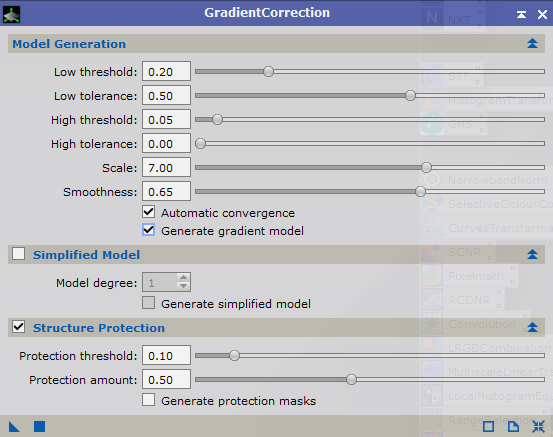 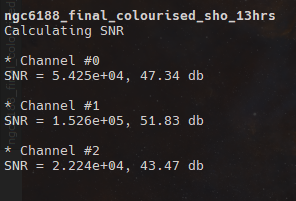 Linear OIII gradient model  Non Linear OIII gradient model 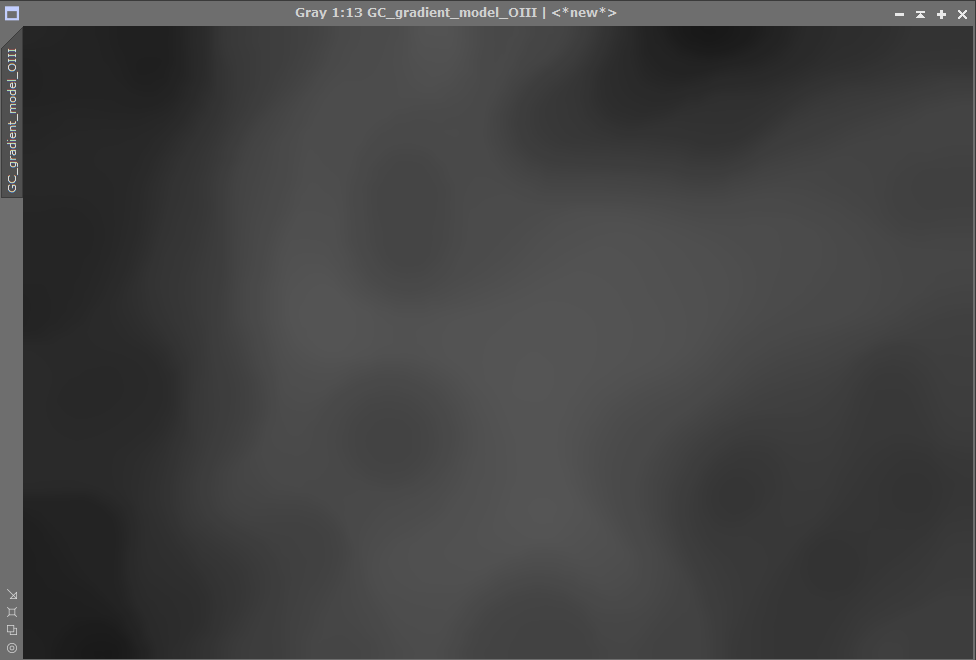 Linear SII gradient model  Non Linear SII gradient model 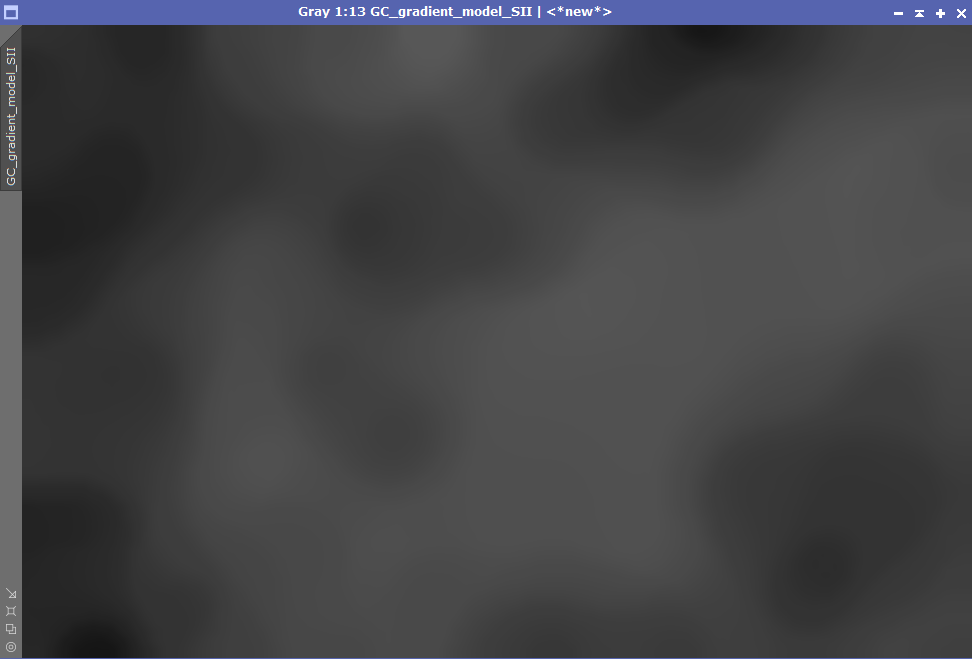 Linear Ha gradient model  Non Linear Ha gradient model 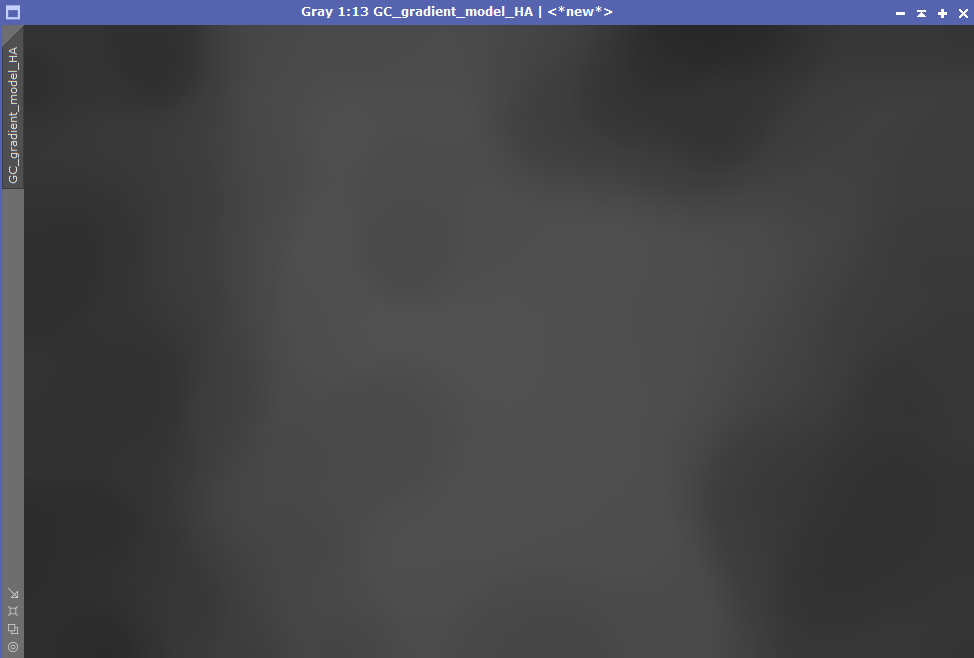 |
You cannot like this item. Reason: "ANONYMOUS".
You cannot remove your like from this item.
Editing a post is only allowed within 24 hours after creating it.
You cannot Like this post because the topic is closed.
Copy the URL below to share a direct link to this post.
This post cannot be edited using the classic forums editor.
To edit this post, please enable the "New forums experience" in your settings.
Be sure to turn on 24bit Look Up Tables! I think you may falsely be seeing the contours incorrectly 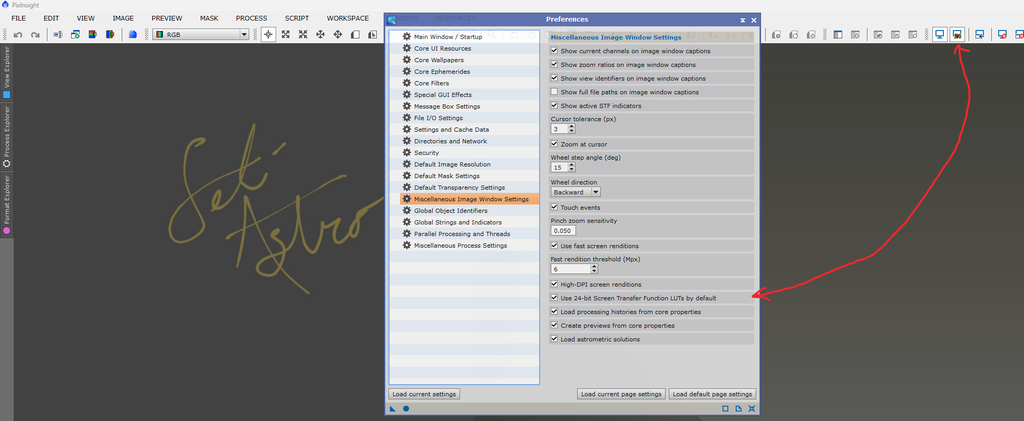 The gradient correction you are extracting looks smooth, but that is not just gradient. There is too small of structures to just be gradient and you are changing broad brightness levels in the image. That is why I normally steer clear of GC. I said my opinion on GC in two different videos I made on GC and leave it at that. You are right that gradient tends to be easier to remove as you increase the SNR in your image. With a lot of noise and your signal near the noise floor it is hard to discern if it is gradient, signal, bad calibration, etc. At 13 hours you are well on your way to getting some nice exposure! As far as an SNR to shoot for you really can't use the script for that. Since it is global and not specifically looking at your target's signal. What it is good for though is comparing different noise reduction methods, stacking rejection methods, drizzle vs non drizzle, etc. So you can tweak those settings and see how it impacts your overall image with quantitative numbers to back it up instead of relying on your eyes and STF Hope some of this helps  Frank
|
You cannot like this item. Reason: "ANONYMOUS".
You cannot remove your like from this item.
Editing a post is only allowed within 24 hours after creating it.
You cannot Like this post because the topic is closed.
Copy the URL below to share a direct link to this post.
This post cannot be edited using the classic forums editor.
To edit this post, please enable the "New forums experience" in your settings.
Franklin Marek:
Be sure to turn on 24bit Look Up Tables! I think you may falsely be seeing the contours incorrectly
The gradient correction you are extracting looks smooth, but that is not just gradient. There is too small of structures to just be gradient and you are changing broad brightness levels in the image. That is why I normally steer clear of GC. I said my opinion on GC in two different videos I made on GC and leave it at that. You are right that gradient tends to be easier to remove as you increase the SNR in your image. With a lot of noise and your signal near the noise floor it is hard to discern if it is gradient, signal, bad calibration, etc. At 13 hours you are well on your way to getting some nice exposure!
As far as an SNR to shoot for you really can't use the script for that. Since it is global and not specifically looking at your target's signal. What it is good for though is comparing different noise reduction methods, stacking rejection methods, drizzle vs non drizzle, etc. So you can tweak those settings and see how it impacts your overall image with quantitative numbers to back it up instead of relying on your eyes and STF
Hope some of this helps
Frank Hi Frank I'll jump on to YouTube and have a watch over your graident videos (assuming they're on there) GC hasnt really failed me yet as I always get a nice flat background/image but as others have mentioned and as I think you're hinting at, it may also be mistaking small faint structures/nebula as gradients CS - Sam
|
You cannot like this item. Reason: "ANONYMOUS".
You cannot remove your like from this item.
Editing a post is only allowed within 24 hours after creating it.
You cannot Like this post because the topic is closed.
Copy the URL below to share a direct link to this post.
This post cannot be edited using the classic forums editor.
To edit this post, please enable the "New forums experience" in your settings.
I'll jump on to YouTube and have a watch over your graident videos (assuming they're on there) Look up When Good Gradients Go Bad by SetiAstro if you want to watch them
|
You cannot like this item. Reason: "ANONYMOUS".
You cannot remove your like from this item.
Editing a post is only allowed within 24 hours after creating it.
You cannot Like this post because the topic is closed.
Copy the URL below to share a direct link to this post.
This post cannot be edited using the classic forums editor.
To edit this post, please enable the "New forums experience" in your settings.
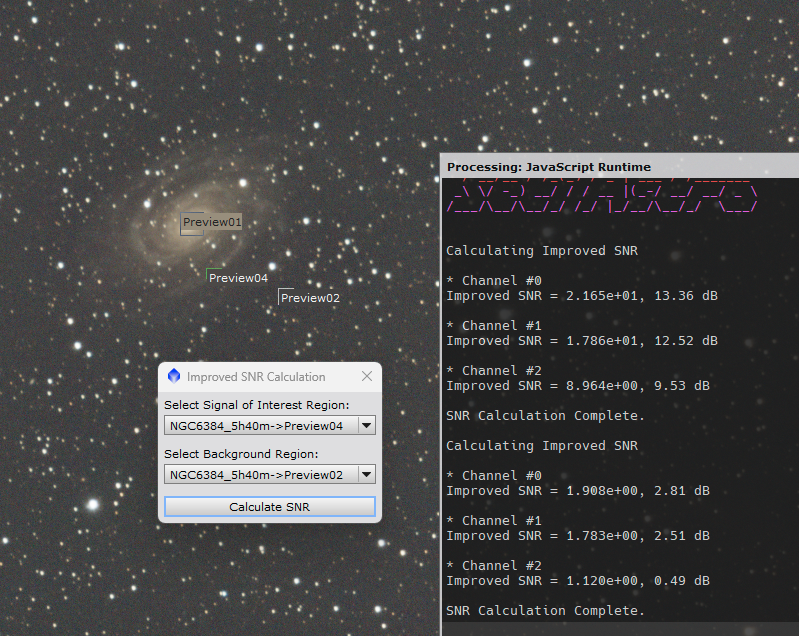
I wrote a little script to find the SNR of an object instead of holistically across the whole image. Nothing fancy here. Draw some preview areas where you want to measure the SNR and draw one more preview representing the background. In my case below i have two areas I want the SNR from (Preview01 and Preview04) and I drew a background preview (Preview02). You can get the zip here, just unzip it and add it as a feature script: https://www.setiastro.com/s/ImprovedSNR.zip |
You cannot like this item. Reason: "ANONYMOUS".
You cannot remove your like from this item.
Editing a post is only allowed within 24 hours after creating it.
You cannot Like this post because the topic is closed.
Copy the URL below to share a direct link to this post.
This post cannot be edited using the classic forums editor.
To edit this post, please enable the "New forums experience" in your settings.
Franklin Marek:
I wrote a little script to find the SNR of an object instead of holistically across the whole image. Nothing fancy here. Draw some preview areas where you want to measure the SNR and draw one more preview representing the background. In my case below i have two areas I want the SNR from (Preview01 and Preview04) and I drew a background preview (Preview02).
You can get the zip here, just unzip it and add it as a feature script: https://www.setiastro.com/s/ImprovedSNR.zip Most excellent, thank you very much!!
|
You cannot like this item. Reason: "ANONYMOUS".
You cannot remove your like from this item.
Editing a post is only allowed within 24 hours after creating it.
You cannot Like this post because the topic is closed.
Copy the URL below to share a direct link to this post.
This post cannot be edited using the classic forums editor.
To edit this post, please enable the "New forums experience" in your settings.
Franklin Marek:
I wrote a little script to find the SNR of an object instead of holistically across the whole image. Very handy; it confirmed me that NB filter for fast (f/2) optics indeed cut a humongous amount of signal when used on slower ones (f/7)... Thanks!
|
You cannot like this item. Reason: "ANONYMOUS".
You cannot remove your like from this item.
Editing a post is only allowed within 24 hours after creating it.
You cannot Like this post because the topic is closed.
Copy the URL below to share a direct link to this post.
This post cannot be edited using the classic forums editor.
To edit this post, please enable the "New forums experience" in your settings.
Franklin Marek:
I wrote a little script to find the SNR of an object instead of holistically across the whole image. Nothing fancy here. Draw some preview areas where you want to measure the SNR and draw one more preview representing the background. In my case below i have two areas I want the SNR from (Preview01 and Preview04) and I drew a background preview (Preview02).
You can get the zip here, just unzip it and add it as a feature script: https://www.setiastro.com/s/ImprovedSNR.zip
Awesome Frank, like the others I’ll give it a jam later on!! Thanks heaps
|
You cannot like this item. Reason: "ANONYMOUS".
You cannot remove your like from this item.
Editing a post is only allowed within 24 hours after creating it.
You cannot Like this post because the topic is closed.
Copy the URL below to share a direct link to this post.
This post cannot be edited using the classic forums editor.
To edit this post, please enable the "New forums experience" in your settings.