Good afternoon all,
Just got the ASI air plus in intro to auto guiding and I am super excited. Currently trying to figure out the best spot to out it on my mount. I've seen people placing it underneath the plate at the front, I've seen people using velcro, etc.
What are the best ways to get this little guy in place so that there is good cable management and no cables are snagging?
If you've got specific dovetails or adapaters, please drop those in here as well. Much appreciated in advance!
|
You cannot like this item. Reason: "ANONYMOUS".
You cannot remove your like from this item.
Editing a post is only allowed within 24 hours after creating it.
You cannot Like this post because the topic is closed.
Copy the URL below to share a direct link to this post.
This post cannot be edited using the classic forums editor.
To edit this post, please enable the "New forums experience" in your settings.
Either on a top side dovetail, or on a finder shoe (usually where a guide-scope sits). If you are planning to use a guide-scope then you'd have to resort to the dovetail method. You could mount it beneath the scope on the dovetail but you have to take care so it does not collide with the mount. Top side is the safest way.
Some may use velcro and other solutions but I would only trust a proper method with screws over time and ever changing weather conditions. Just my opinion on the matter.
|
You cannot like this item. Reason: "ANONYMOUS".
You cannot remove your like from this item.
Editing a post is only allowed within 24 hours after creating it.
You cannot Like this post because the topic is closed.
Copy the URL below to share a direct link to this post.
This post cannot be edited using the classic forums editor.
To edit this post, please enable the "New forums experience" in your settings.
I've got mine on the dovetail mount on my Skywatcher ESPRIT 120, and then 3D printed some clips to go on it for cable management. Looks messy with this view (2nd pic), but I've just routed the existing cables ... some are way too long and need to be wrapped back and forth ... would like to eventually get shorter / better length matching cables, but it's all a work in progress. When I get to it I'll move the top clip so it isn't obstructing power outlet #3, but I don't need that at this stage anyway. All the loose cables in the first pic are now routed through "loom tube" (split corrugated conduit) and much tidier than when this pic was taken. 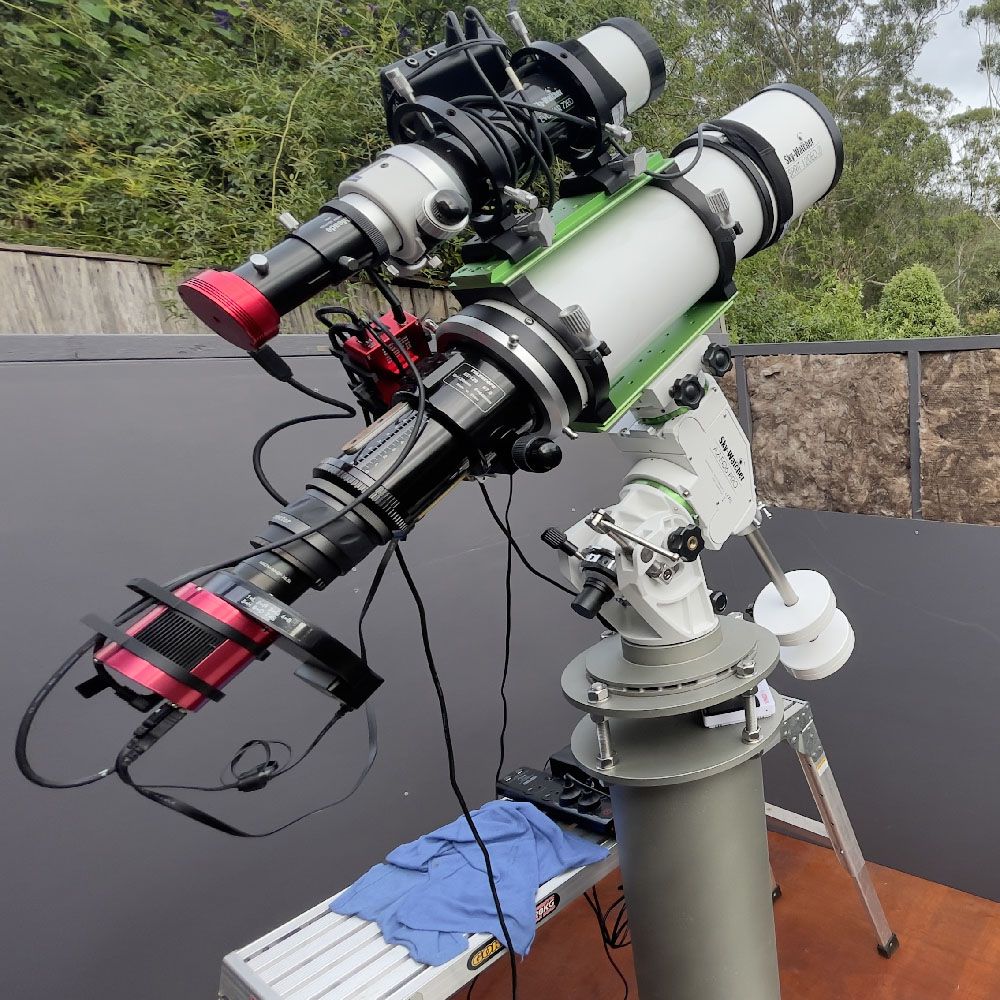 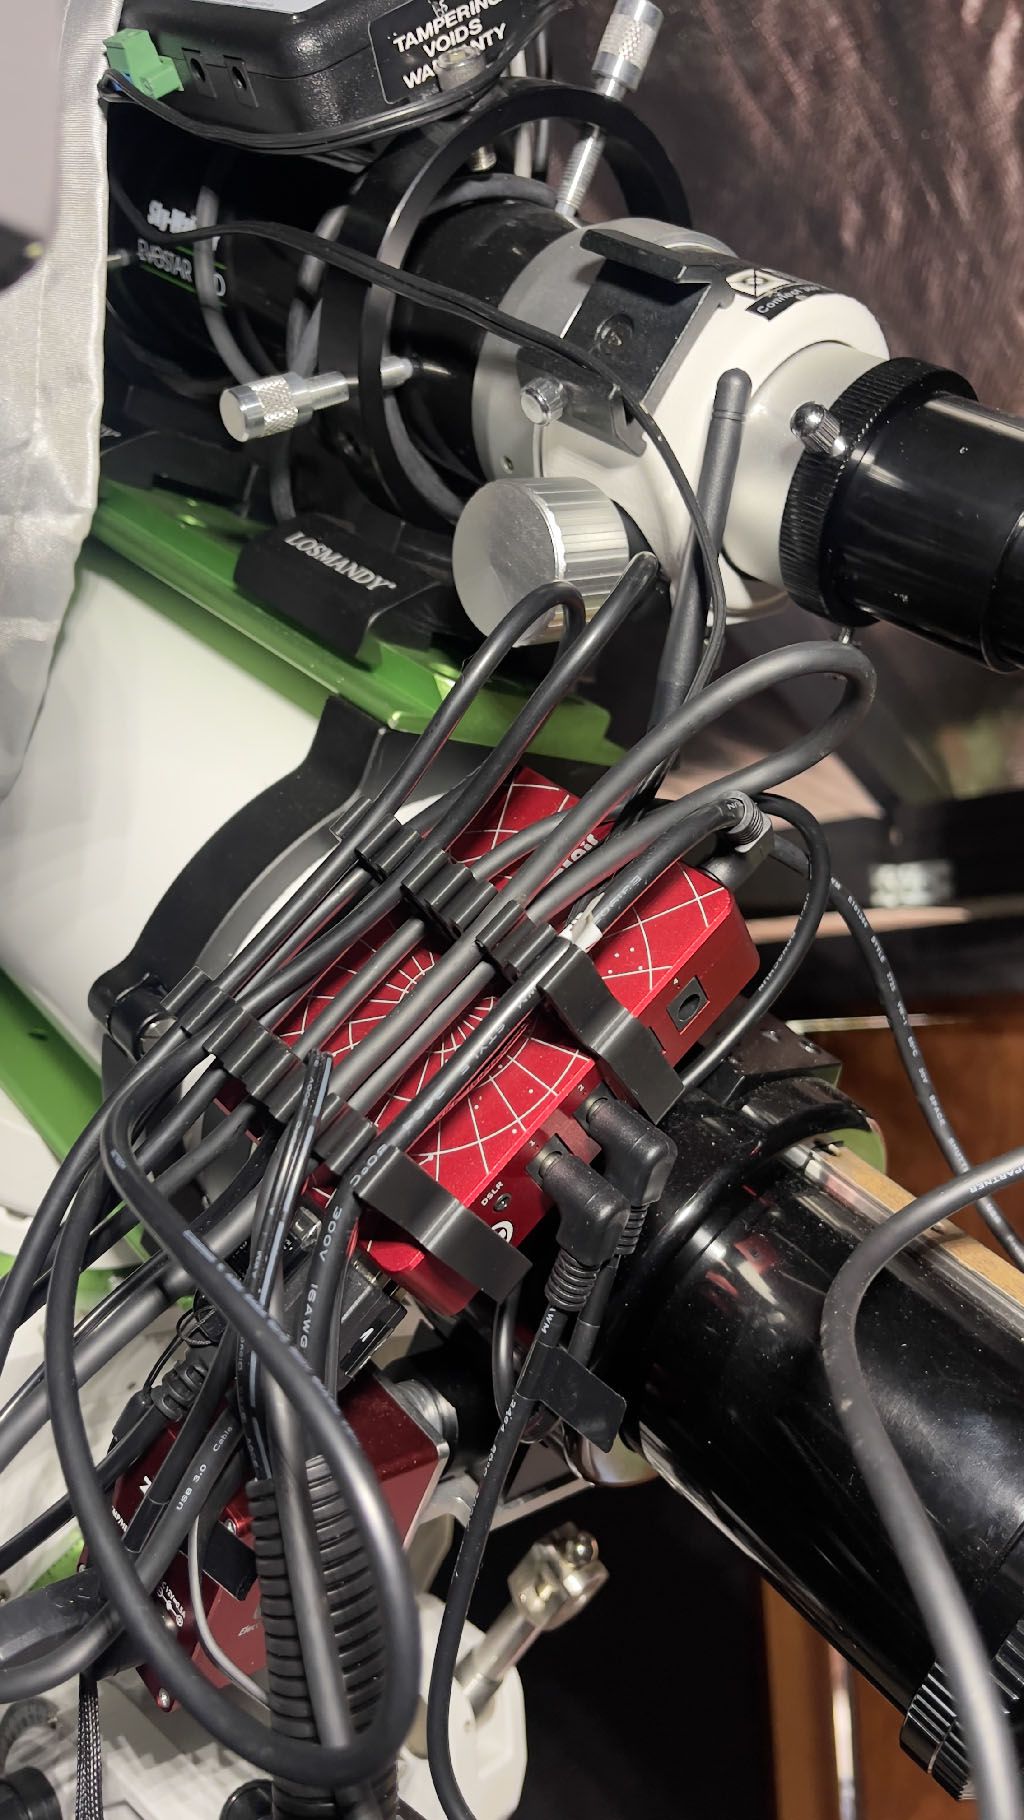 |
You cannot like this item. Reason: "ANONYMOUS".
You cannot remove your like from this item.
Editing a post is only allowed within 24 hours after creating it.
You cannot Like this post because the topic is closed.
Copy the URL below to share a direct link to this post.
This post cannot be edited using the classic forums editor.
To edit this post, please enable the "New forums experience" in your settings.
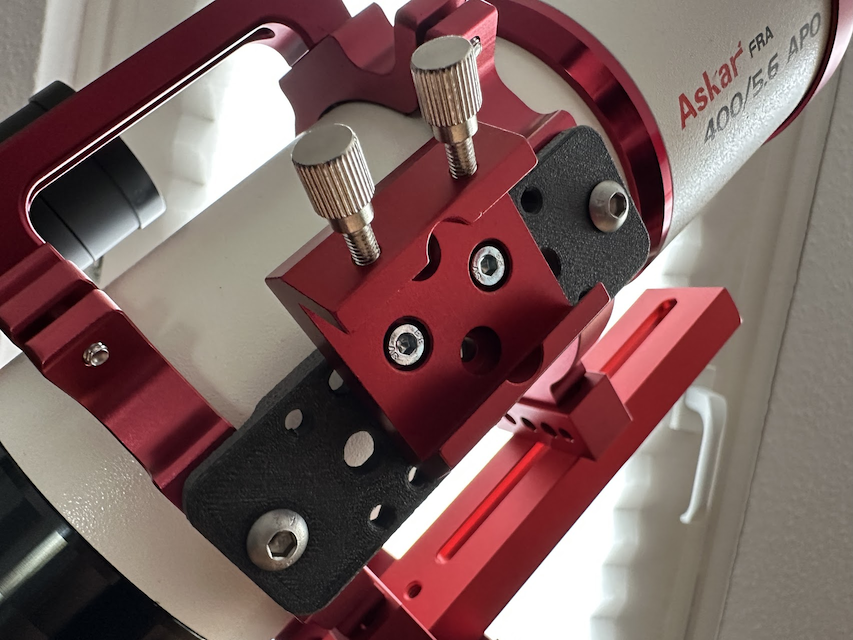
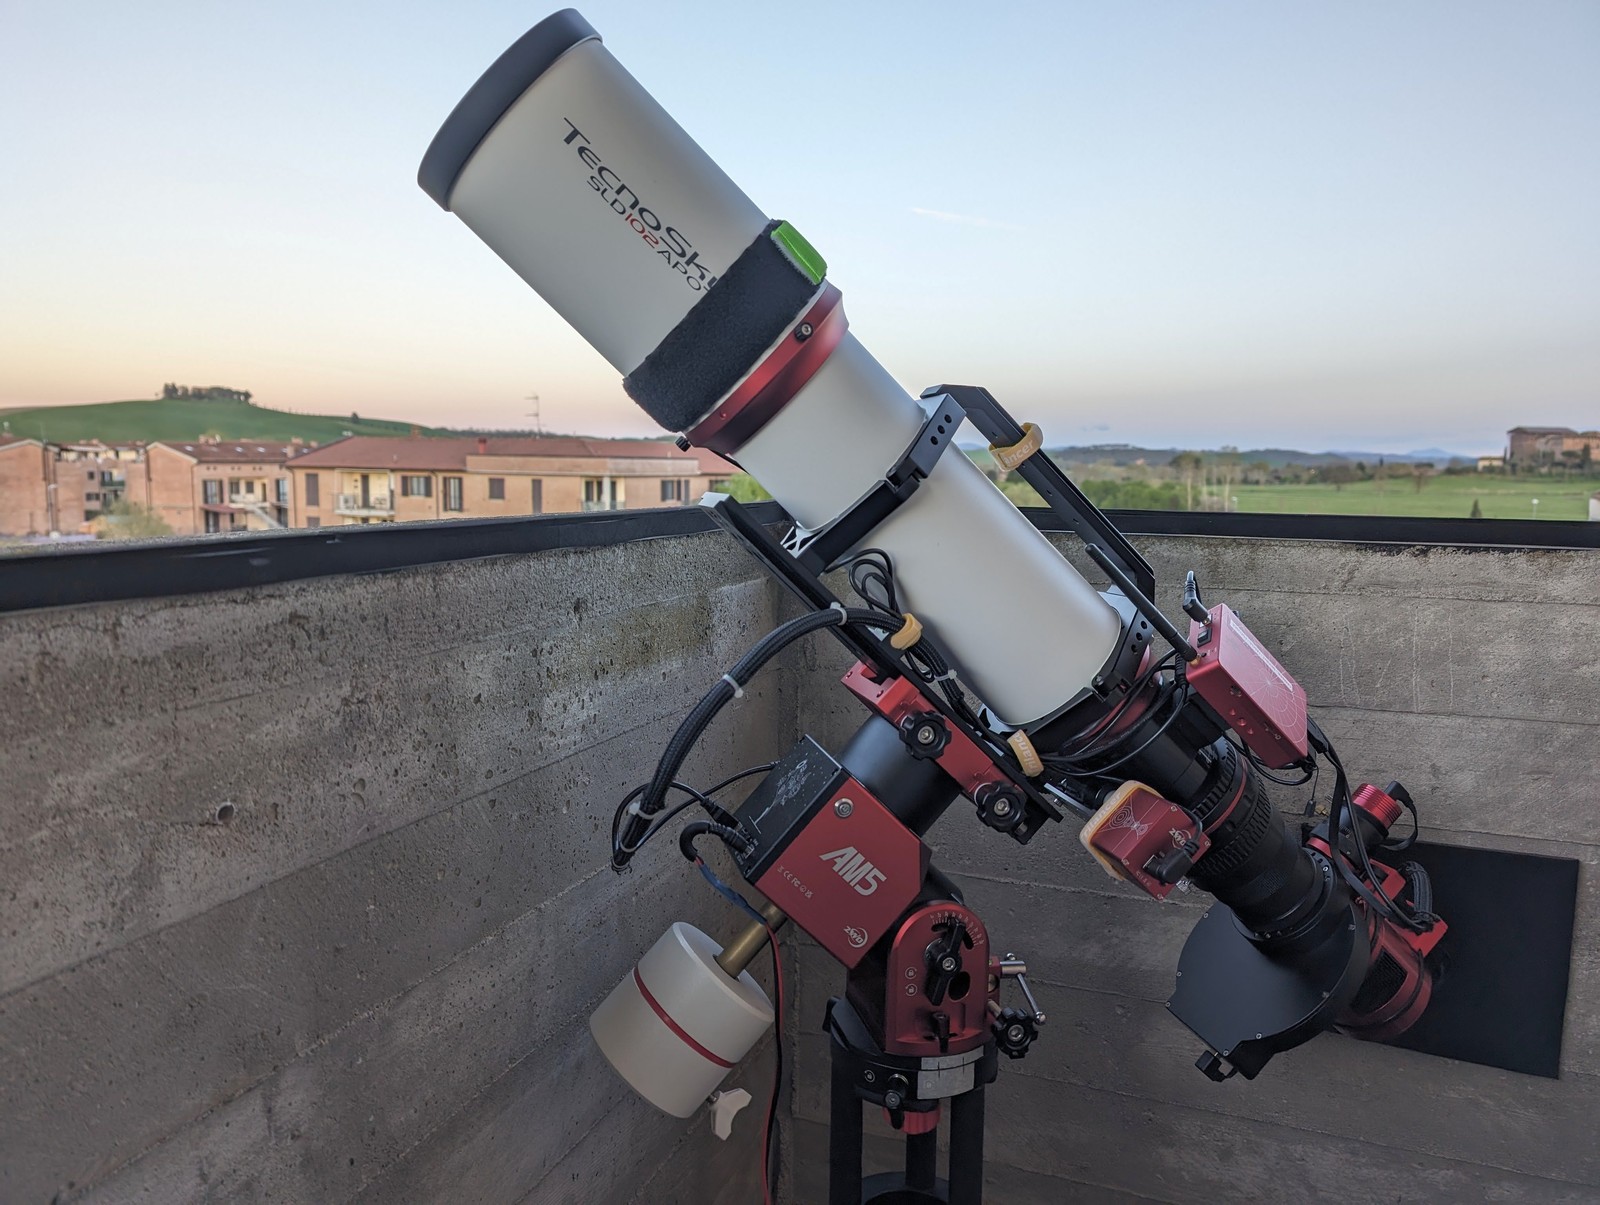
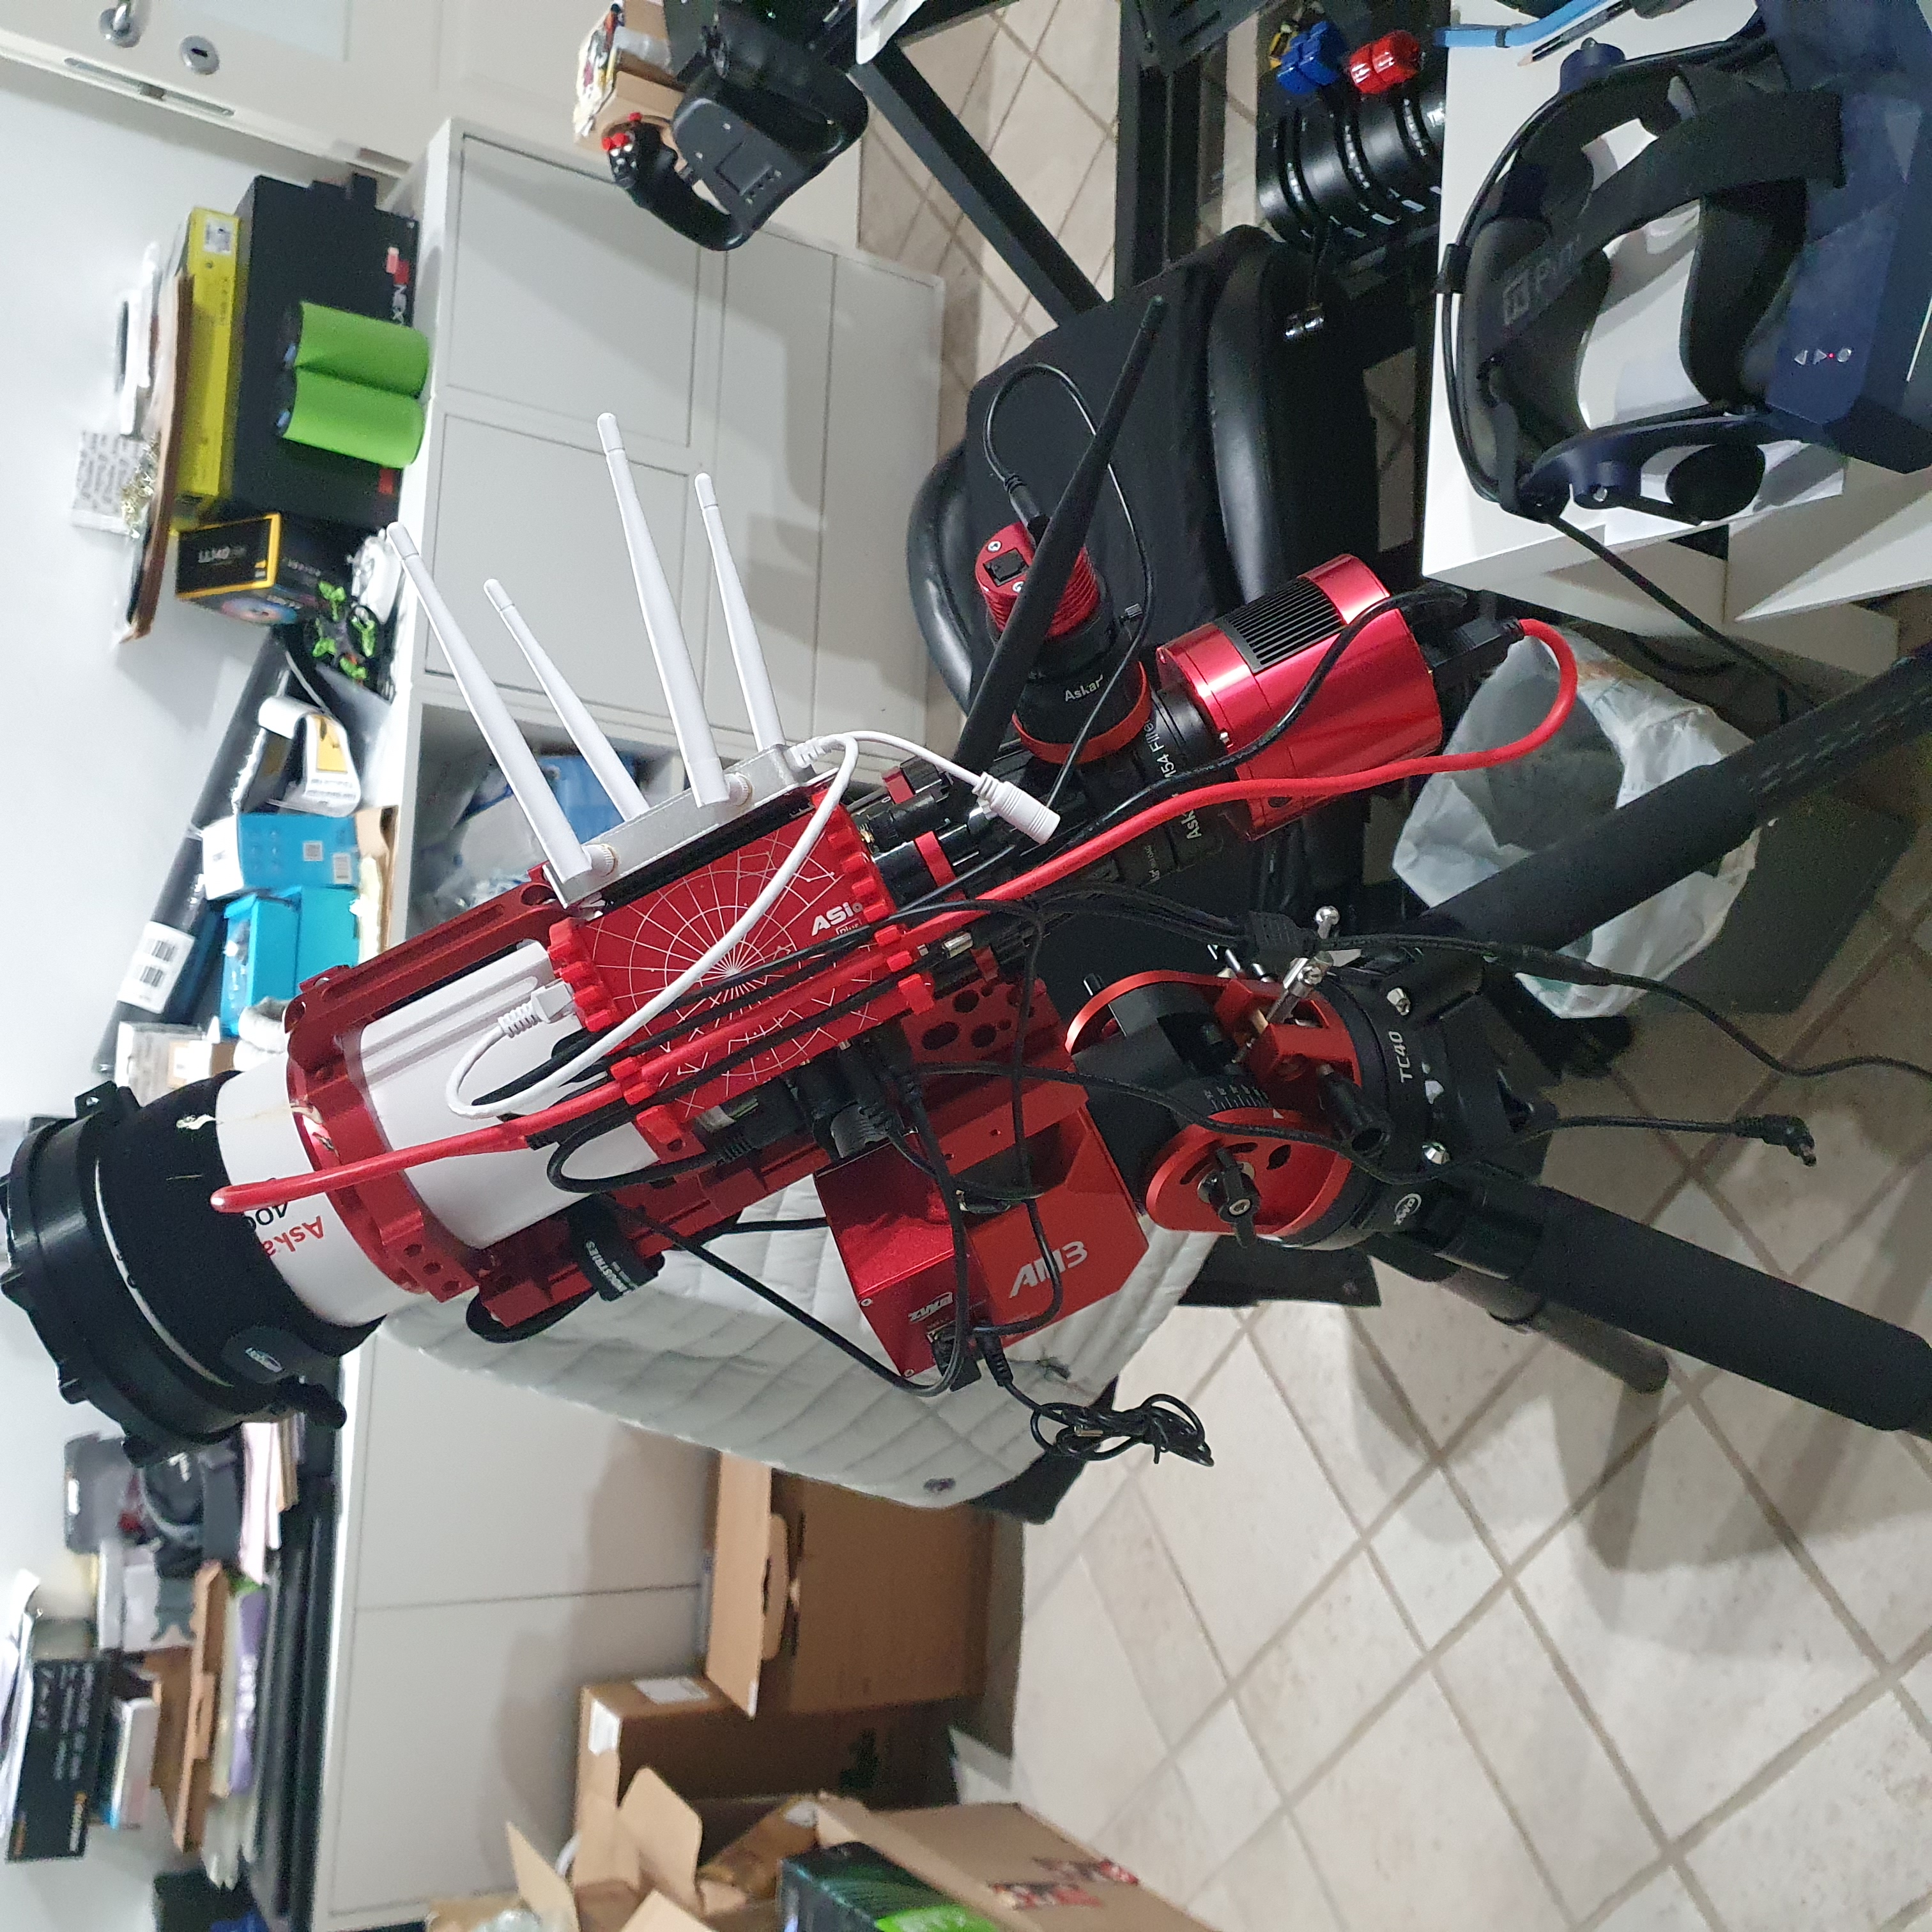
What kind of telescope do you have? I've mounted mine on the side of the Askar FRA400 using this 3D printed rail for example. Maybe there are similar solutions for your setup.  |
You cannot like this item. Reason: "ANONYMOUS".
You cannot remove your like from this item.
Editing a post is only allowed within 24 hours after creating it.
You cannot Like this post because the topic is closed.
Copy the URL below to share a direct link to this post.
This post cannot be edited using the classic forums editor.
To edit this post, please enable the "New forums experience" in your settings.
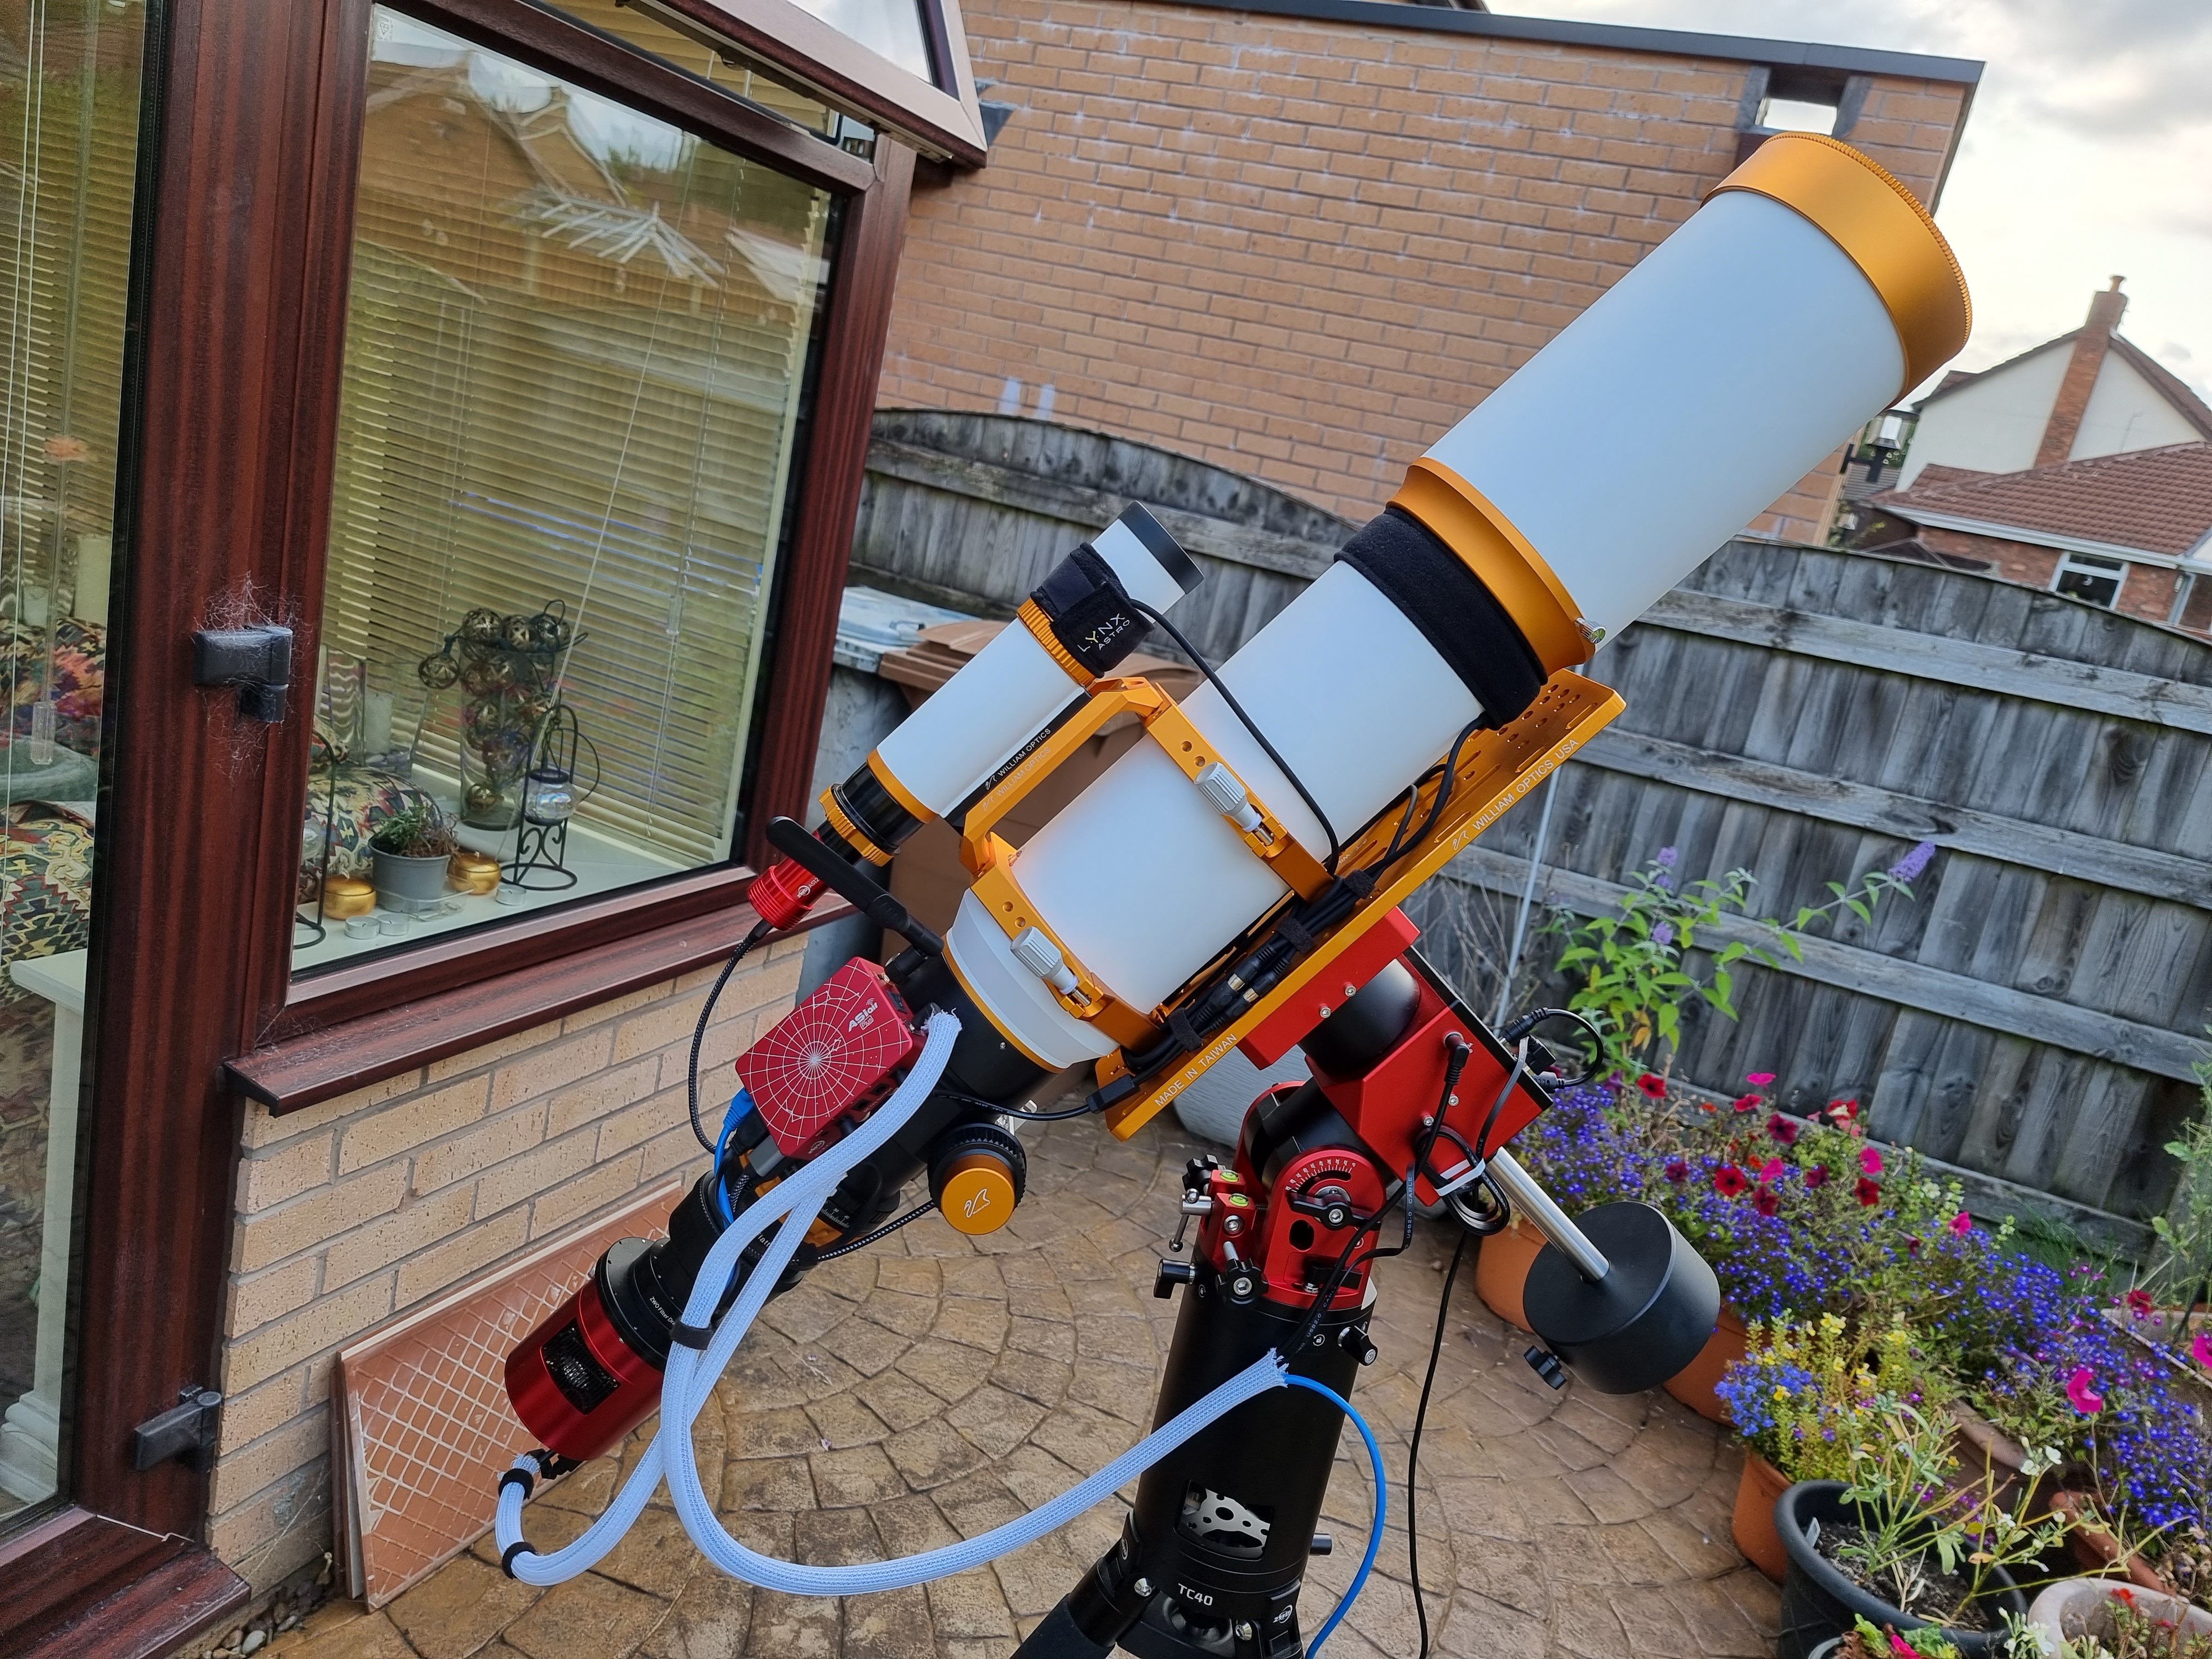
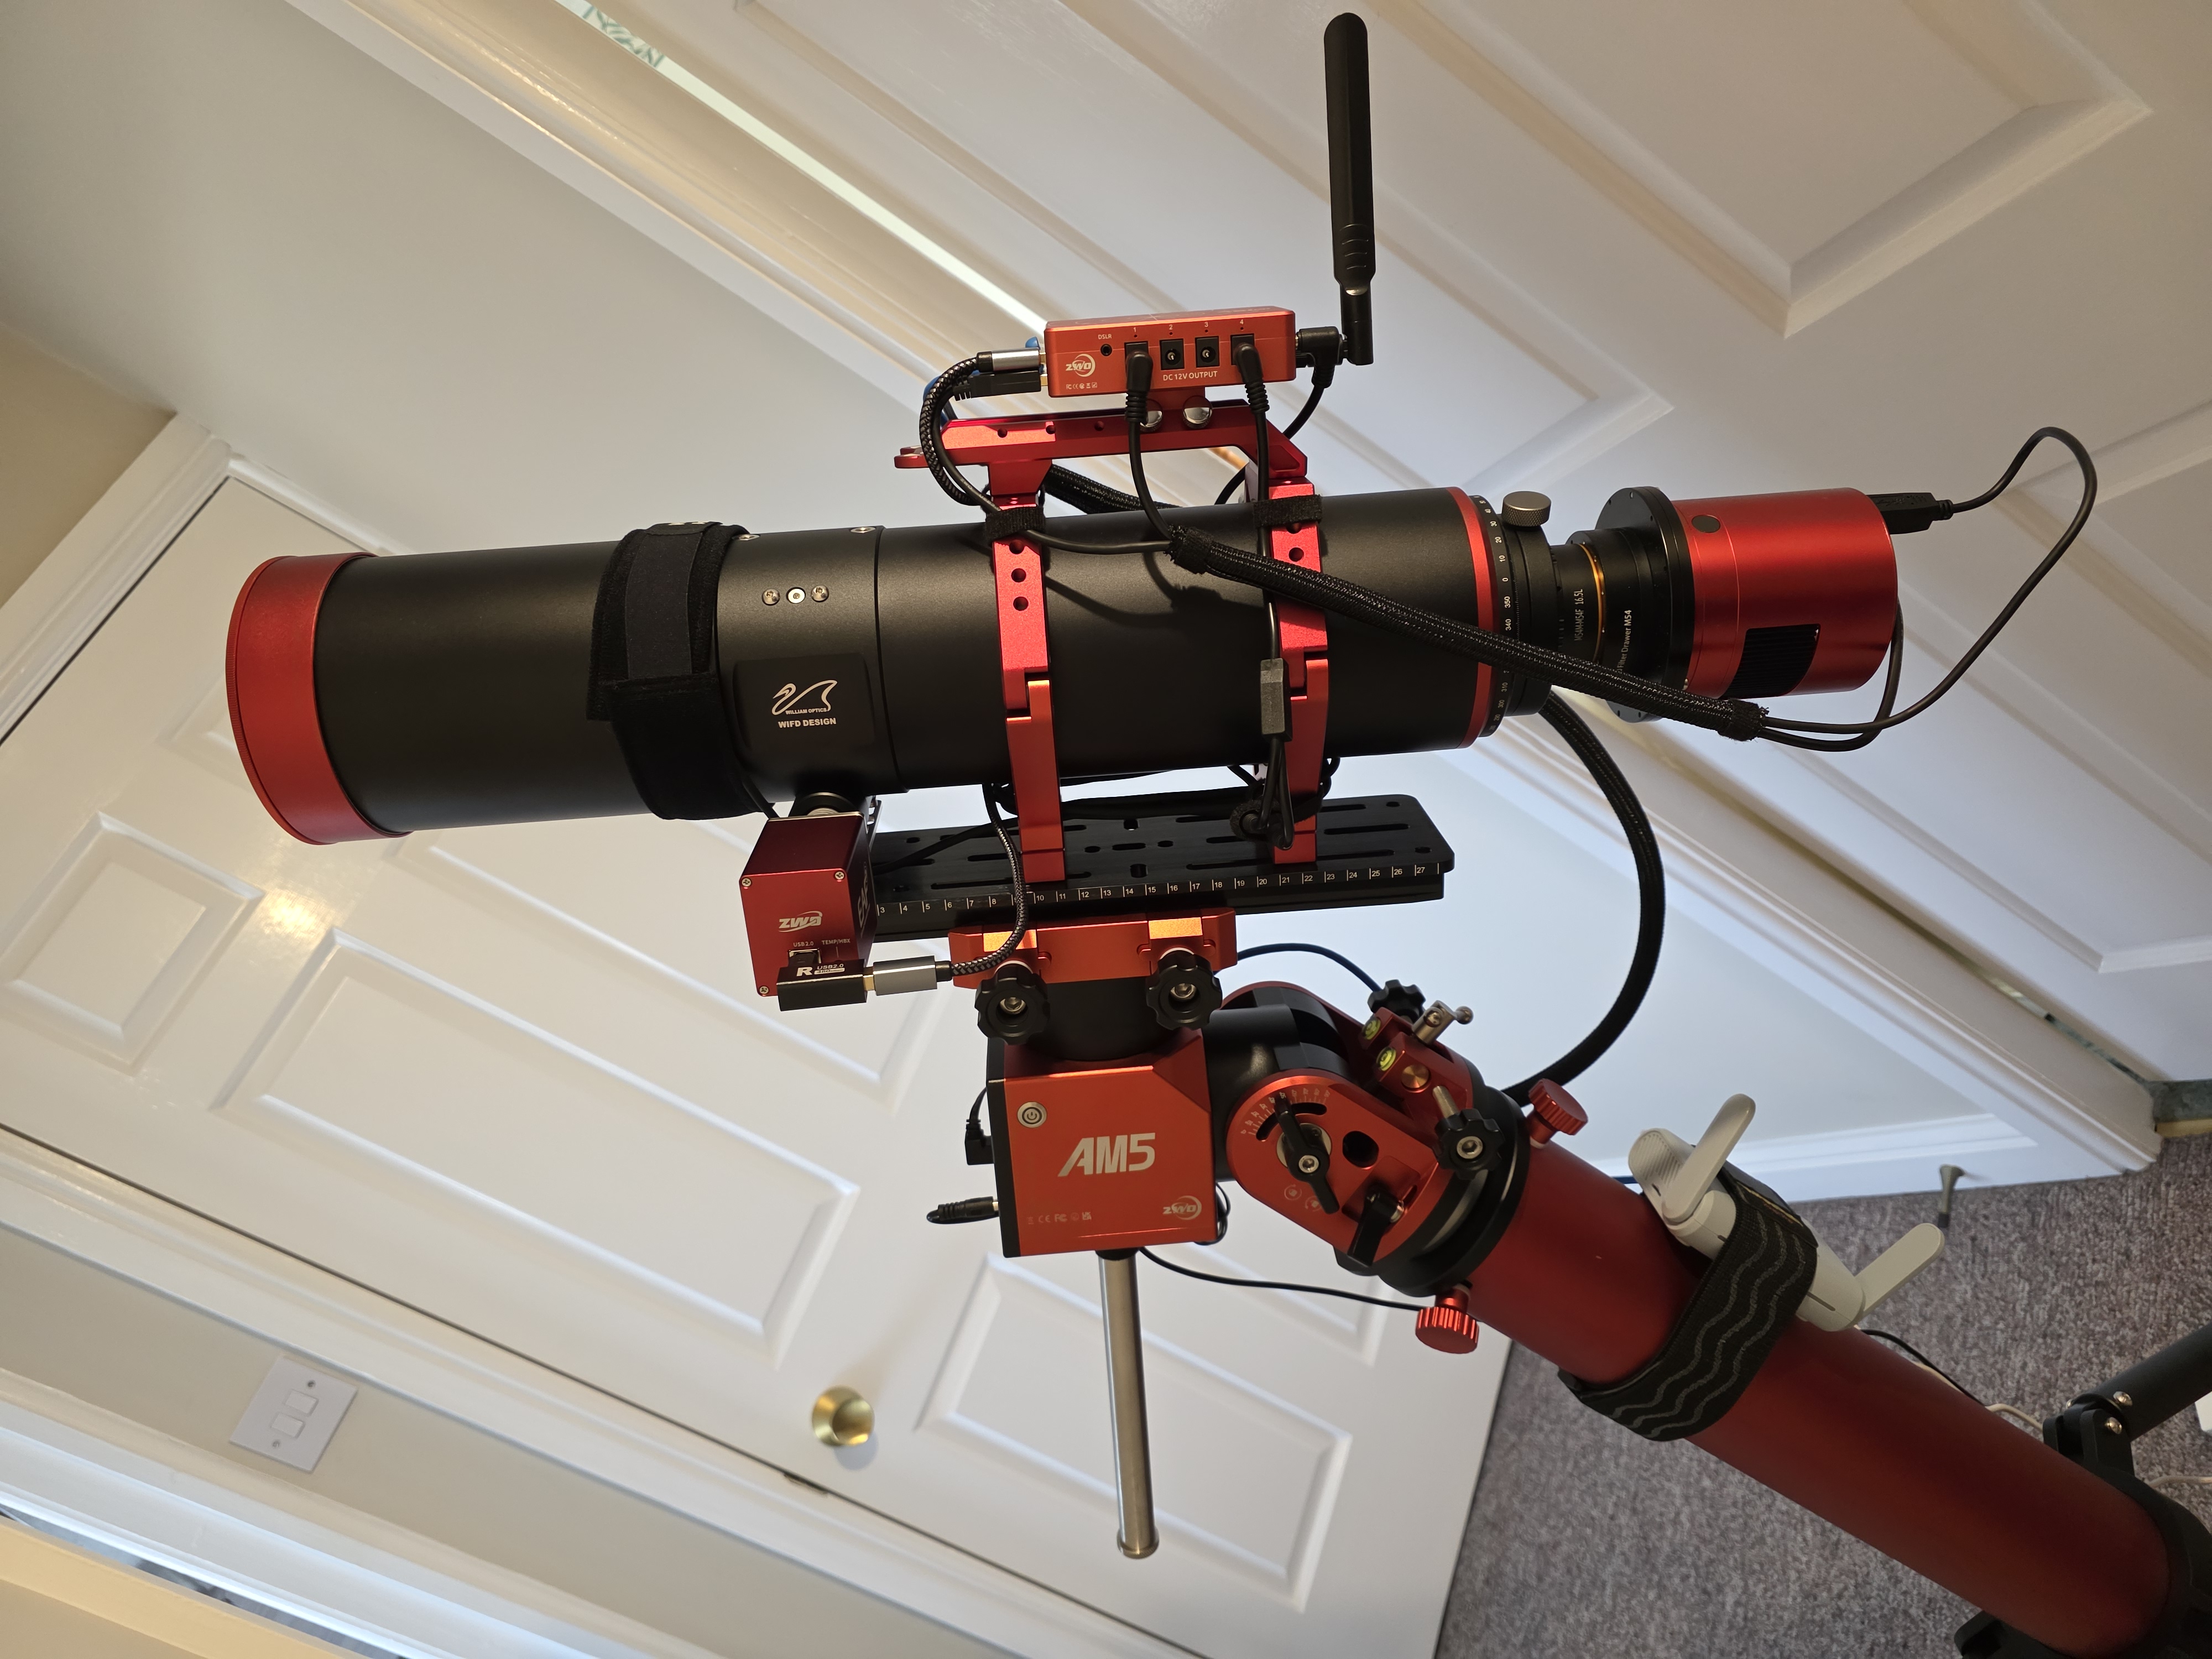
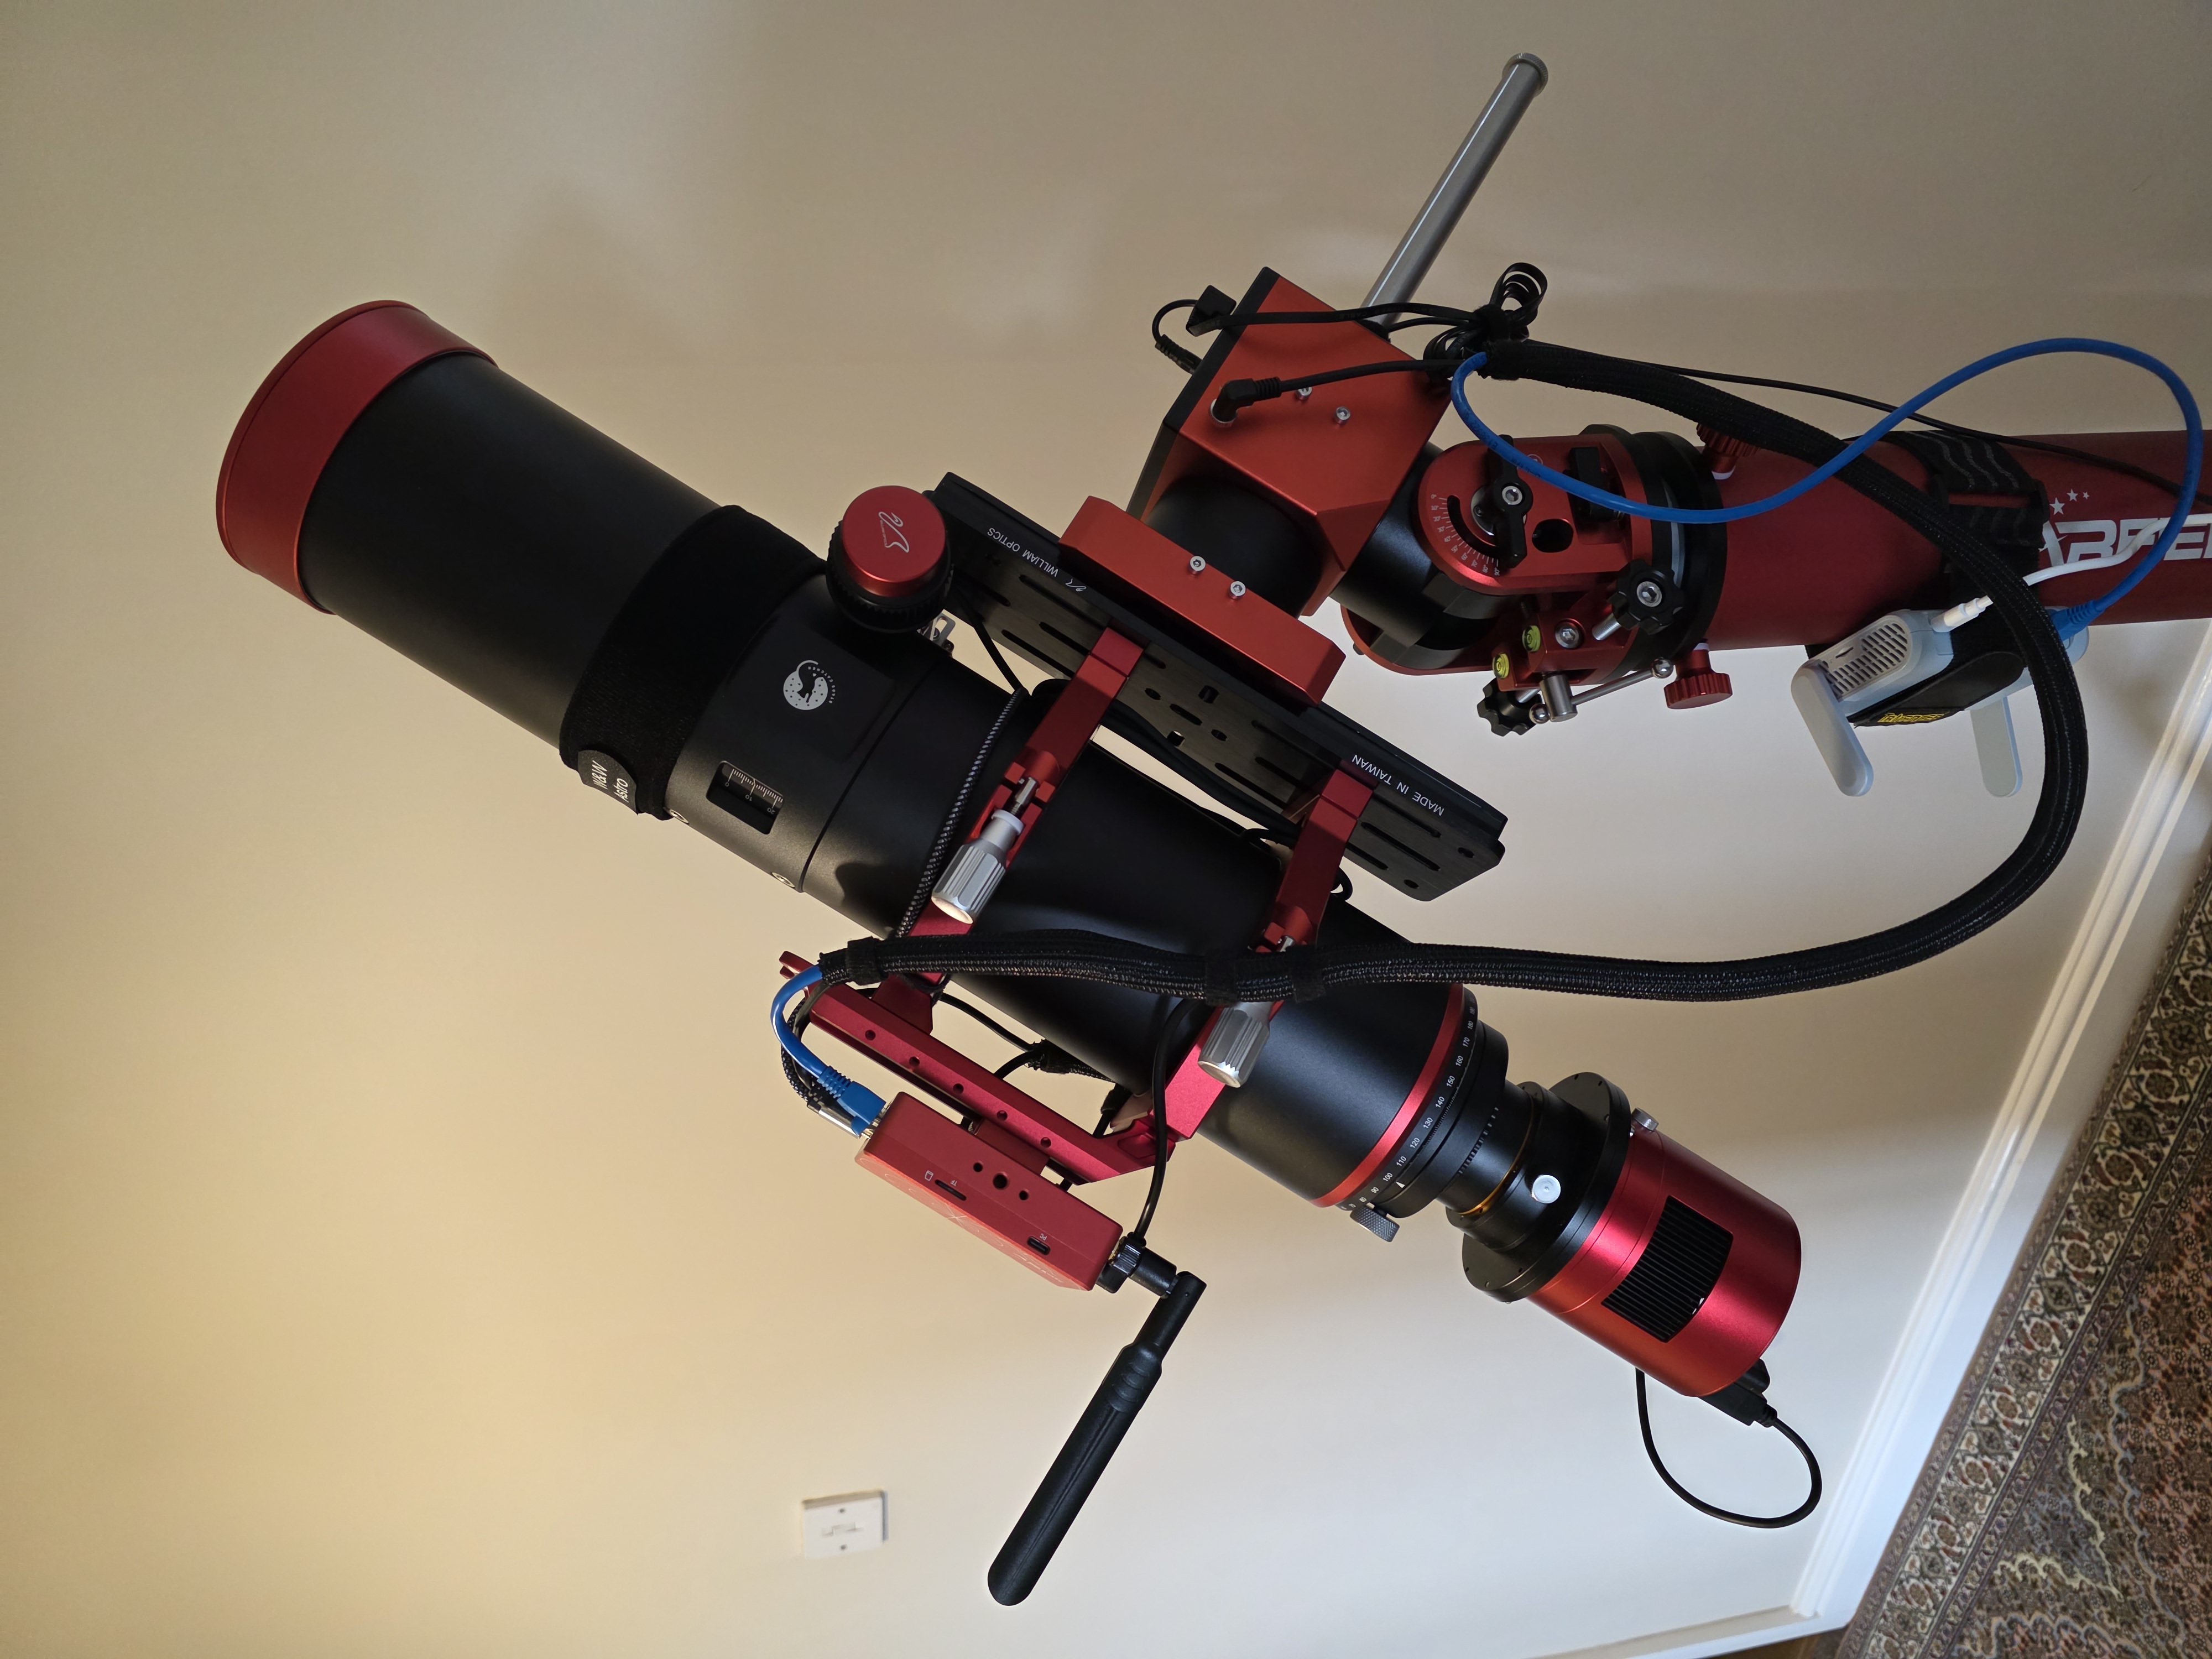
As stated by Jan, any finder shoe on the telescope is usually fine. Or, if your scope has a carry handle with vixen track is also fine. I find the major key to the cable management is to source cables of the correct size, surplus cable is a pain to management. Right-angled connectors also help in this regard. Split cable sleeving is also very useful for collecting/combining cables. Example of one of my rigs attached.   |
You cannot like this item. Reason: "ANONYMOUS".
You cannot remove your like from this item.
Editing a post is only allowed within 24 hours after creating it.
You cannot Like this post because the topic is closed.
Copy the URL below to share a direct link to this post.
This post cannot be edited using the classic forums editor.
To edit this post, please enable the "New forums experience" in your settings.
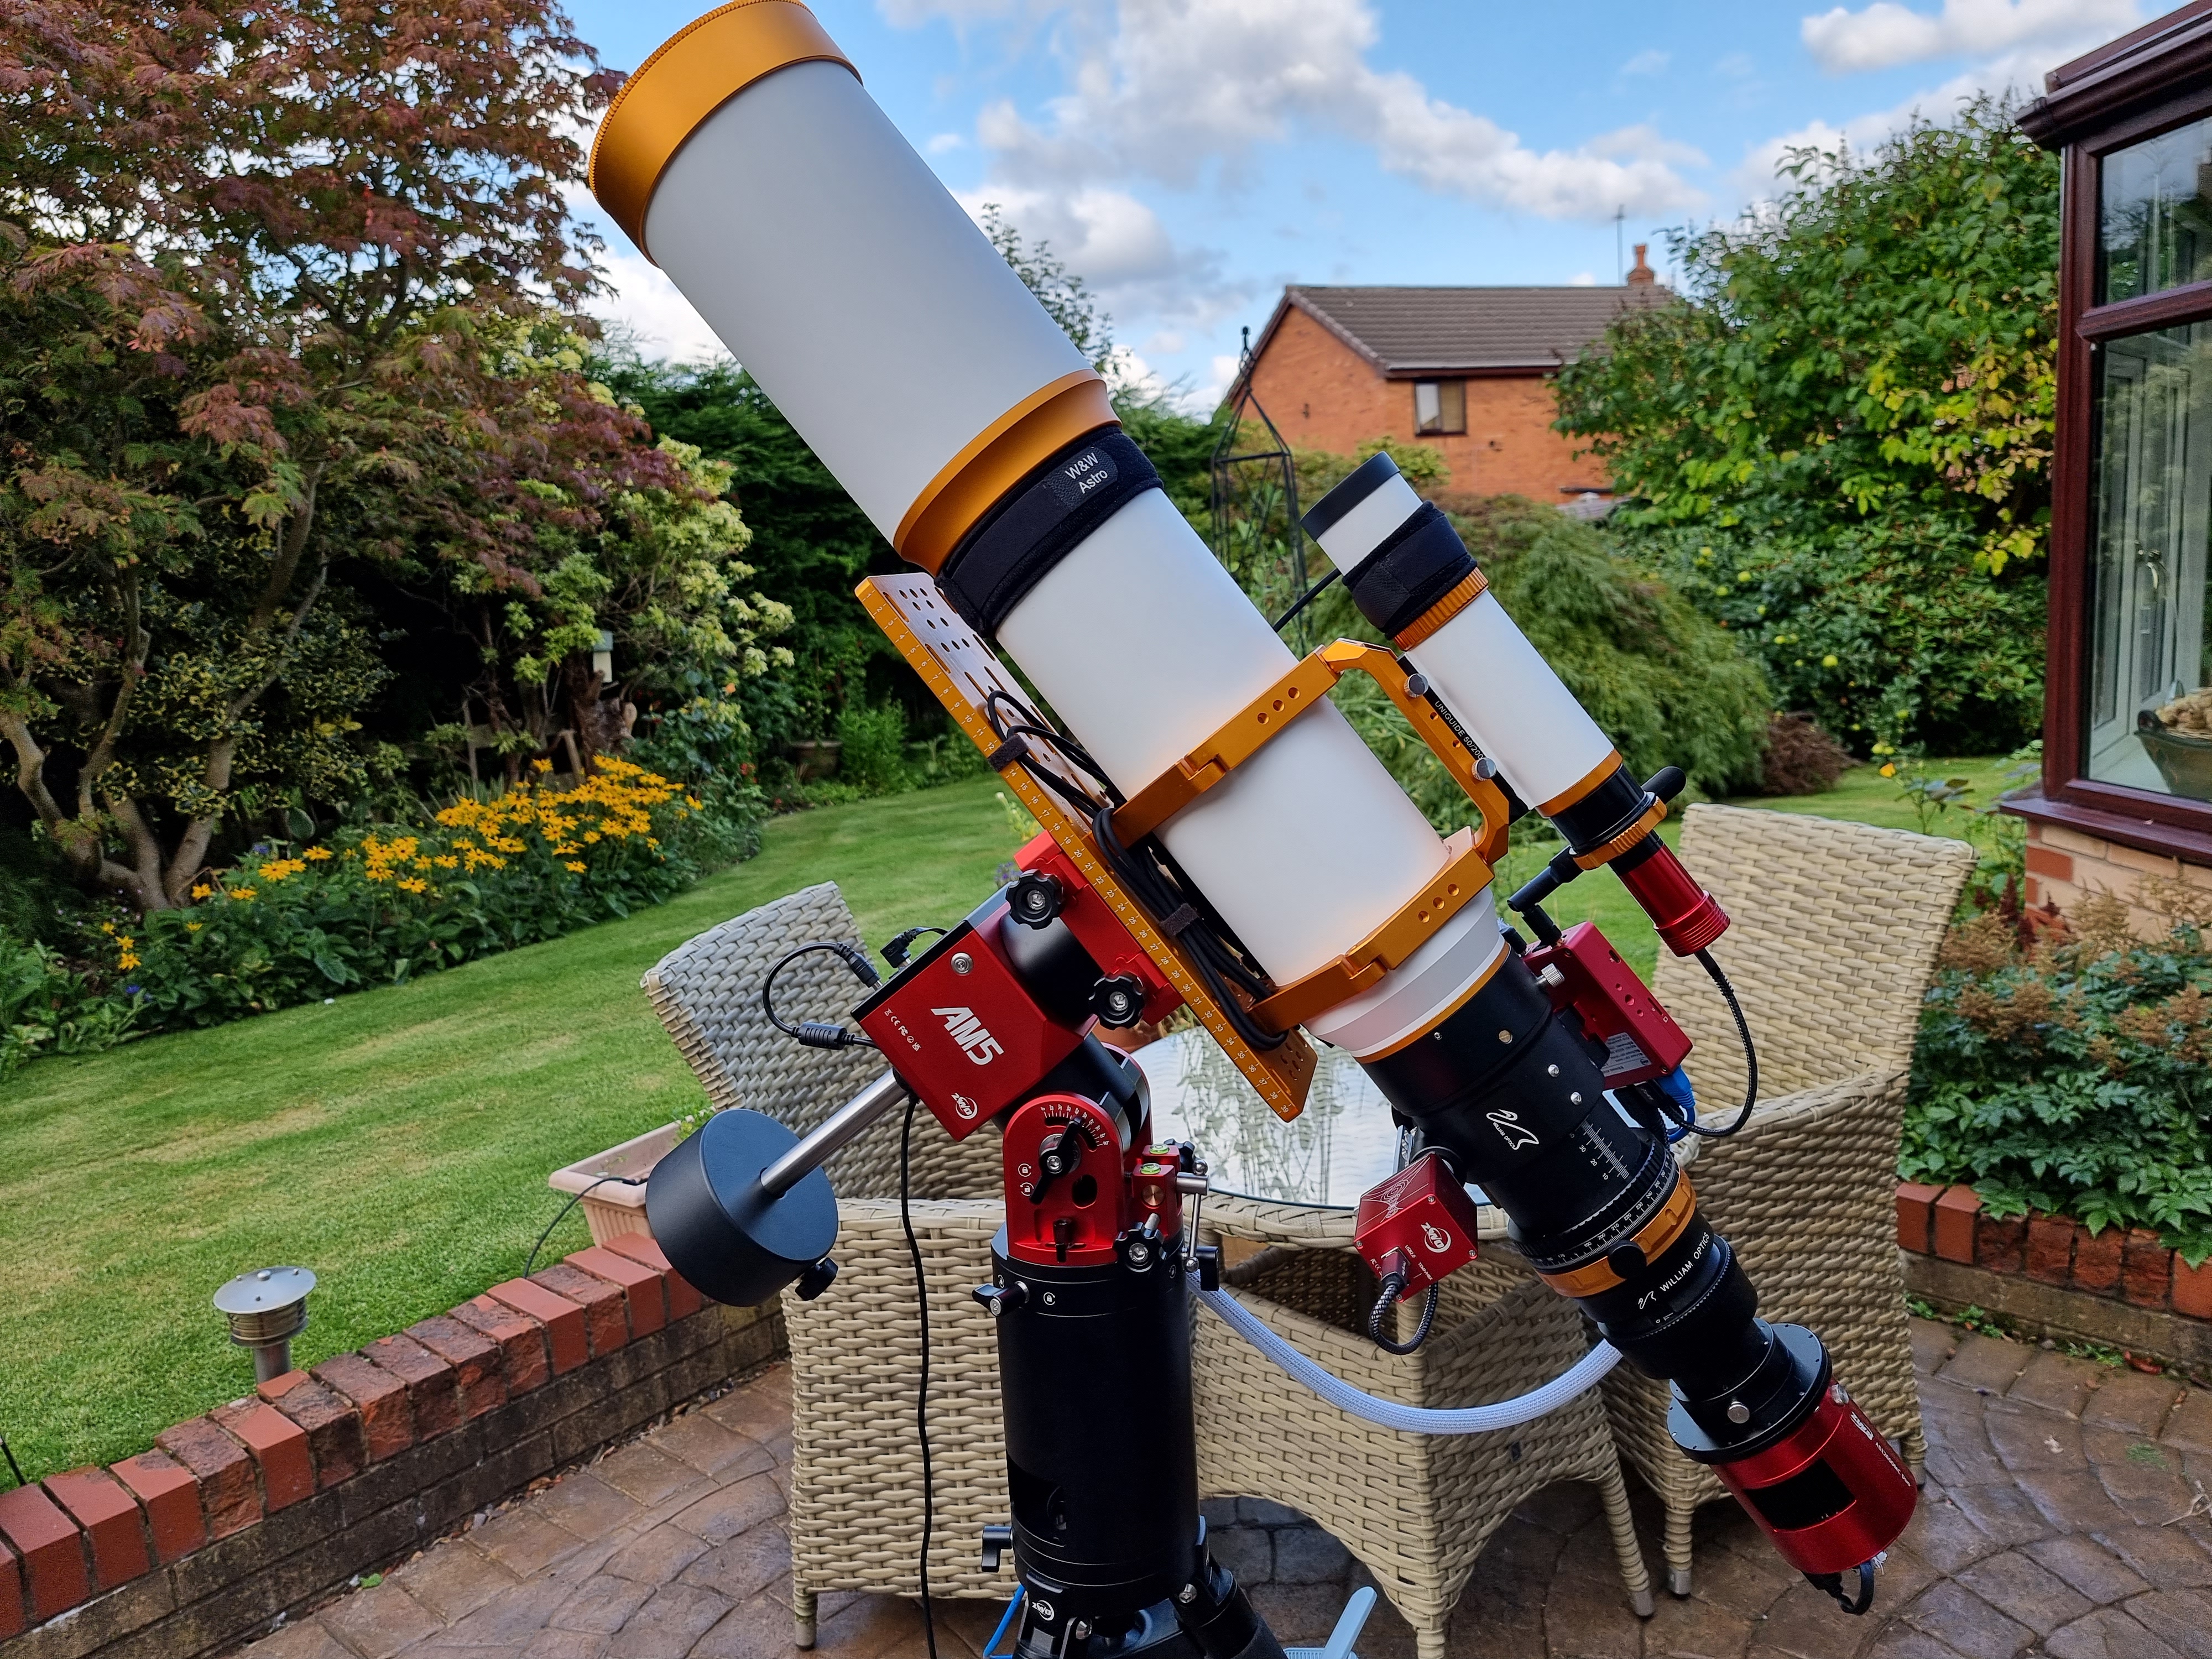
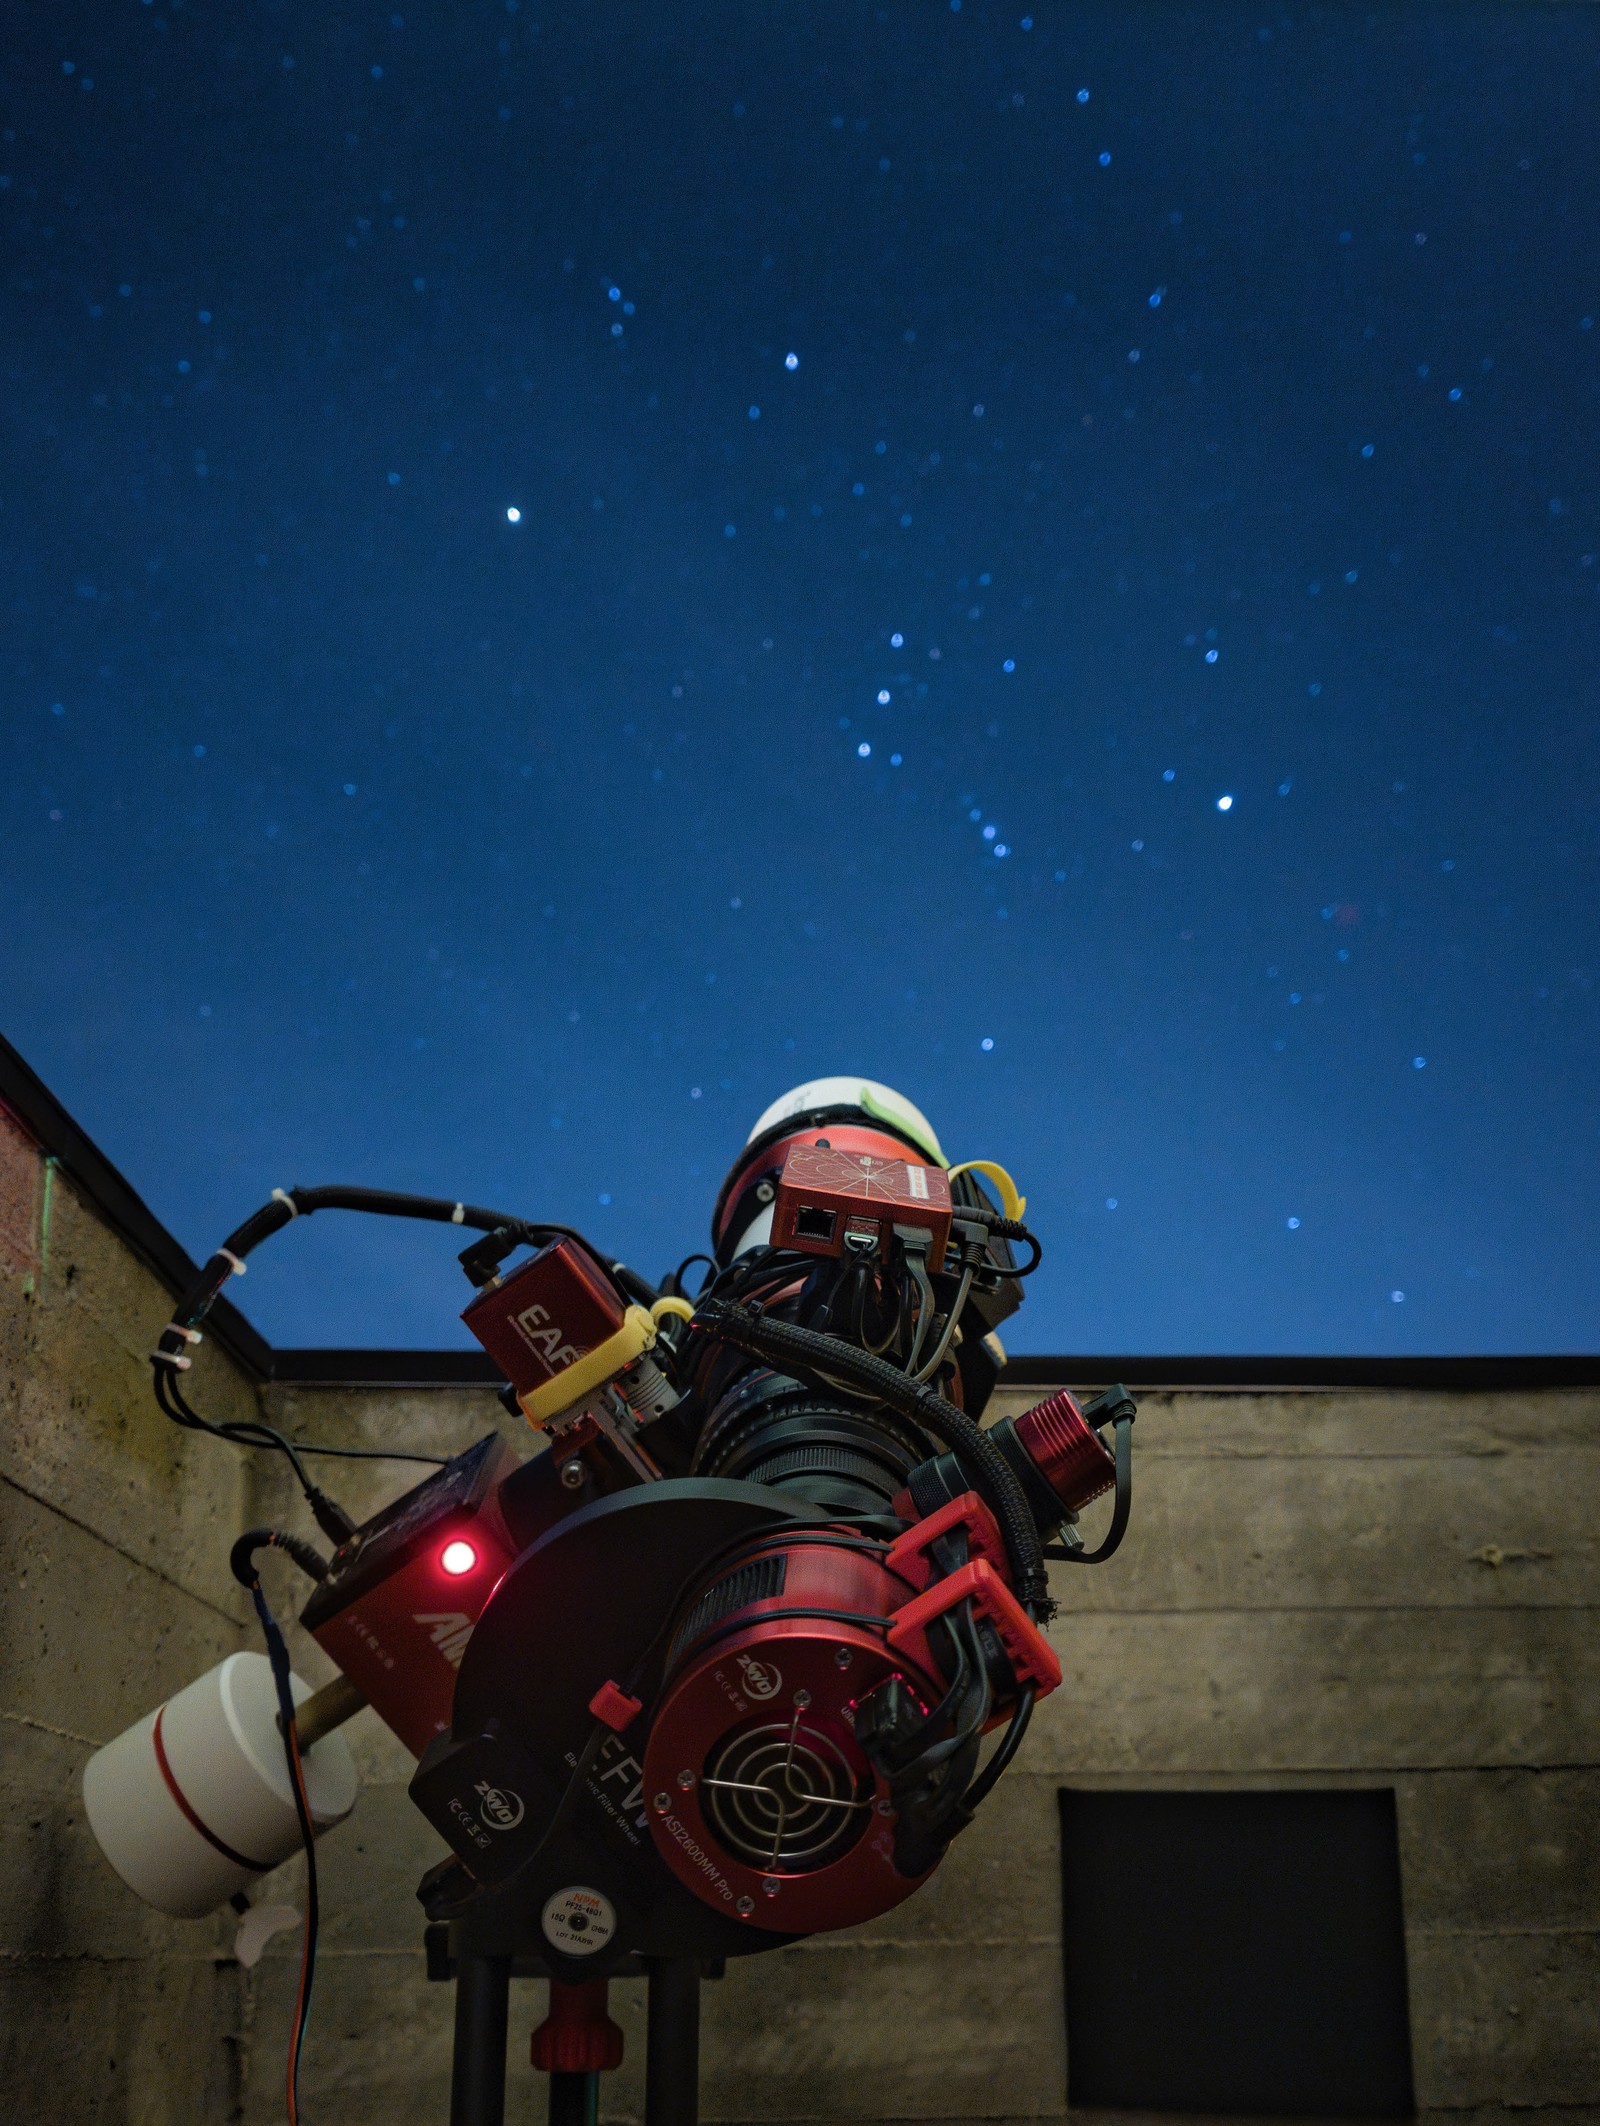
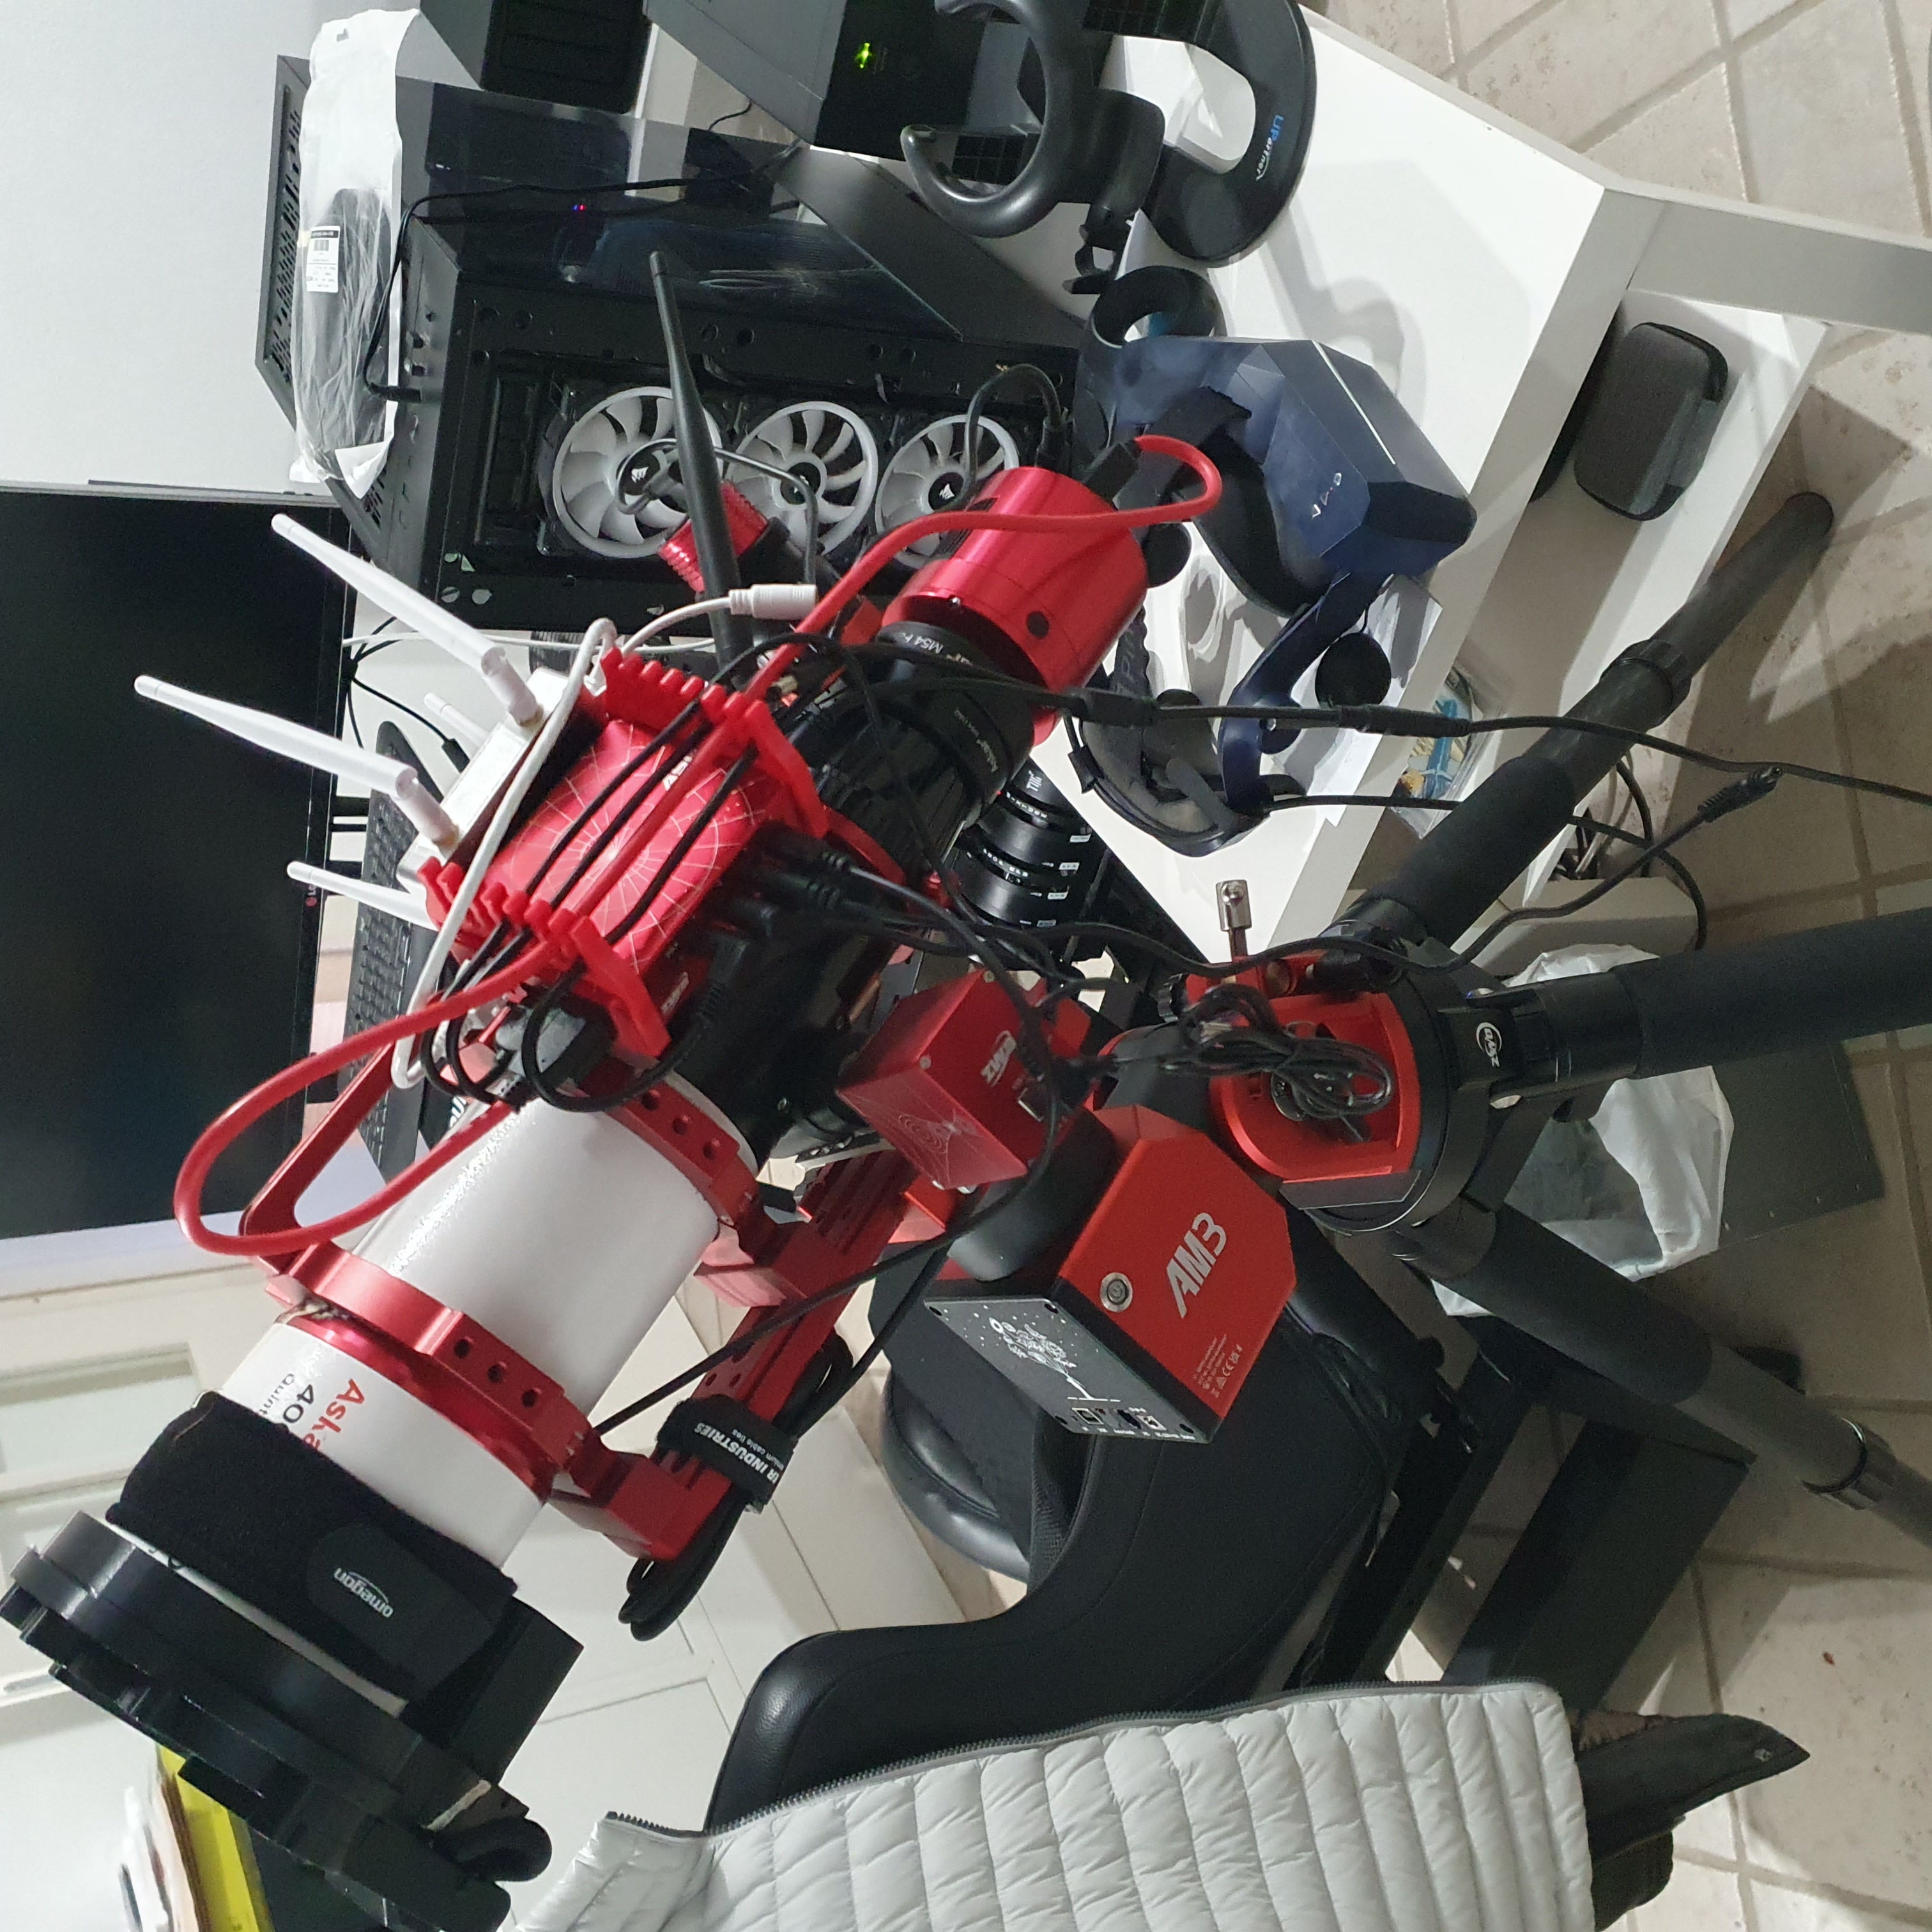
Another example, my second rig. In this setup there is no need for a guide scope/camera as the camera used is the ASI2600 MC Pro Duo which has a built in guide camera, reducing cables even further (no guide camera cable or dew strap cable for a guide scope). It illustrates the use of the vixen carrying handle to mount the ASIAir. Currently my favourite rig to work with. 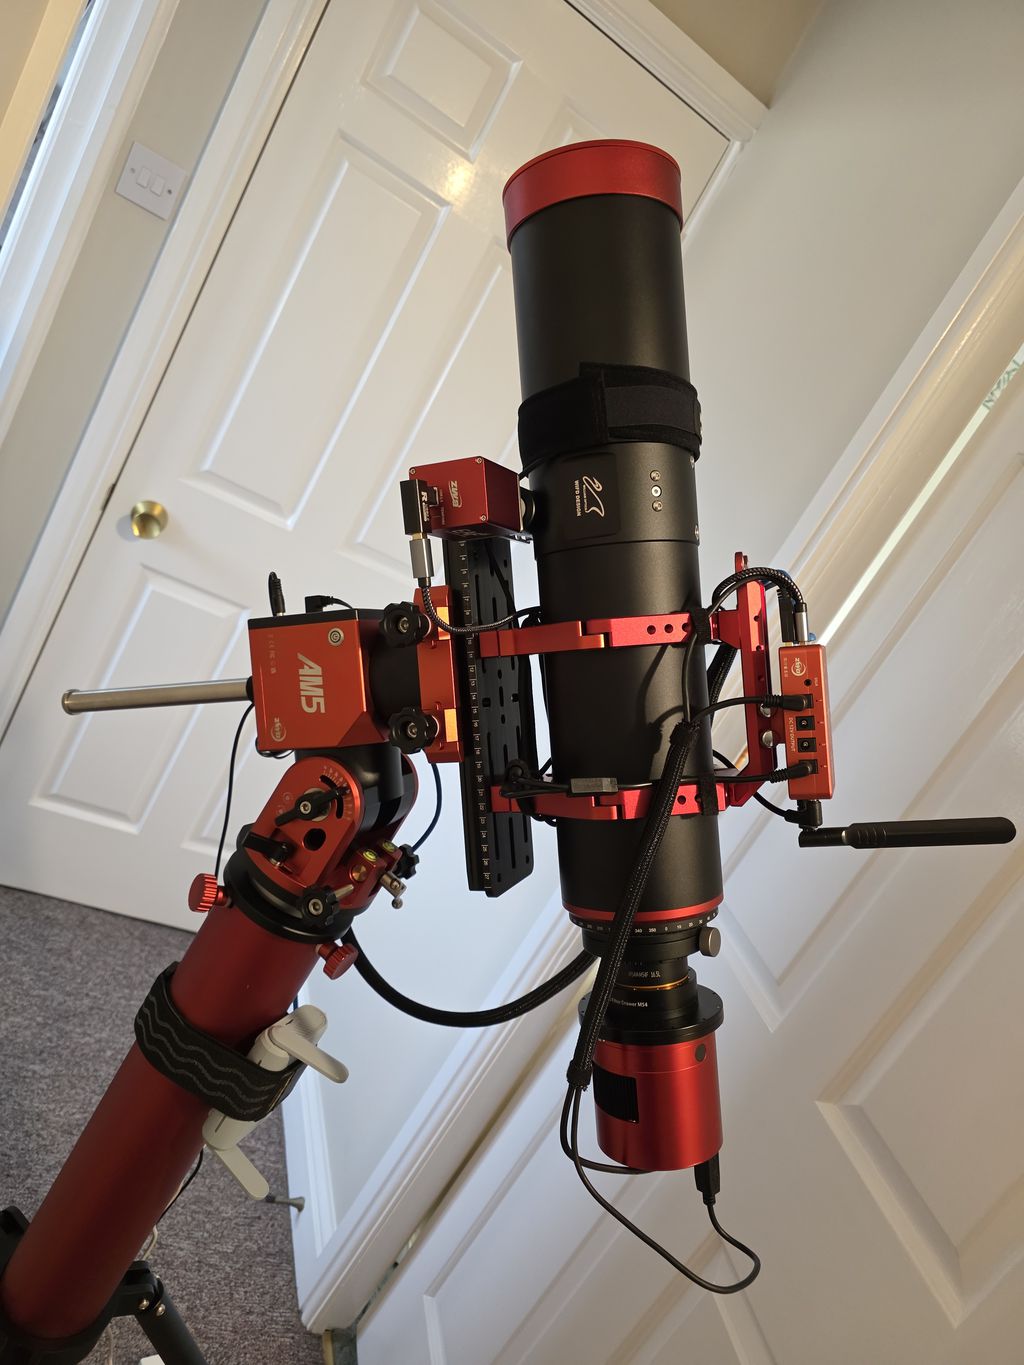 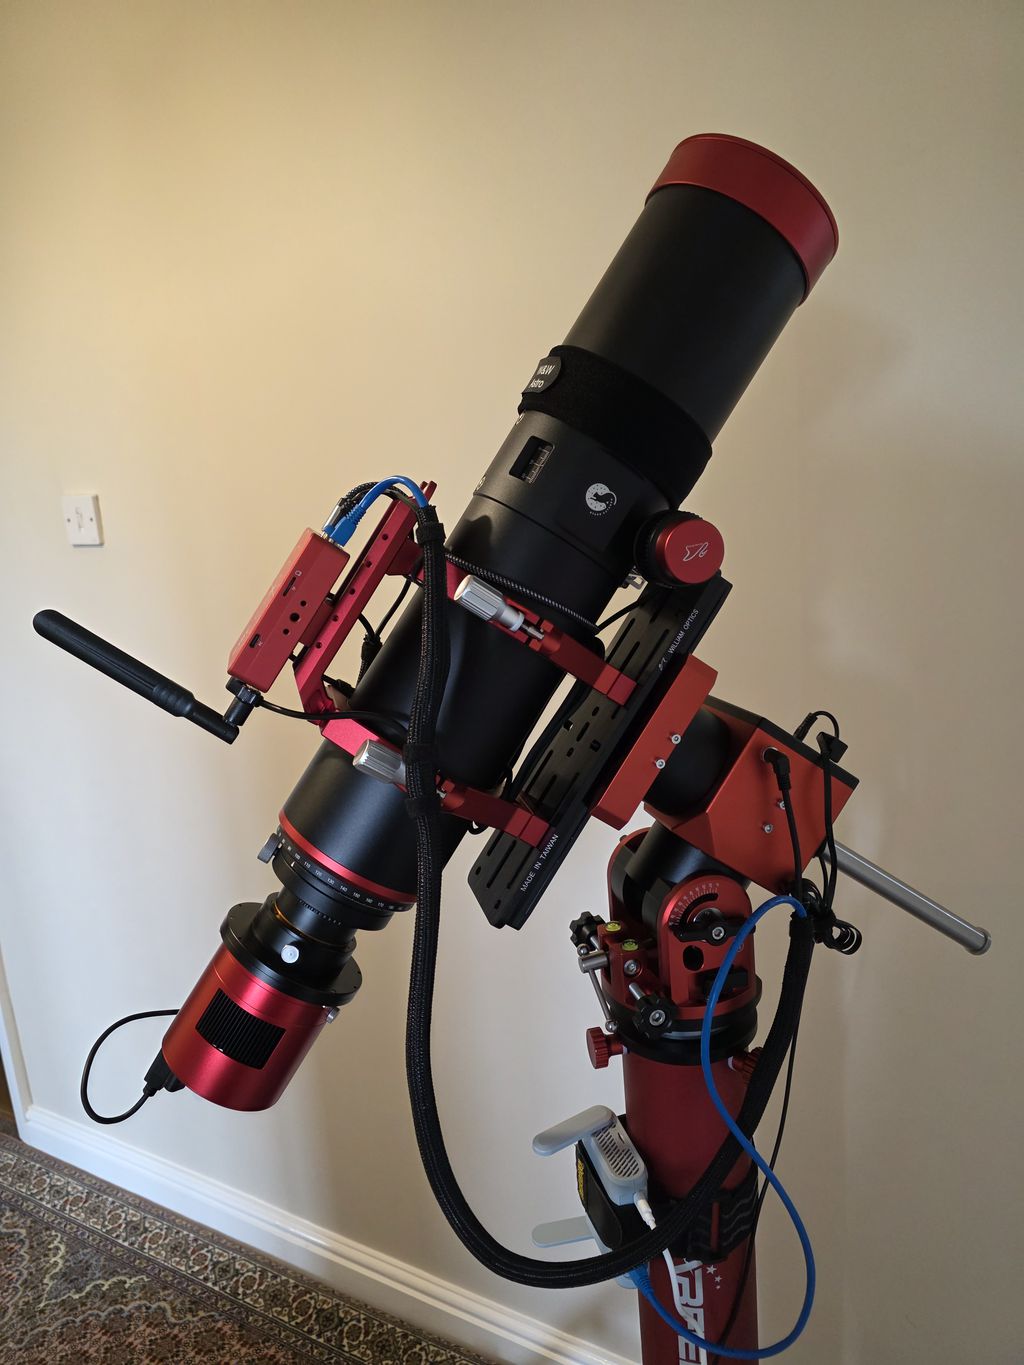 |
You cannot like this item. Reason: "ANONYMOUS".
You cannot remove your like from this item.
Editing a post is only allowed within 24 hours after creating it.
You cannot Like this post because the topic is closed.
Copy the URL below to share a direct link to this post.
This post cannot be edited using the classic forums editor.
To edit this post, please enable the "New forums experience" in your settings.
I avoid any kind of cable clutter, positioning the ASIAIR as close as possible to the pivot point of the mount - this ensures short cable lengths and not too close to other equipment or the telescope to ensure optimal cooling 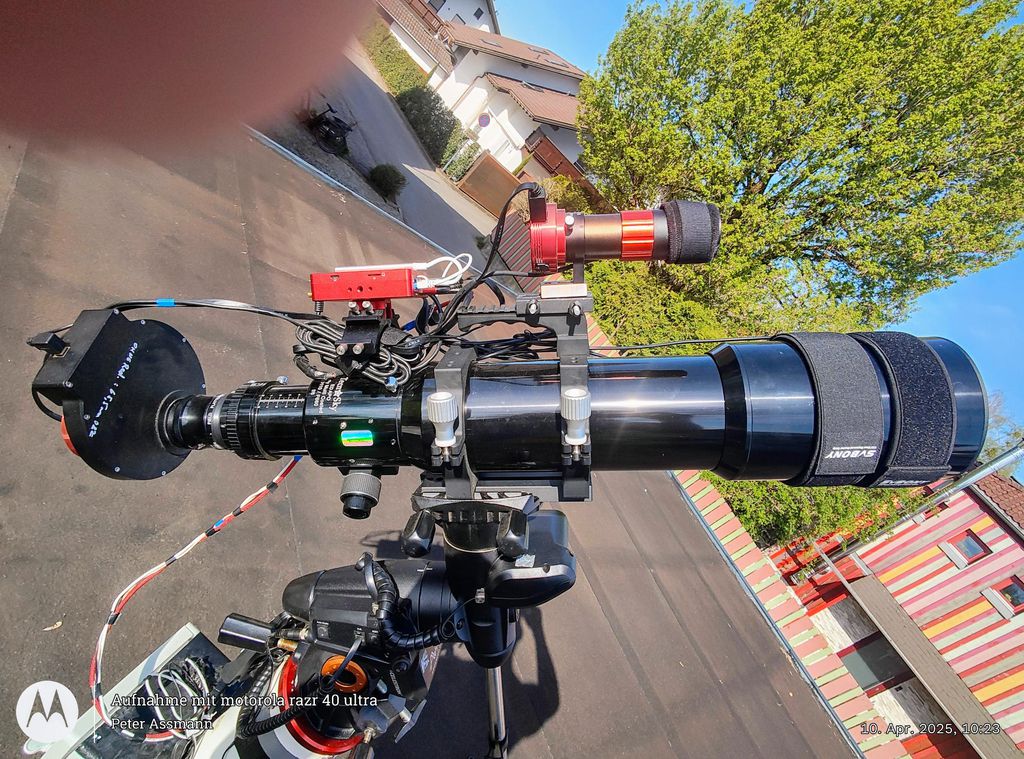 |
You cannot like this item. Reason: "ANONYMOUS".
You cannot remove your like from this item.
Editing a post is only allowed within 24 hours after creating it.
You cannot Like this post because the topic is closed.
Copy the URL below to share a direct link to this post.
This post cannot be edited using the classic forums editor.
To edit this post, please enable the "New forums experience" in your settings.
Mine is just cable tied to the rail thing that holds the telescope rings. Cable ties are more than strong enough (make sure to use multiple just in case)
|
You cannot like this item. Reason: "ANONYMOUS".
You cannot remove your like from this item.
Editing a post is only allowed within 24 hours after creating it.
You cannot Like this post because the topic is closed.
Copy the URL below to share a direct link to this post.
This post cannot be edited using the classic forums editor.
To edit this post, please enable the "New forums experience" in your settings.
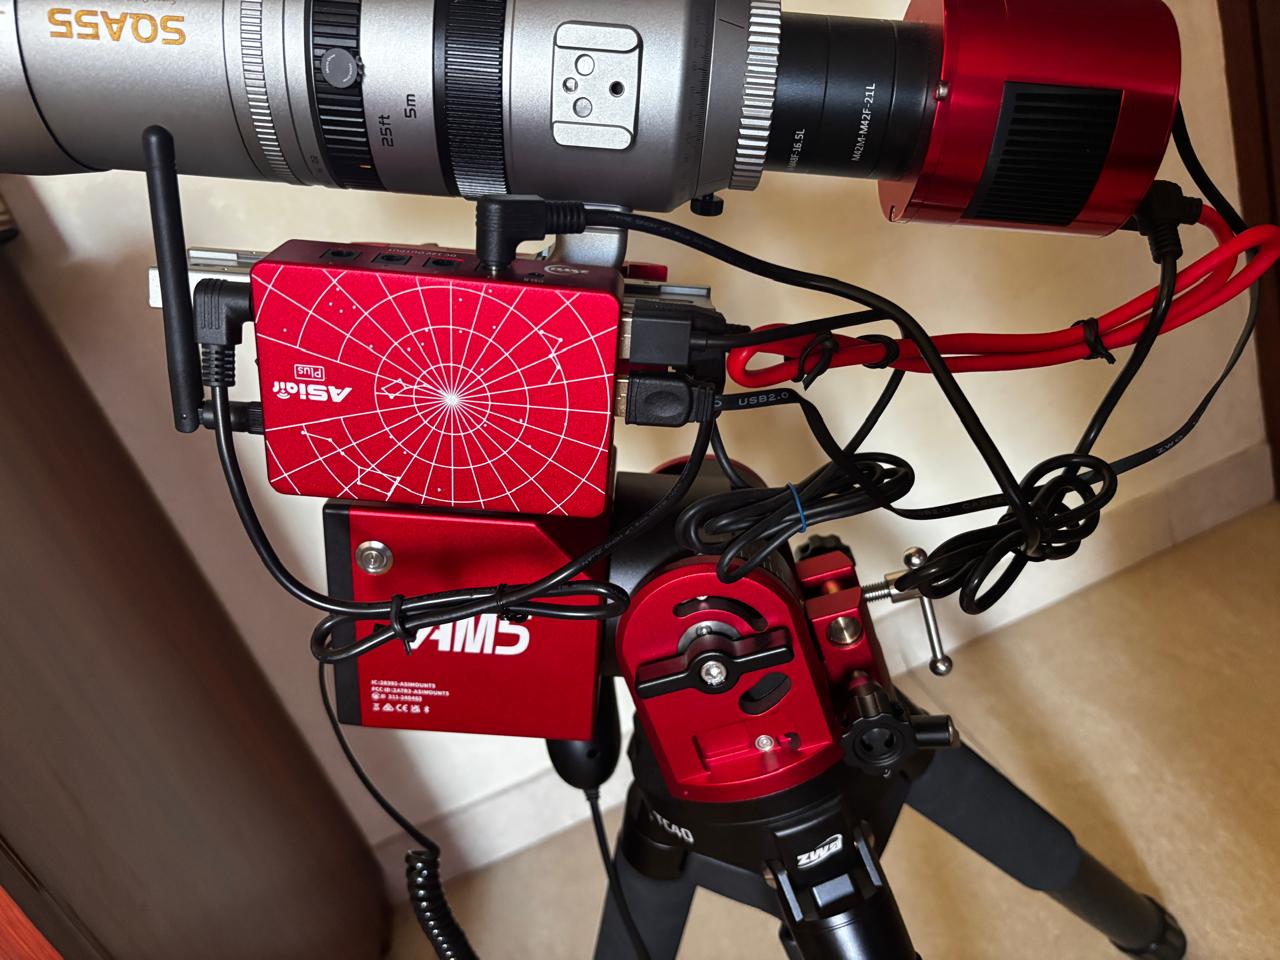
I’ve got both my ASIAIR’s at different spots. On the FF80 I’ve got it at the side of the refractor but with my SQA55 I’ve bought a kit that was specifically for the Star Adventurer GTi mount on Etsy. Wasn’t really expensive and does the job in keeping the ASIAIR locked down. BD6C1A98-4534-448D-B60A-BA33FA683B6A.jpegIMG_3271.jpeg |
You cannot like this item. Reason: "ANONYMOUS".
You cannot remove your like from this item.
Editing a post is only allowed within 24 hours after creating it.
You cannot Like this post because the topic is closed.
Copy the URL below to share a direct link to this post.
This post cannot be edited using the classic forums editor.
To edit this post, please enable the "New forums experience" in your settings.
Richard Flapper:
I’ve got both my ASIAIR’s at different spots. On the FF80 I’ve got it at the side of the refractor but with my SQA55 I’ve bought a kit that was specifically for the Star Adventurer GTi mount on Etsy. Wasn’t really expensive and does the job in keeping the ASIAIR locked down.
BD6C1A98-4534-448D-B60A-BA33FA683B6A.jpeg
IMG_3271.jpeg your cable management is amazing lol. My cables could not be messier.  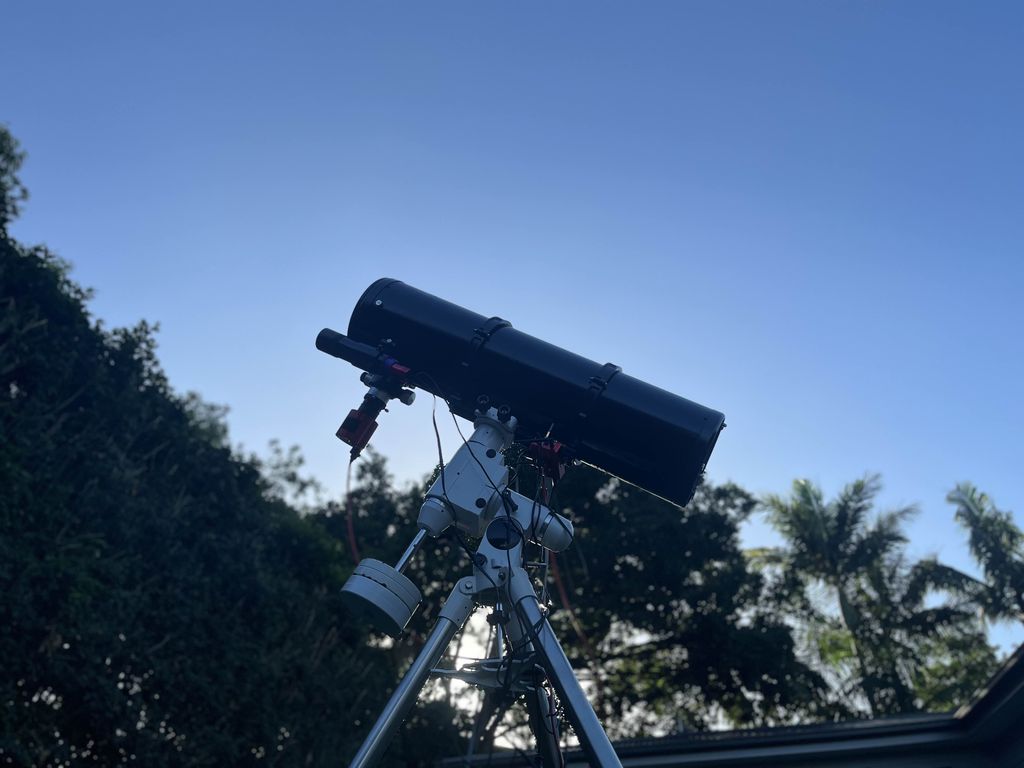 |
You cannot like this item. Reason: "ANONYMOUS".
You cannot remove your like from this item.
Editing a post is only allowed within 24 hours after creating it.
You cannot Like this post because the topic is closed.
Copy the URL below to share a direct link to this post.
This post cannot be edited using the classic forums editor.
To edit this post, please enable the "New forums experience" in your settings.
I have placed the ASIAir+ in several locations on my configurations in the past... but found the best location for me (see attached photo) is at or near the back (camera) end of the dovetail - screwed-in, as suggested above, for stability and resistance to unanticipated taps and hits. In this upper-central location, unobtrusive cable management is relatively easy to achieve and this placement exposes all ASIAir+ ports (power and data) for straightforward access. It has worked for me and I have not had to change its position for years. 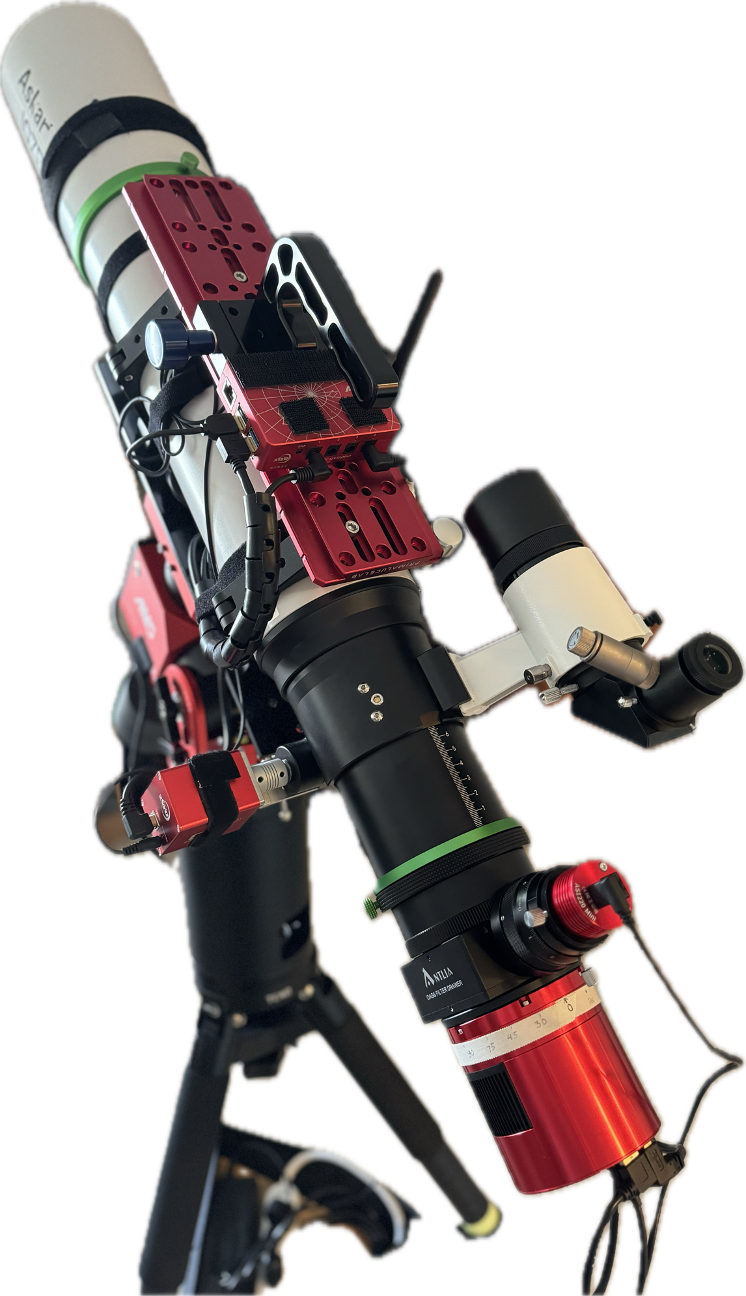 |
You cannot like this item. Reason: "ANONYMOUS".
You cannot remove your like from this item.
Editing a post is only allowed within 24 hours after creating it.
You cannot Like this post because the topic is closed.
Copy the URL below to share a direct link to this post.
This post cannot be edited using the classic forums editor.
To edit this post, please enable the "New forums experience" in your settings.
I used a 3d printed bracket to mount it to the finder shoe. Works like a charm.
|
You cannot like this item. Reason: "ANONYMOUS".
You cannot remove your like from this item.
Editing a post is only allowed within 24 hours after creating it.
You cannot Like this post because the topic is closed.
Copy the URL below to share a direct link to this post.
This post cannot be edited using the classic forums editor.
To edit this post, please enable the "New forums experience" in your settings.
Not sure if anyone else has had any Wi-Fi issues when the scope tube is between the ASIair and the phone or tablet you’re using to control it: sometimes I find that a problem and may be worth just checking…
|
You cannot like this item. Reason: "ANONYMOUS".
You cannot remove your like from this item.
Editing a post is only allowed within 24 hours after creating it.
You cannot Like this post because the topic is closed.
Copy the URL below to share a direct link to this post.
This post cannot be edited using the classic forums editor.
To edit this post, please enable the "New forums experience" in your settings.
As you can see there seem to be lots of different opinion and methods on this. I have tried the velcro model and the the model of trying put it on my tripod or mount, but none of these ever worked out for me.
I recommend sticking with the finderscope (synta) base, the one catch is that if you only have 1 of these it can already be used by your finder/guide scope.
You can buy another base for under 20$, but where to put the base depends on our scope or mounting rings.
I have always wanted to try the model where the asiair is mounted directly to my dovetail bar (Vixen or D Size) but I just havent found a good way to do that (i try to keep my scope as low profile as possible),
|
You cannot like this item. Reason: "ANONYMOUS".
You cannot remove your like from this item.
Editing a post is only allowed within 24 hours after creating it.
You cannot Like this post because the topic is closed.
Copy the URL below to share a direct link to this post.
This post cannot be edited using the classic forums editor.
To edit this post, please enable the "New forums experience" in your settings.
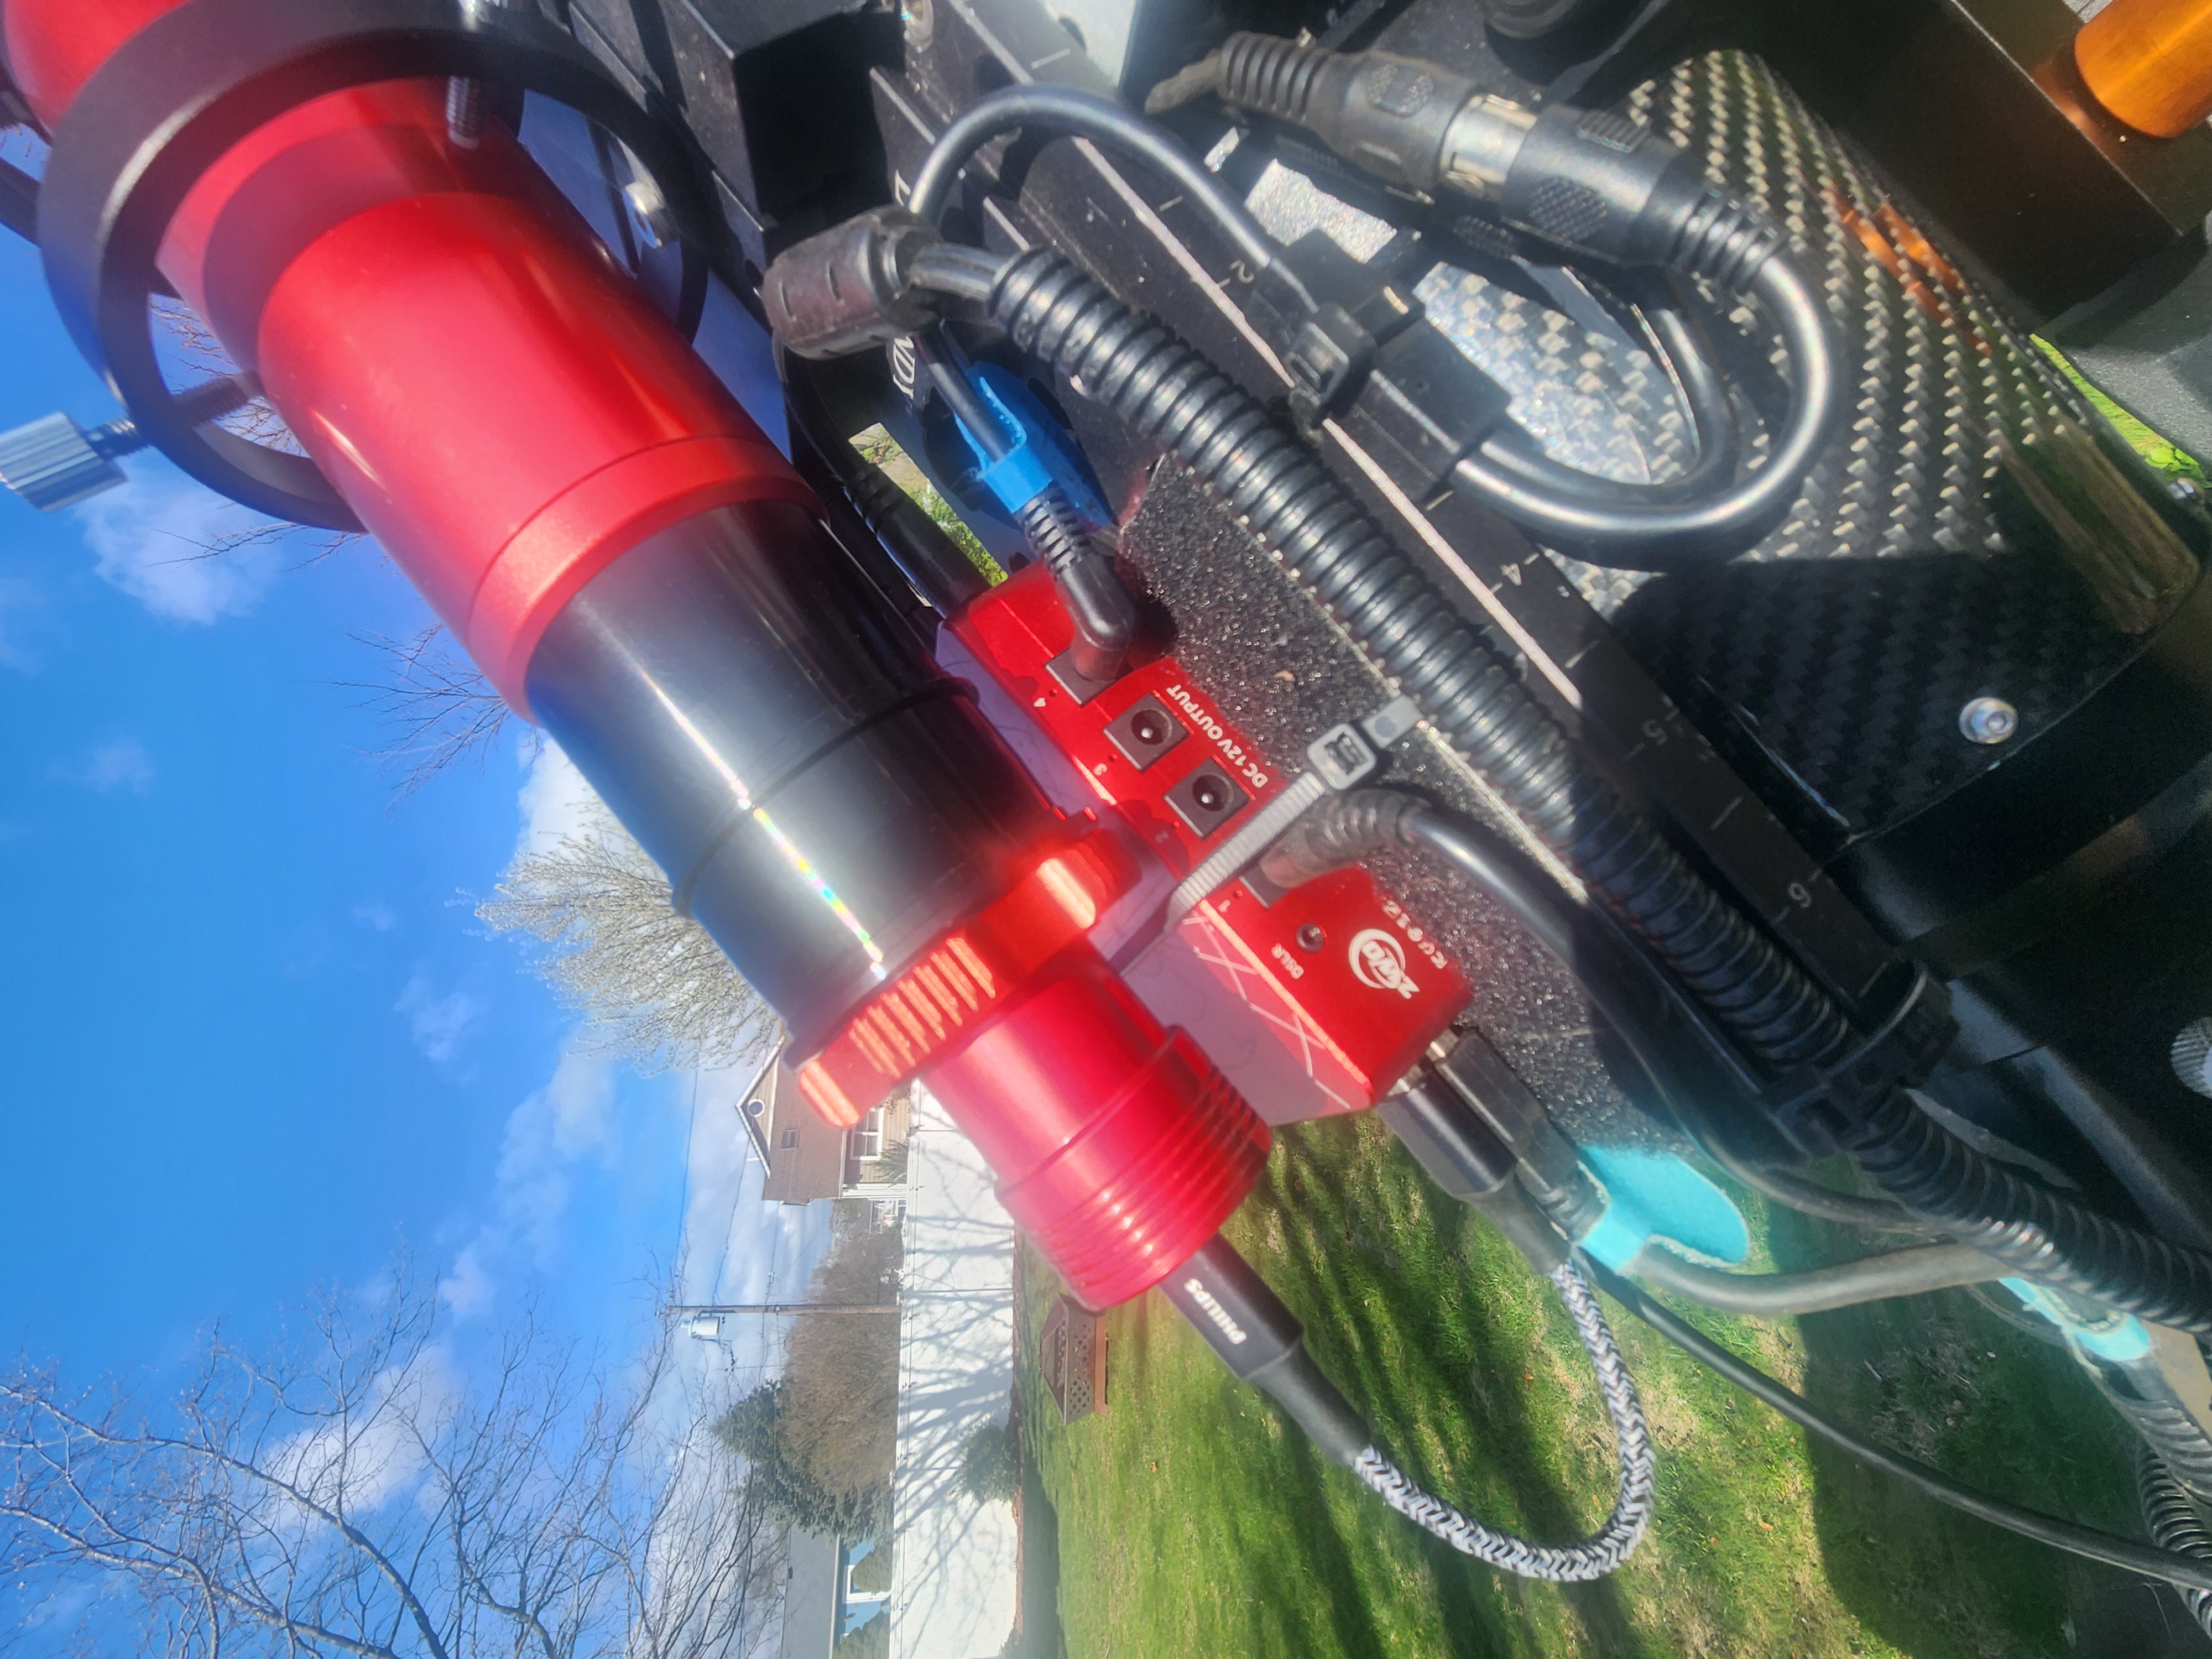
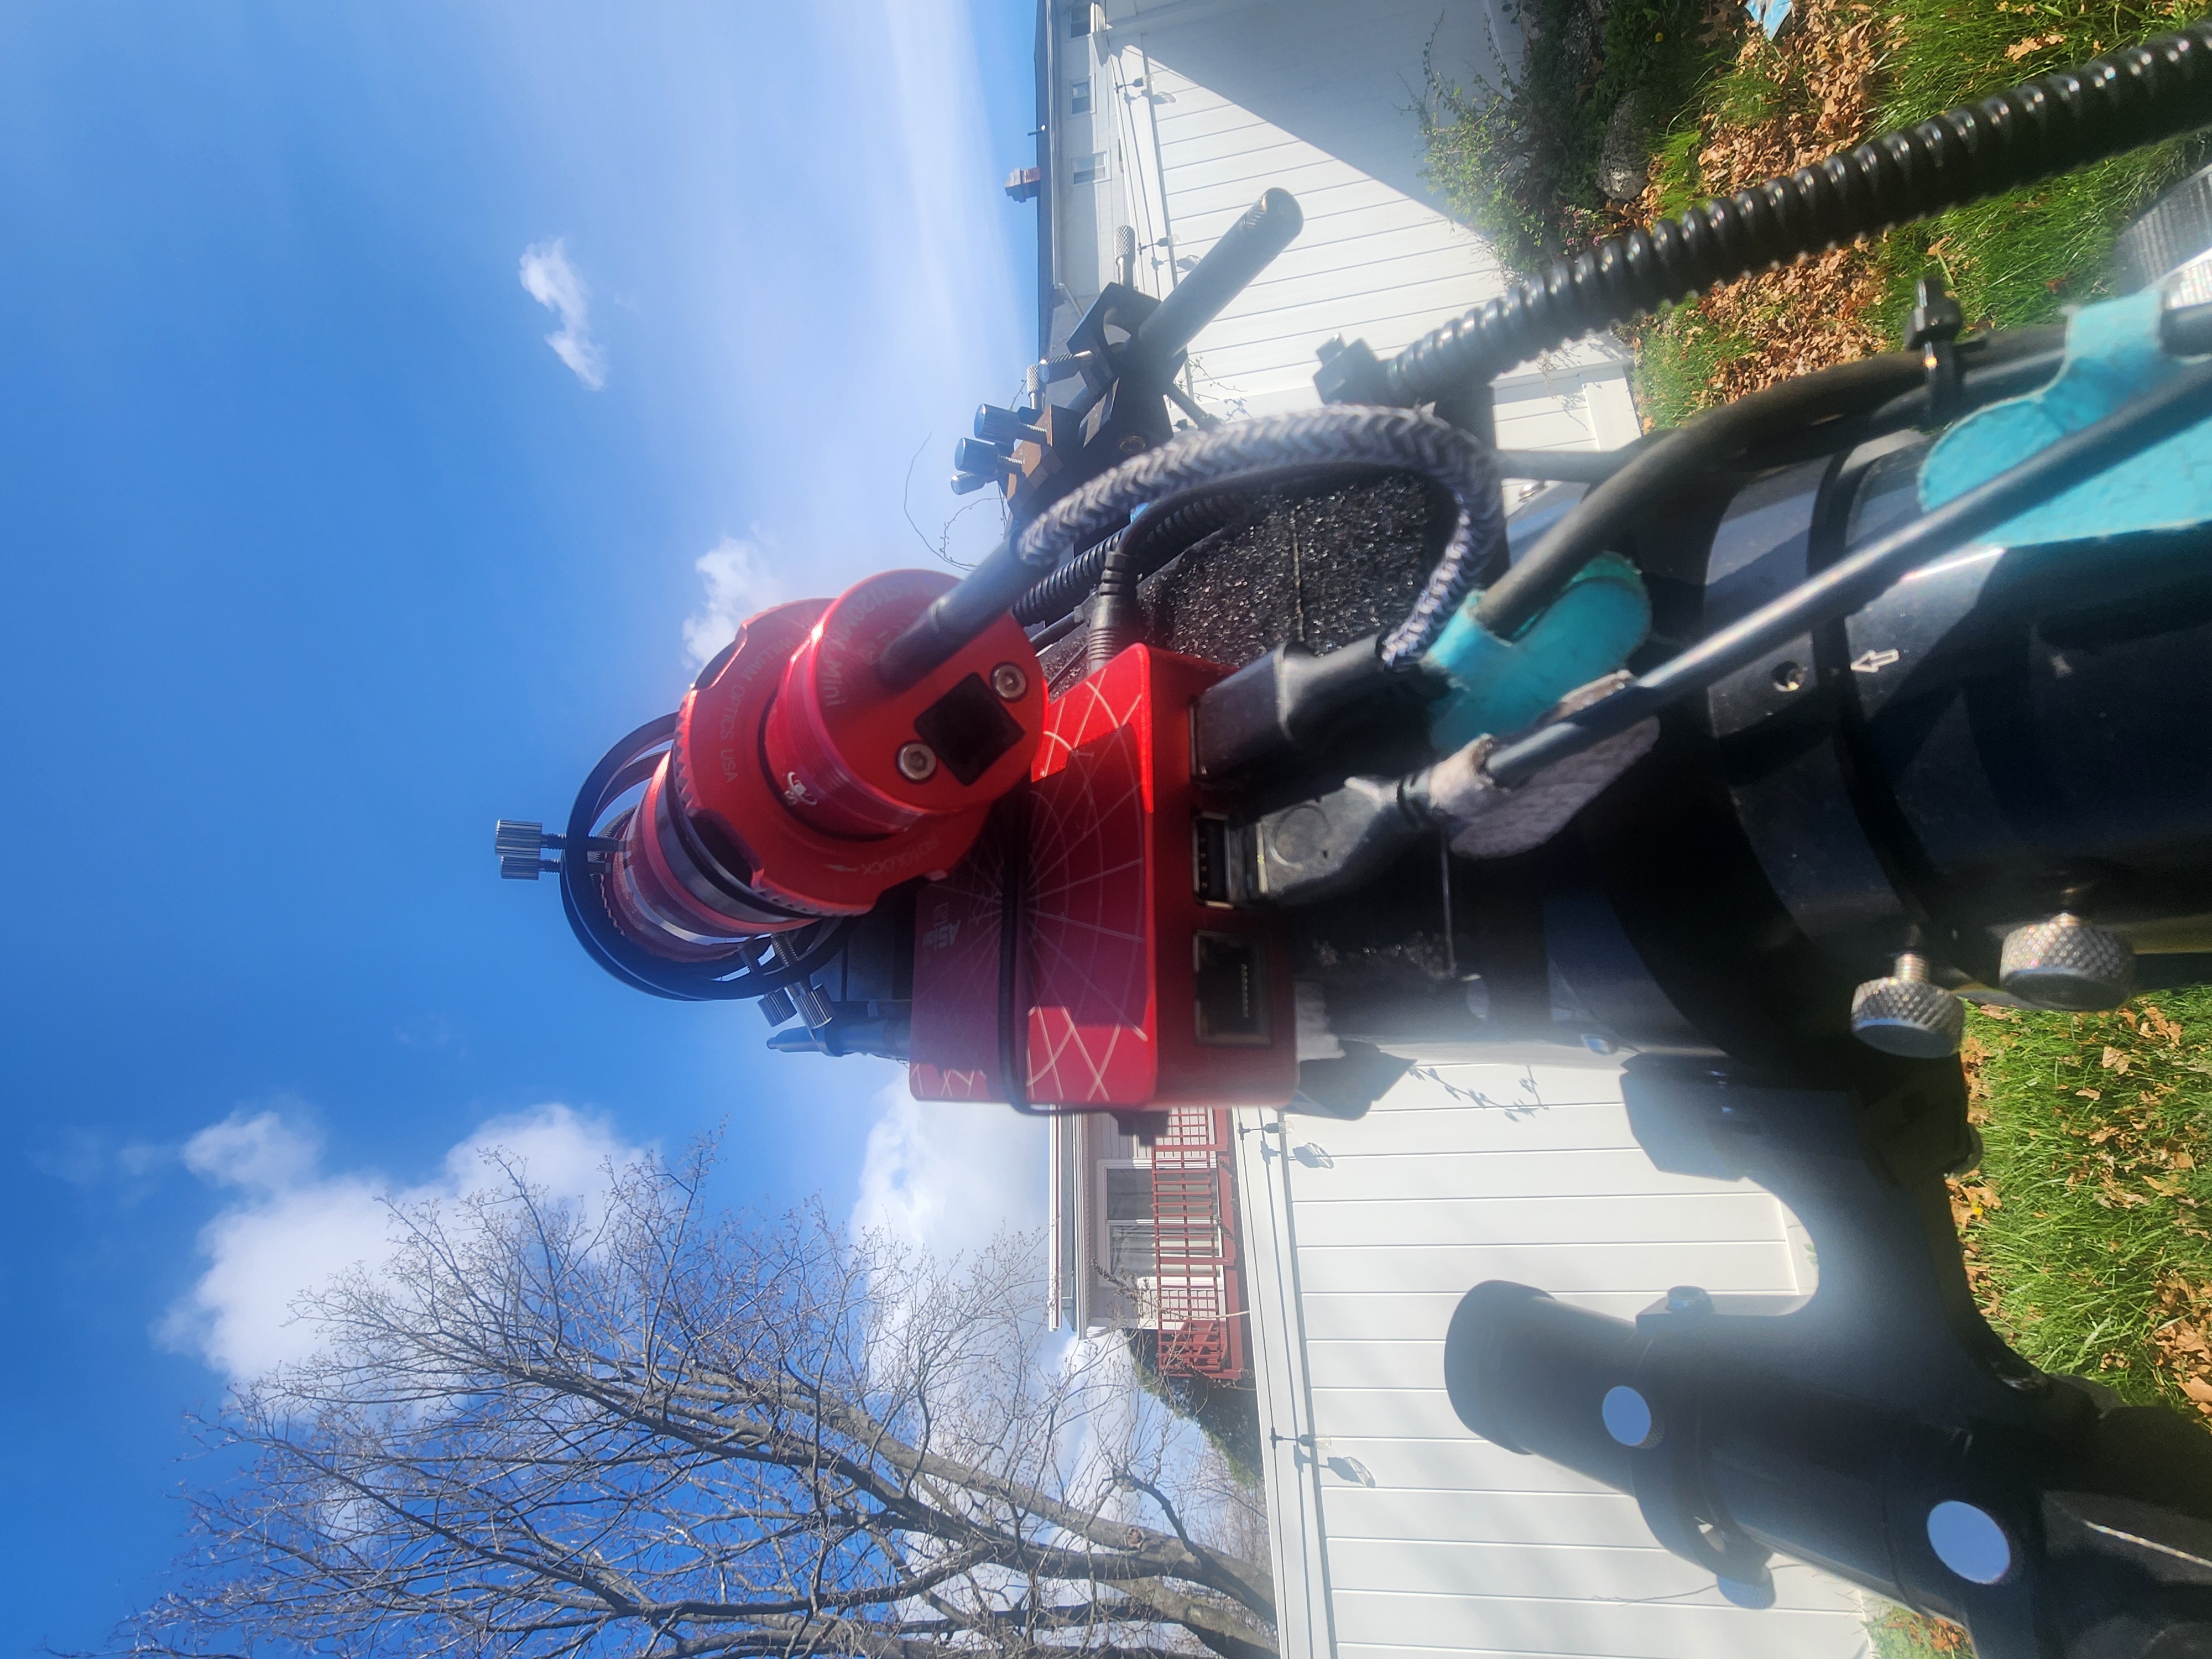
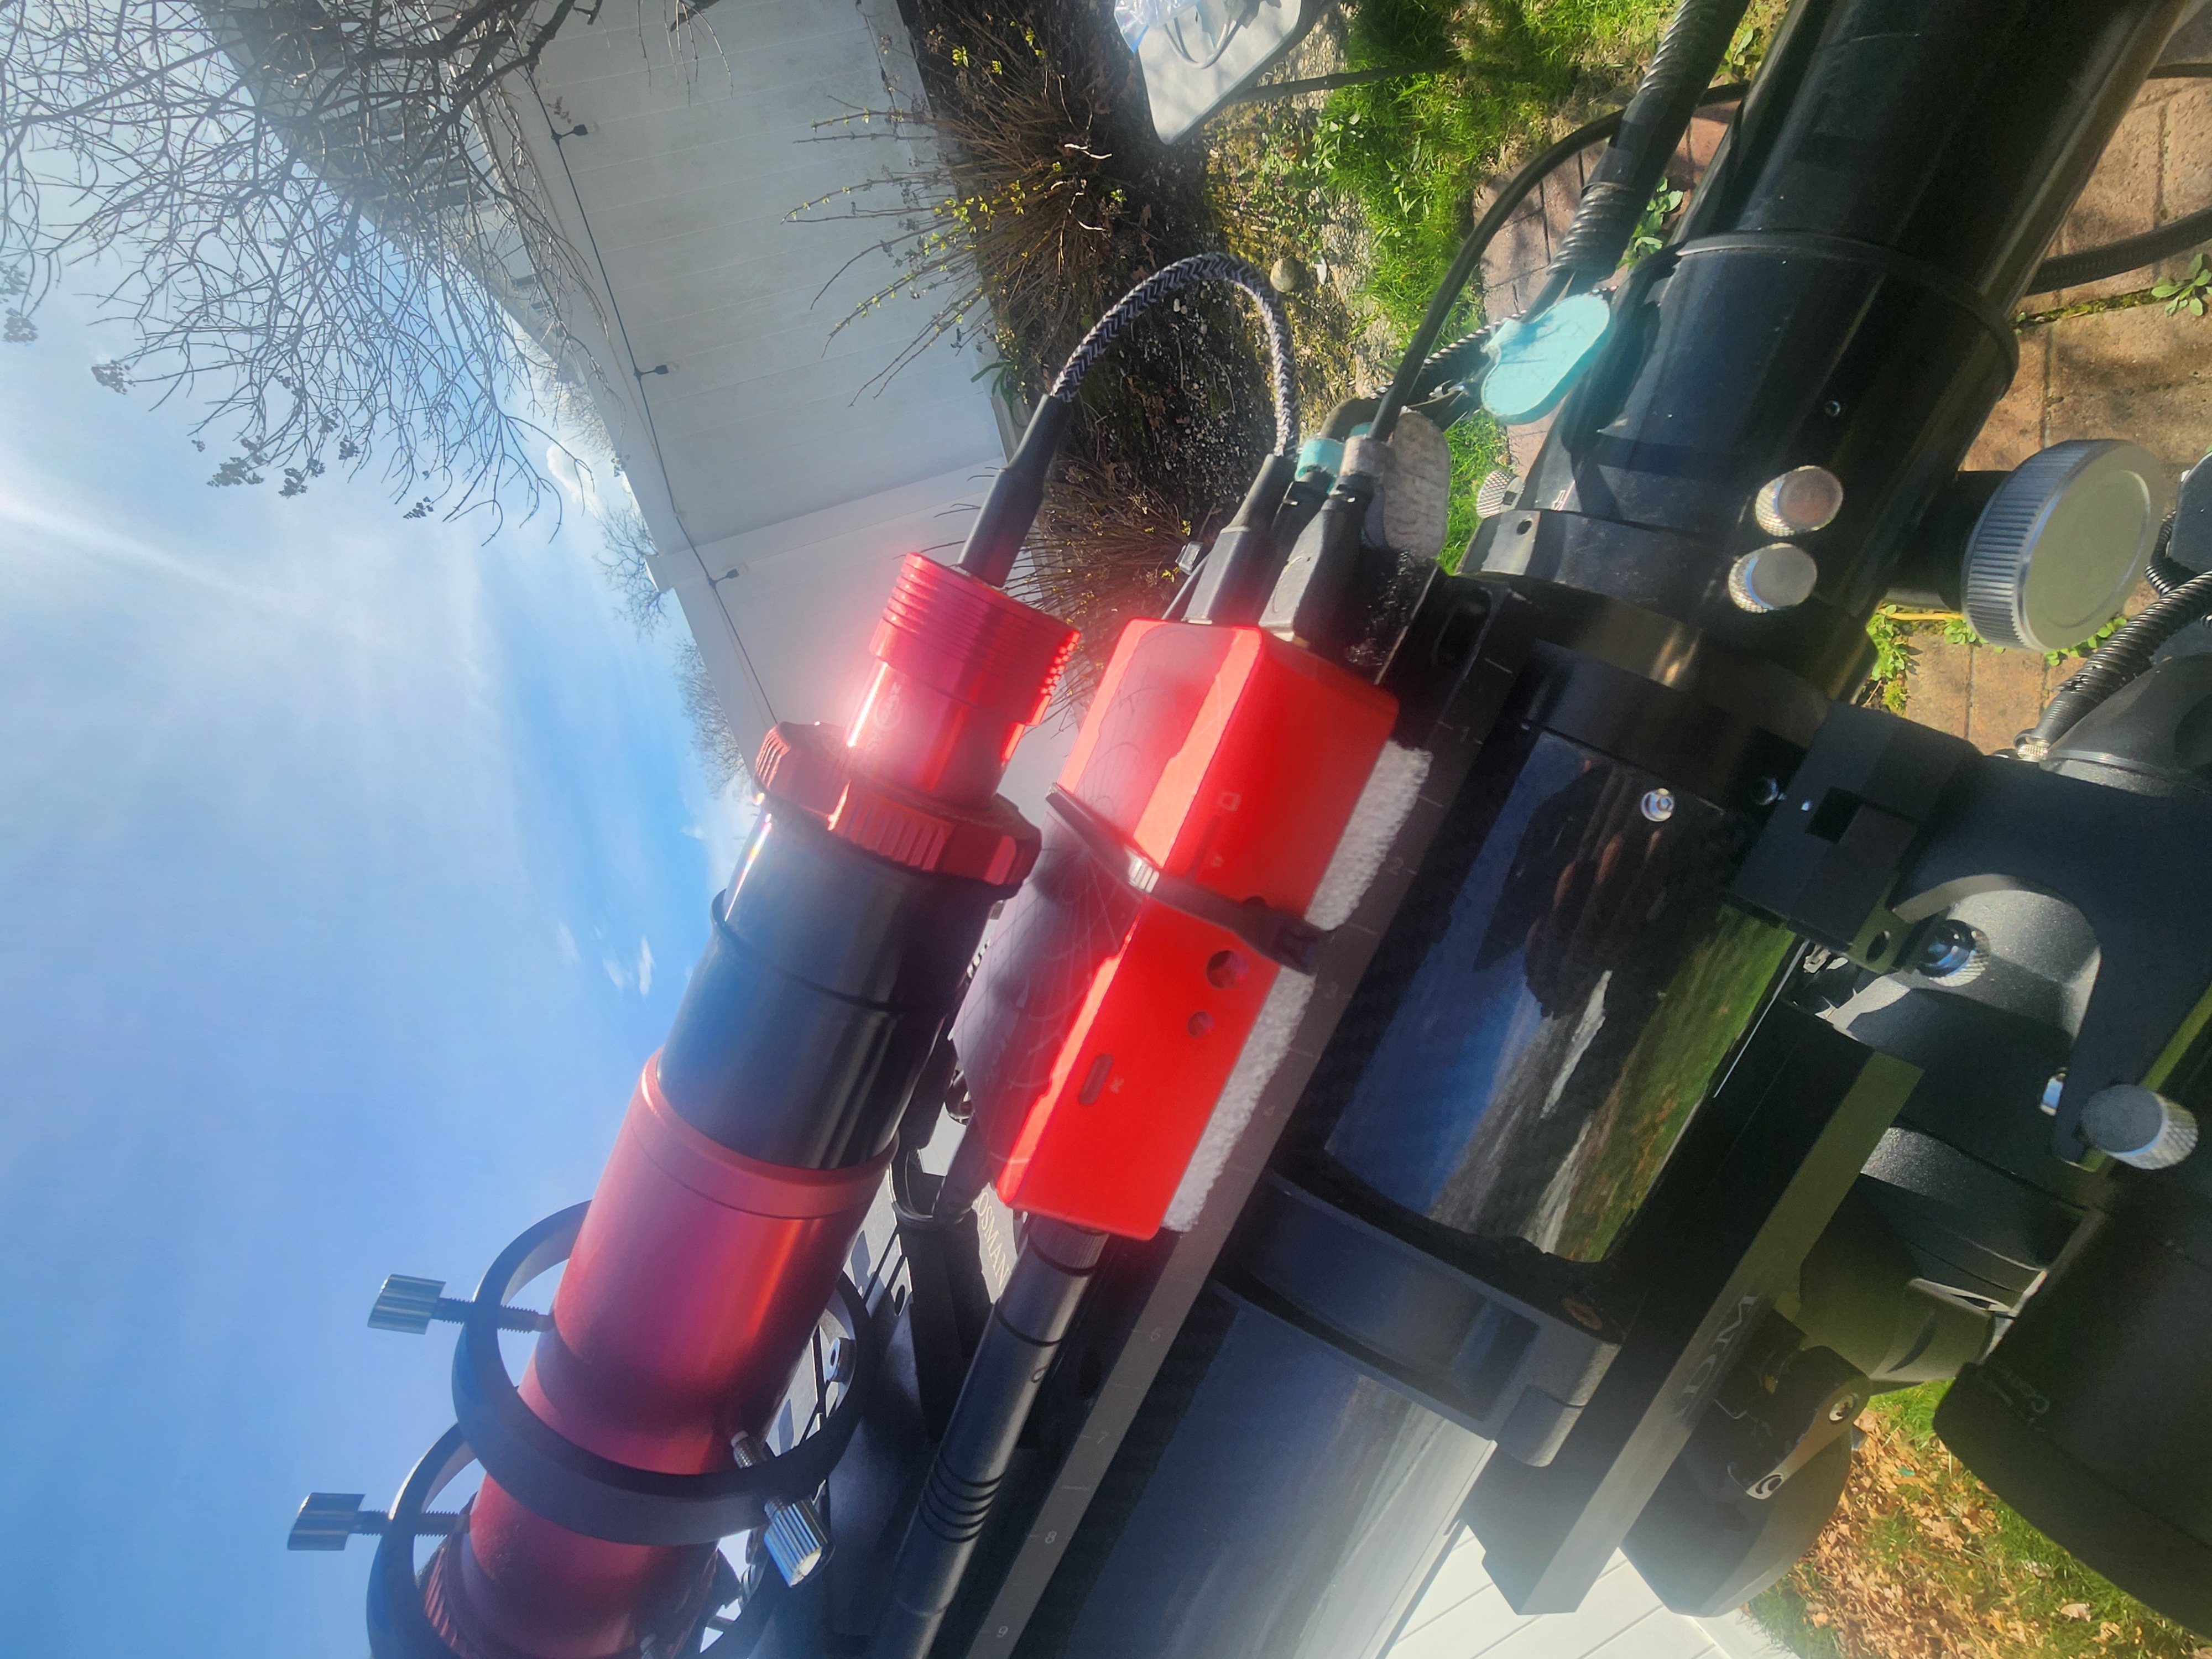
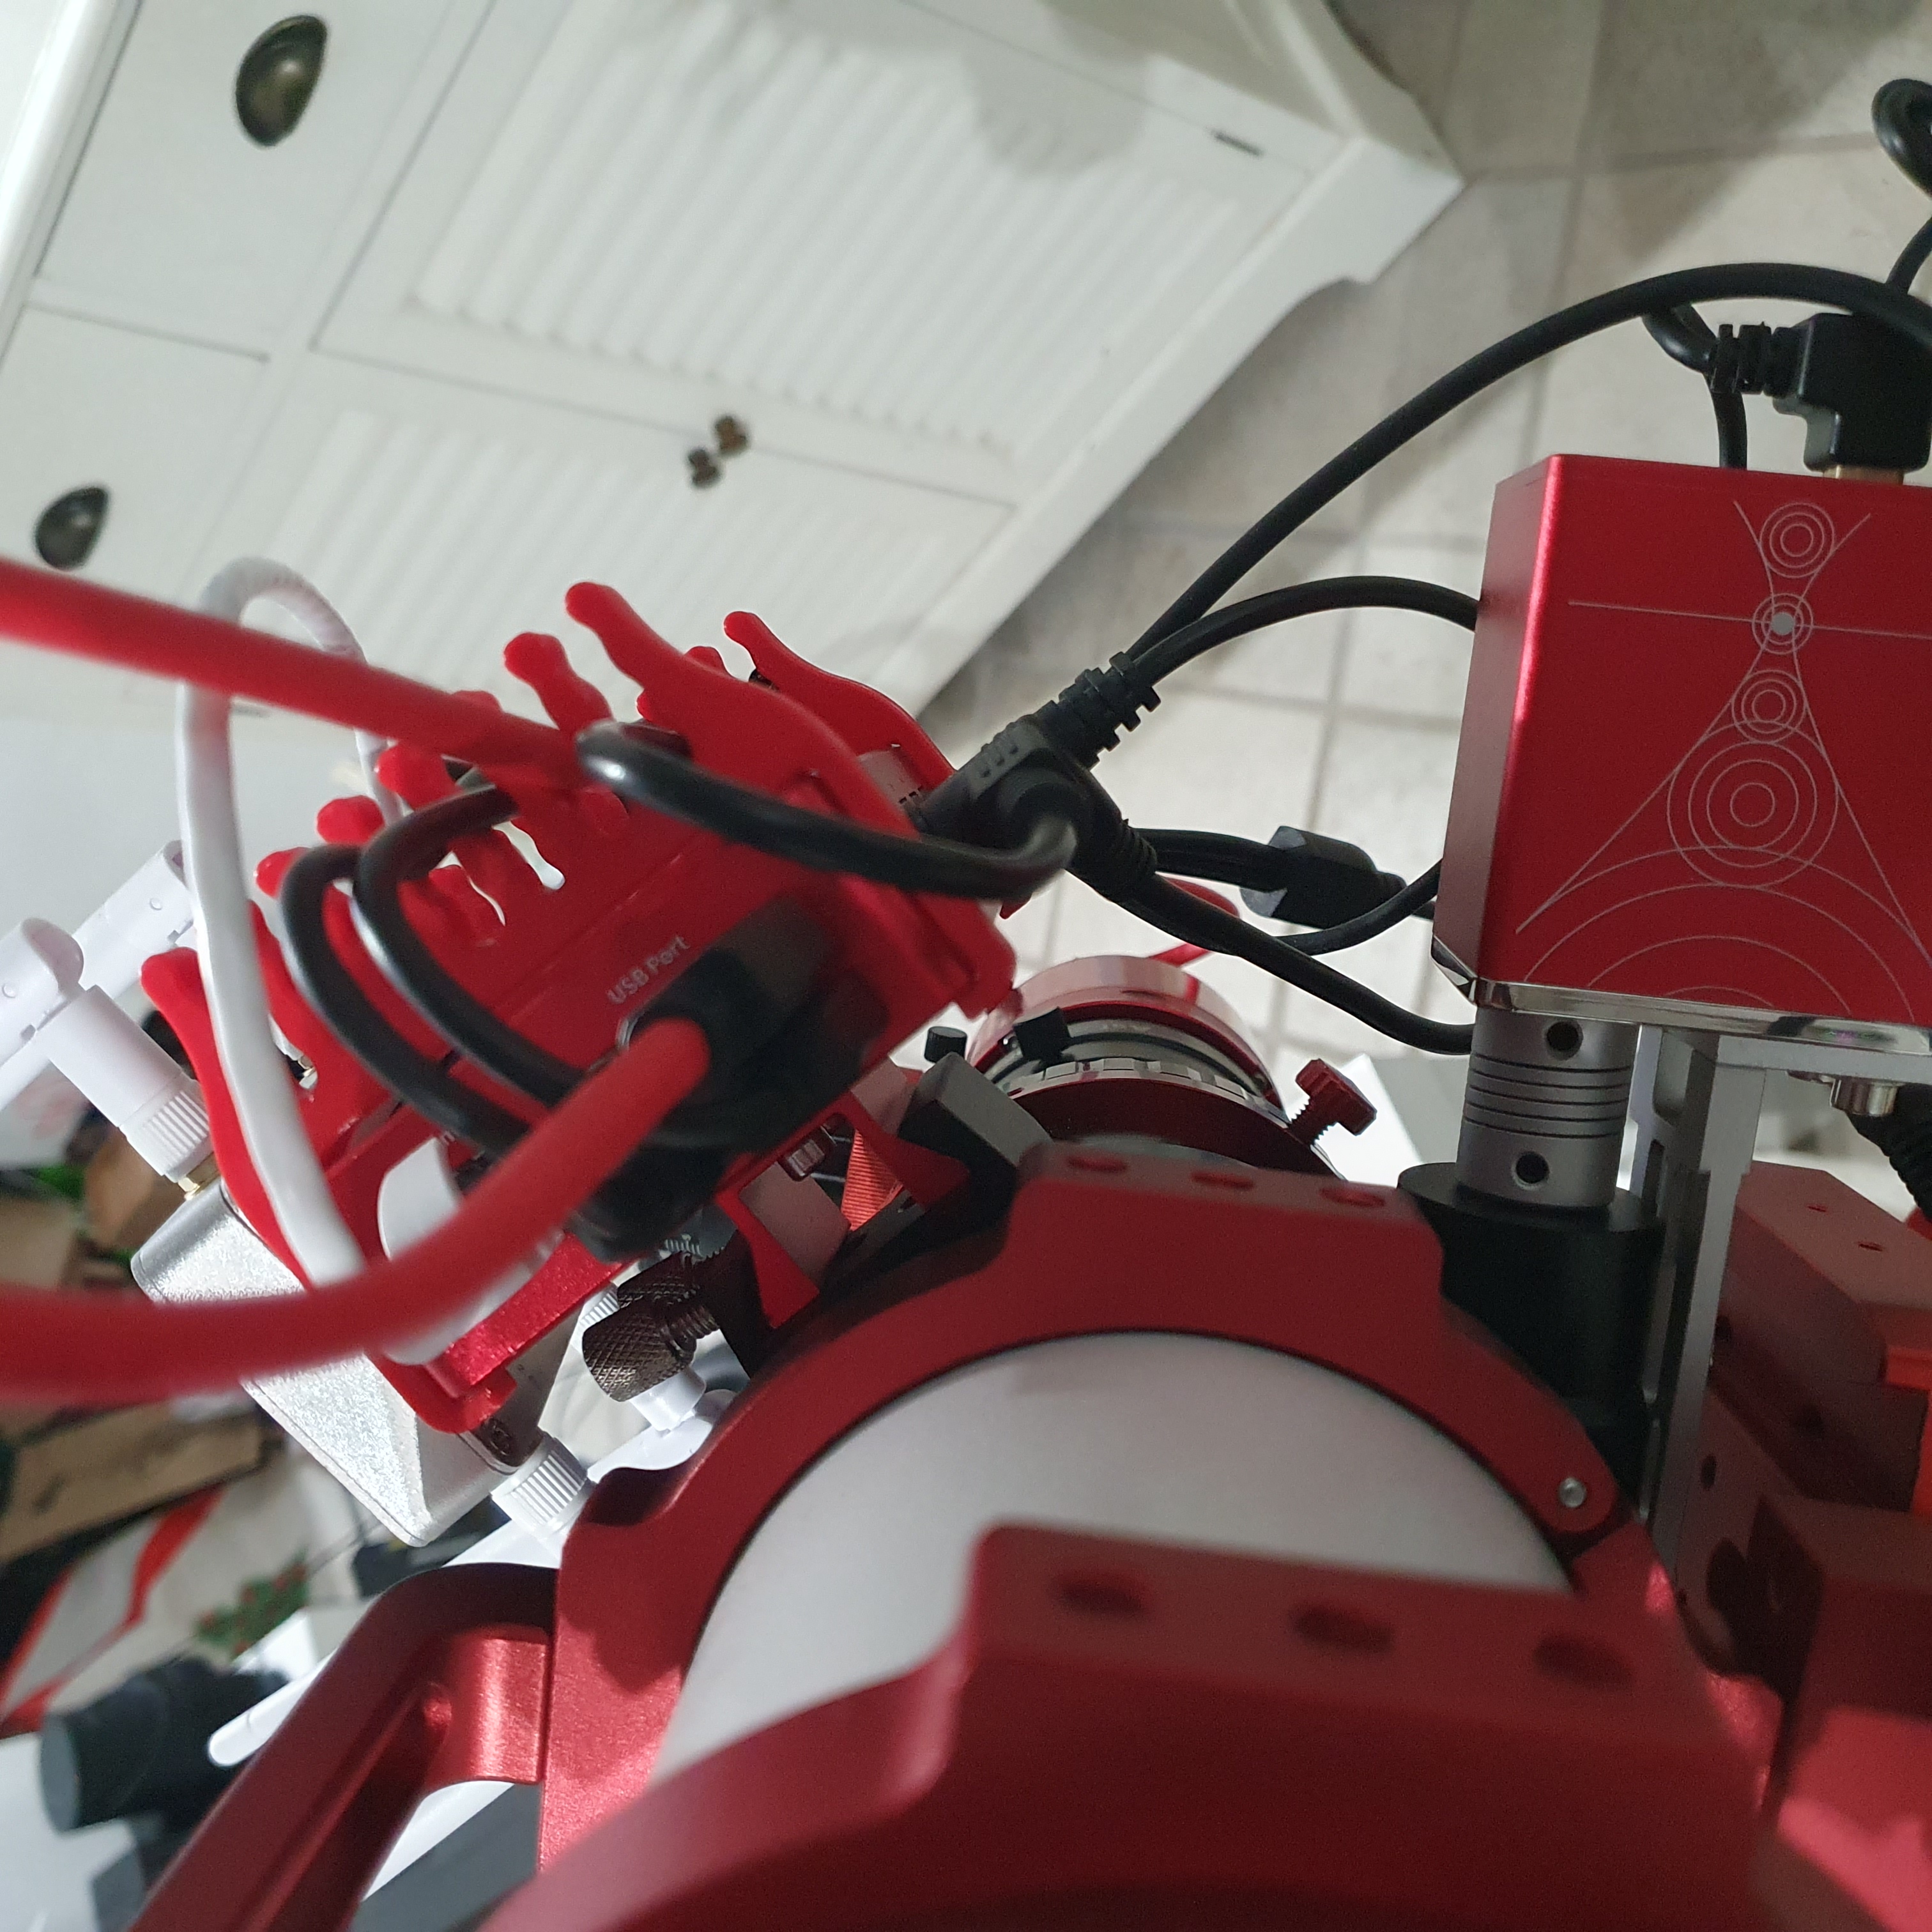
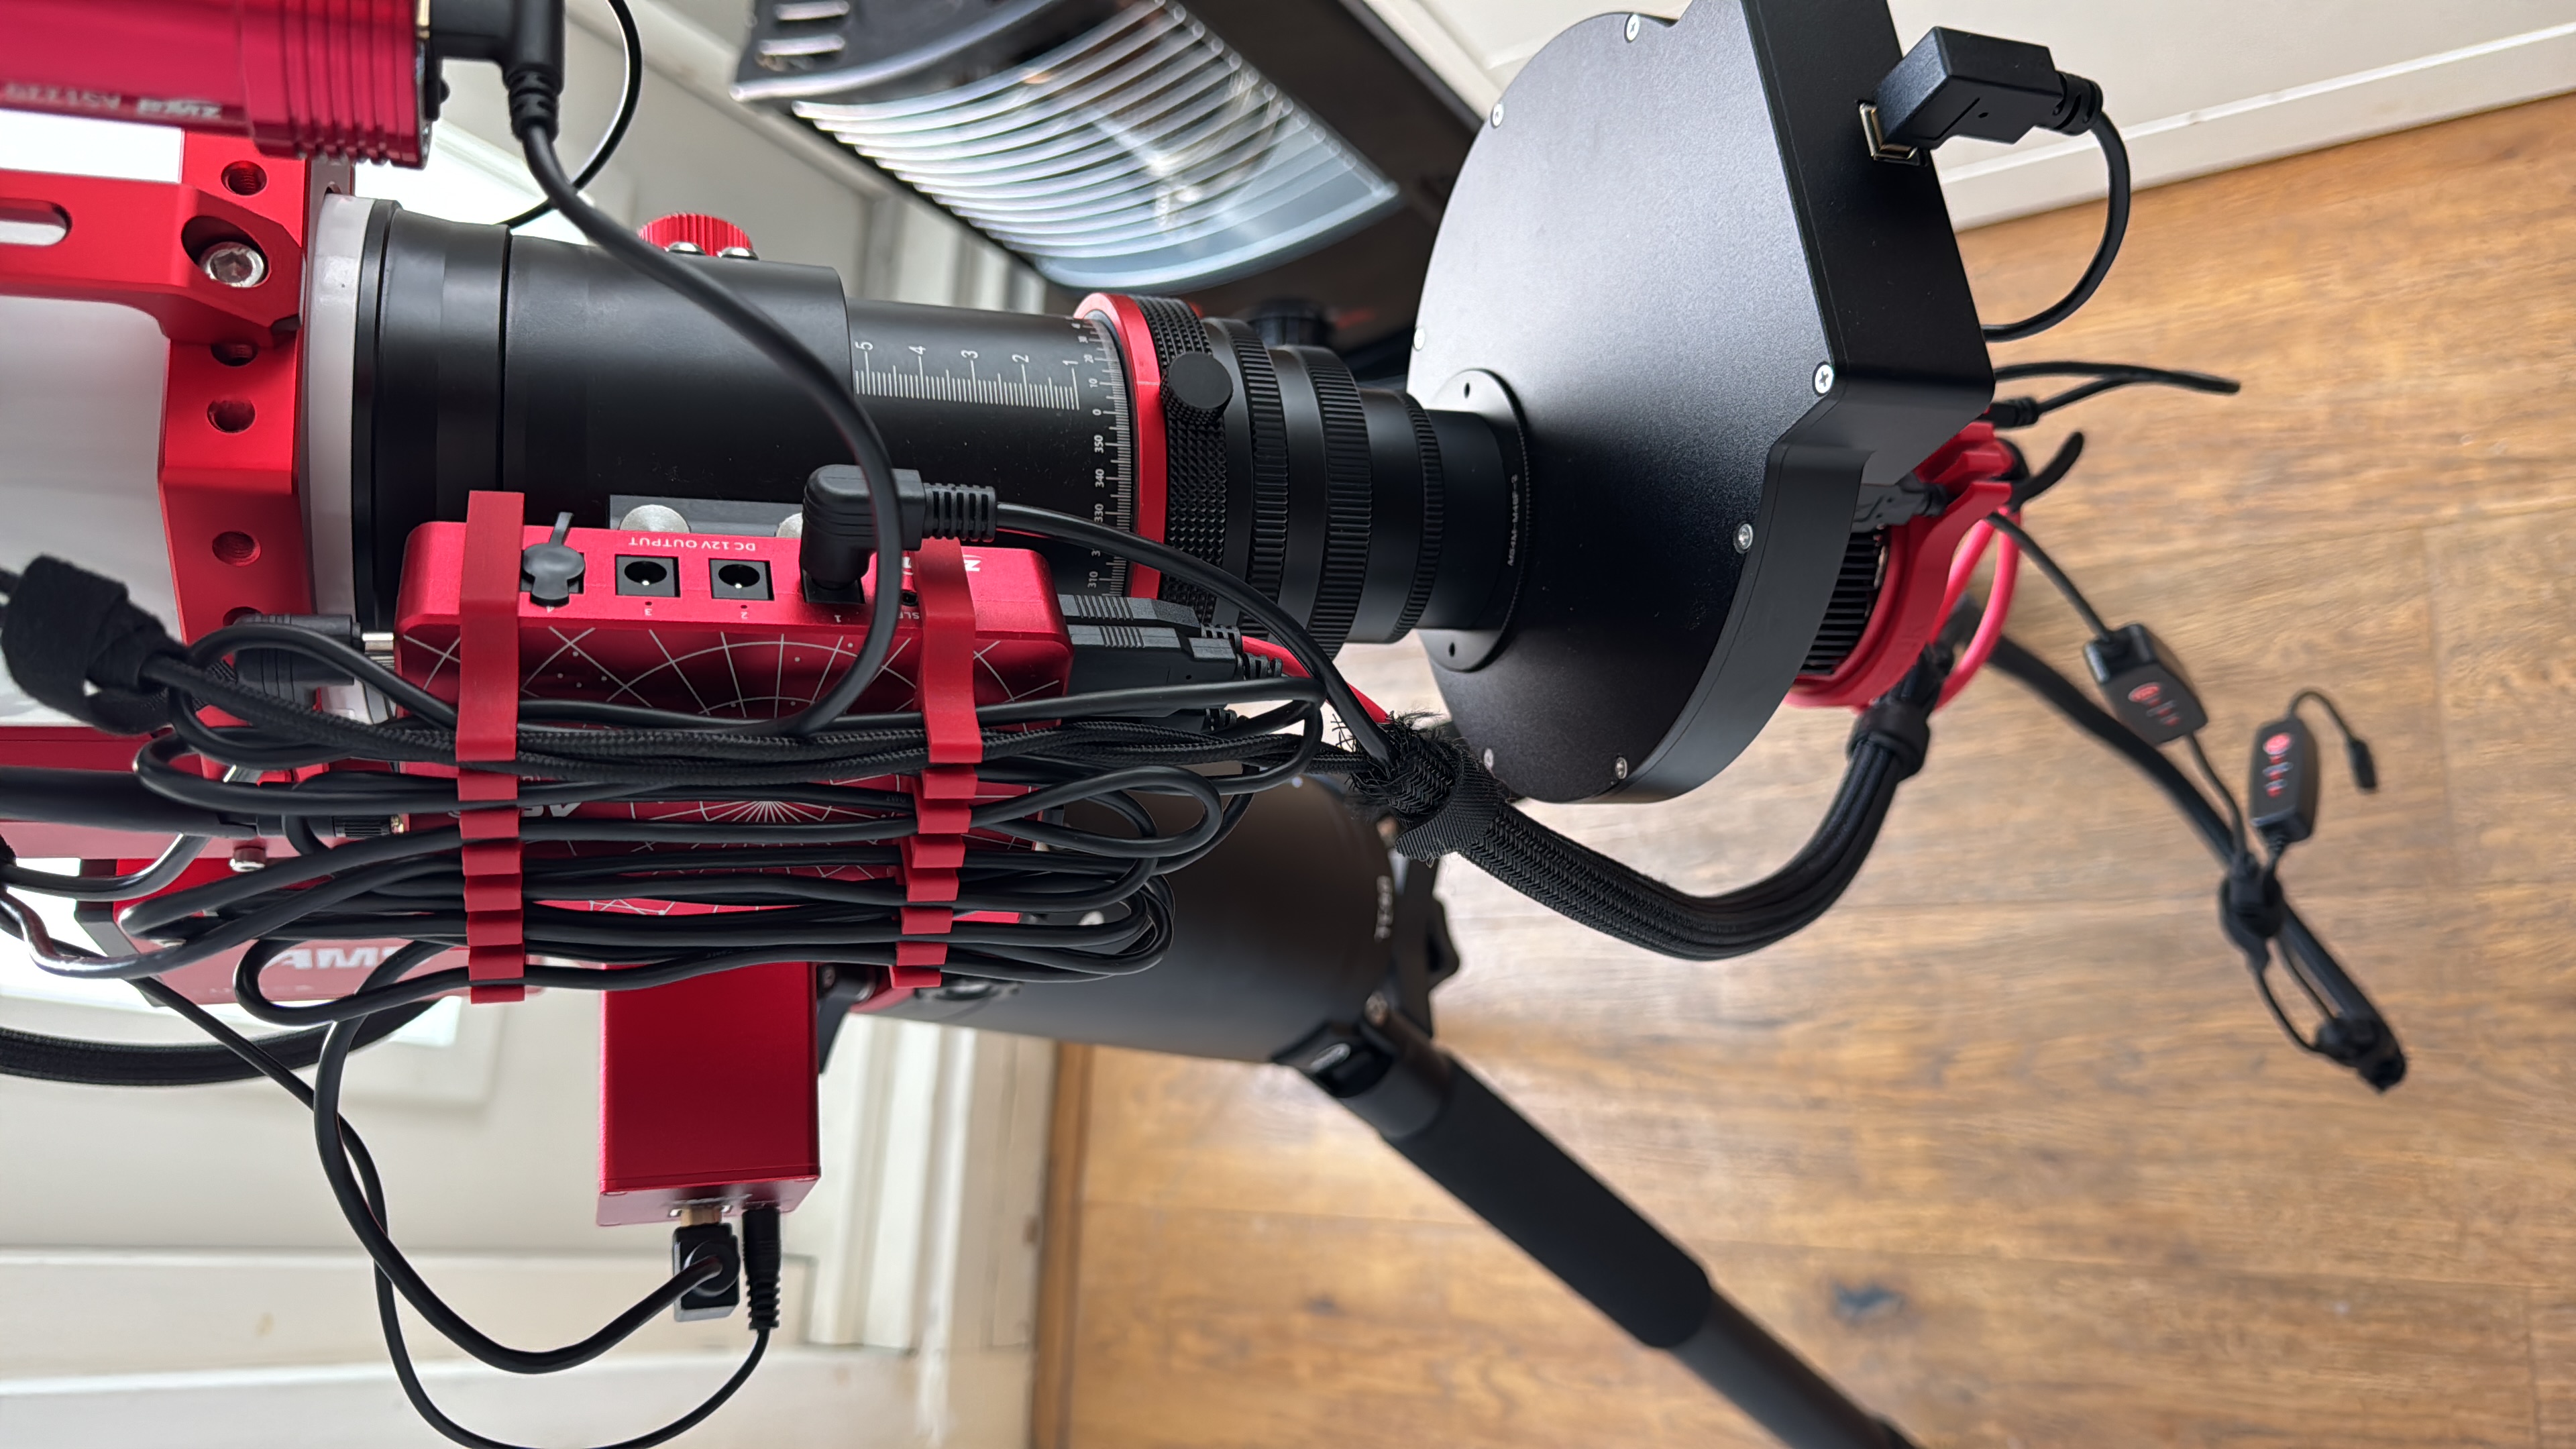
I got a small L shaped metal plate done locally and used one side to connect to my AM5N Mount and other on the ASI Air. The ASI Air moves with the mount and does not create any cable issue. The Cable routing is short and clean and have had no issues sofar. Some pictures attached 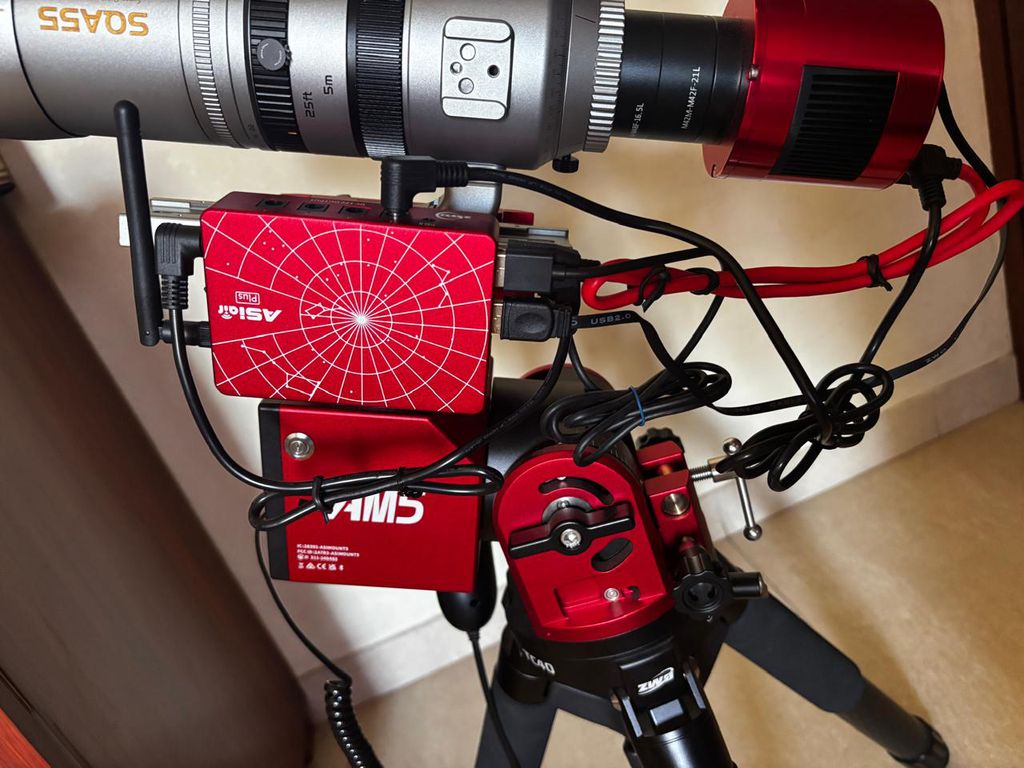 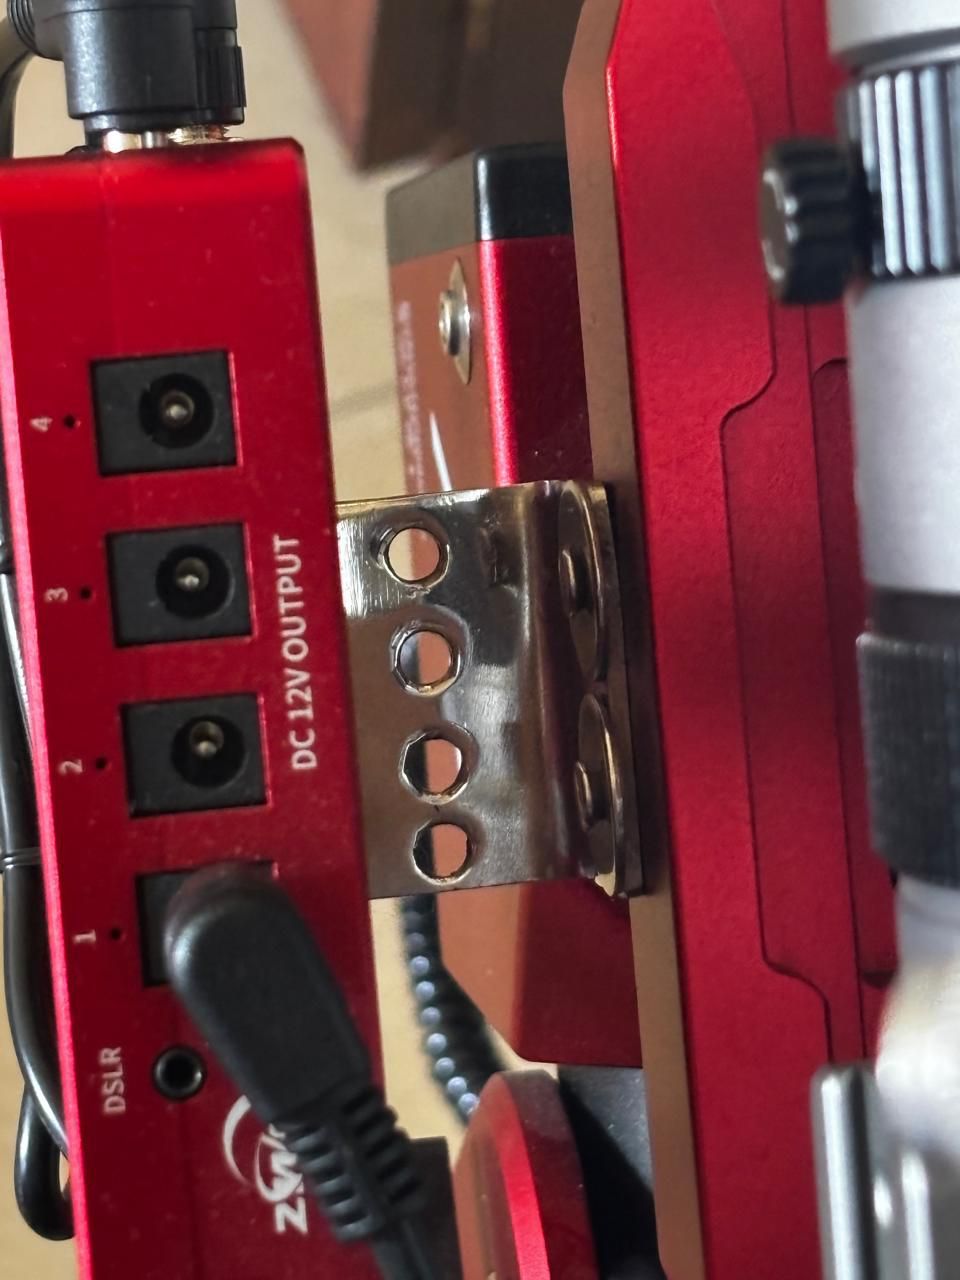 |
You cannot like this item. Reason: "ANONYMOUS".
You cannot remove your like from this item.
Editing a post is only allowed within 24 hours after creating it.
You cannot Like this post because the topic is closed.
Copy the URL below to share a direct link to this post.
This post cannot be edited using the classic forums editor.
To edit this post, please enable the "New forums experience" in your settings.
I've used a Losmandy plate on top of my scope to mount my ASI Air Plus and auto-guiding set-up. Everything remains securely in place with industrial double sided tape, Velcro, and zip ties. C&DS! Terrance 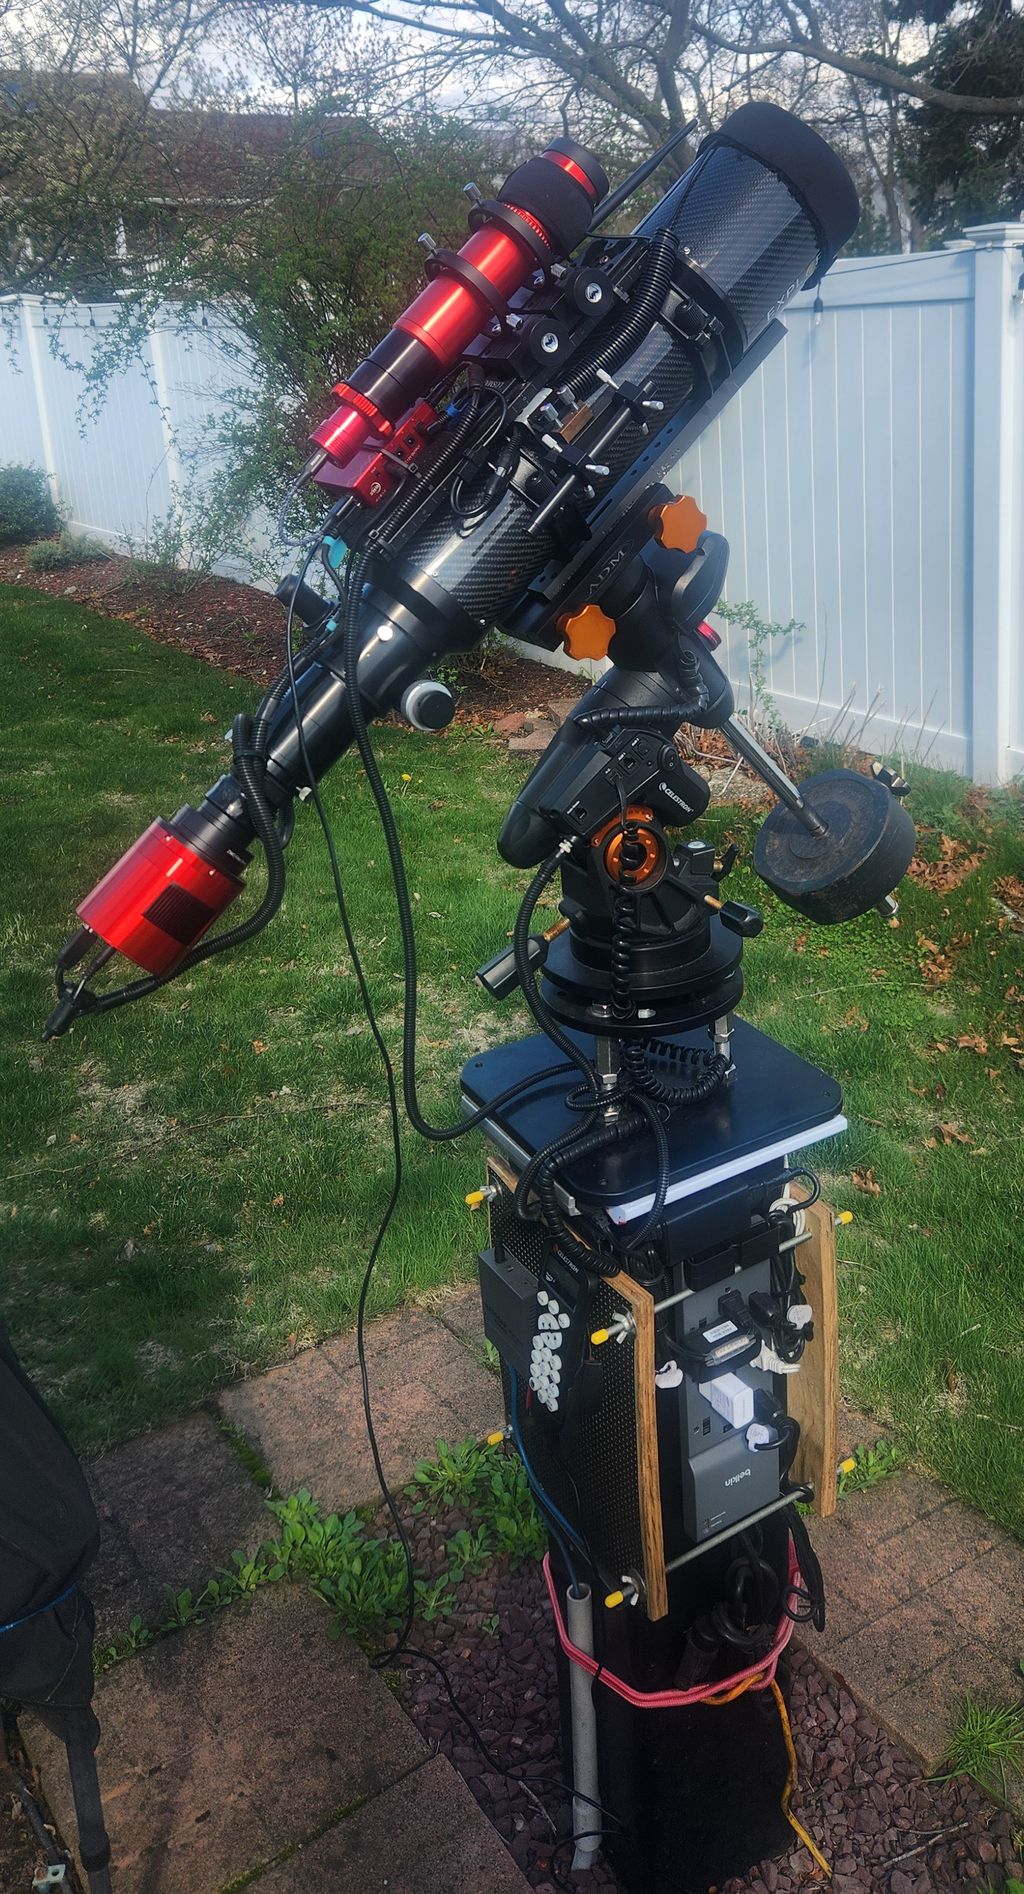 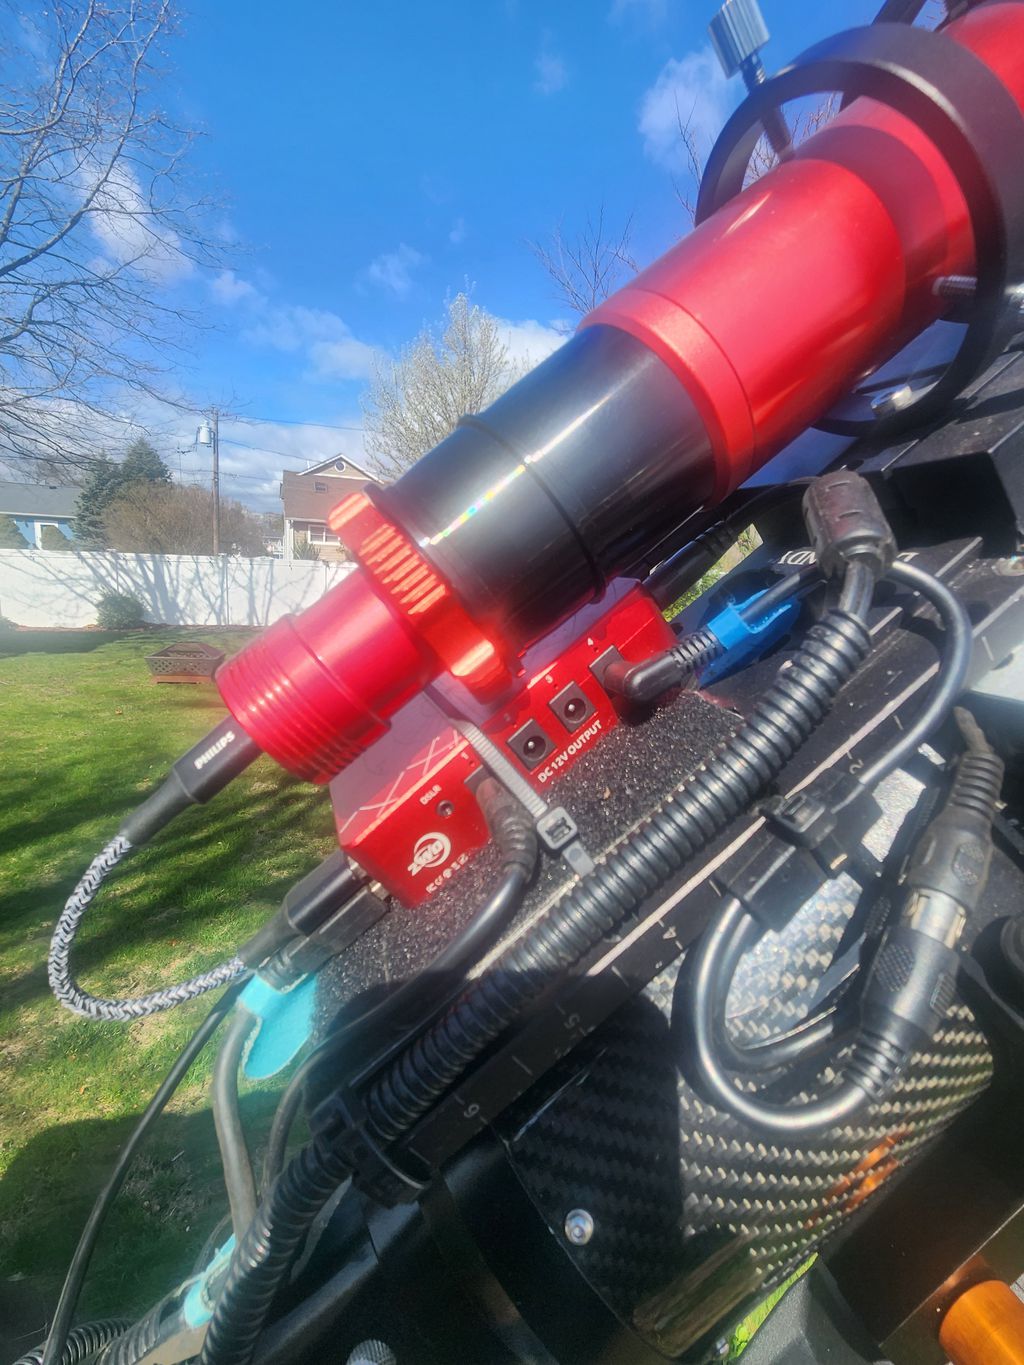 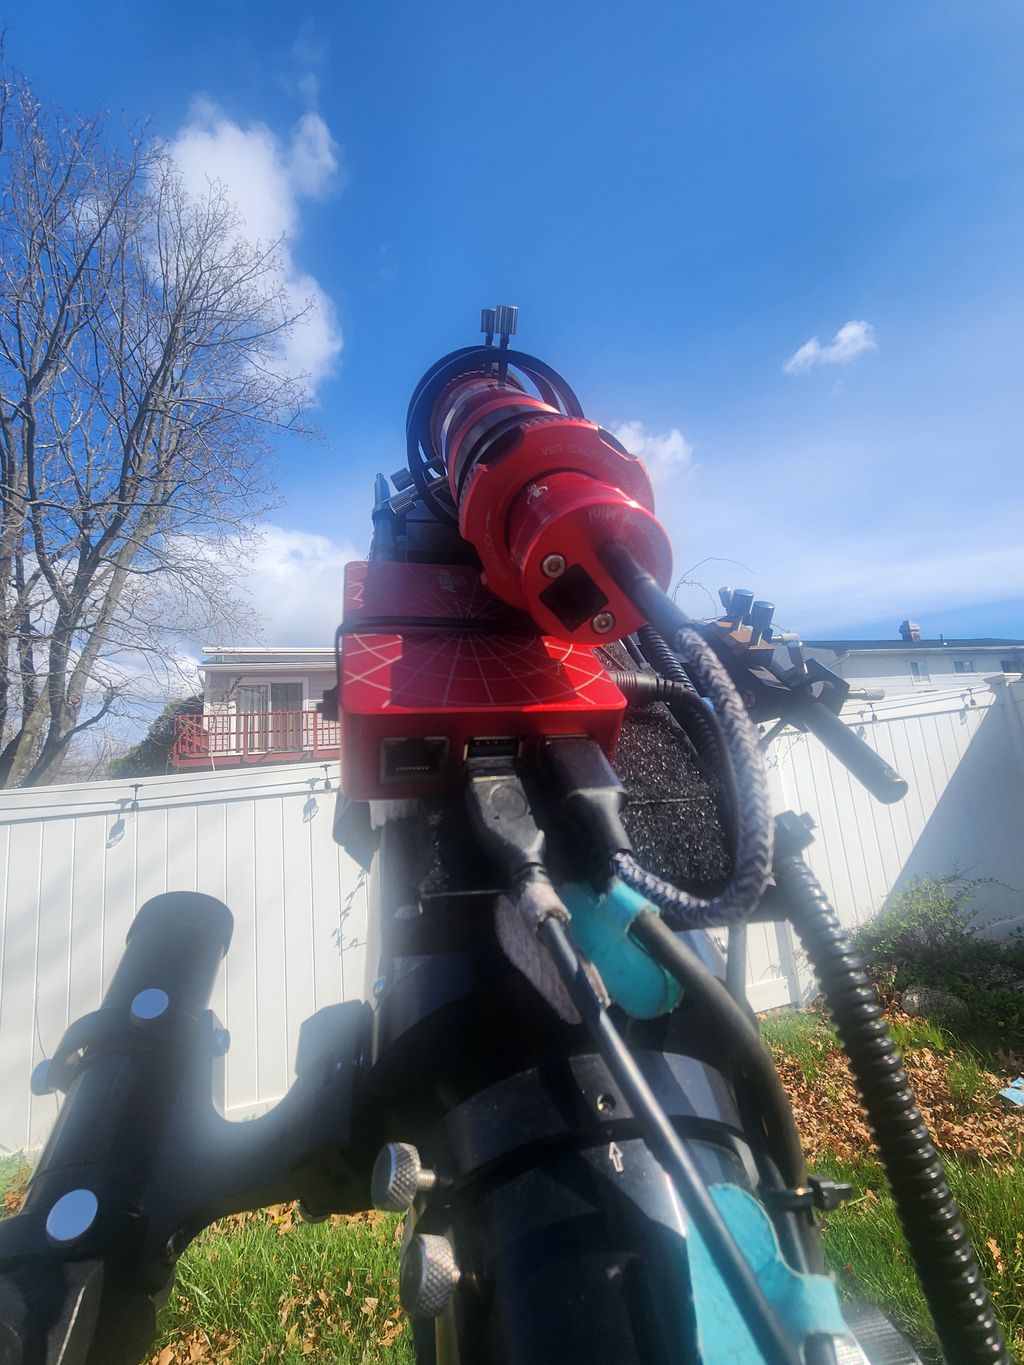 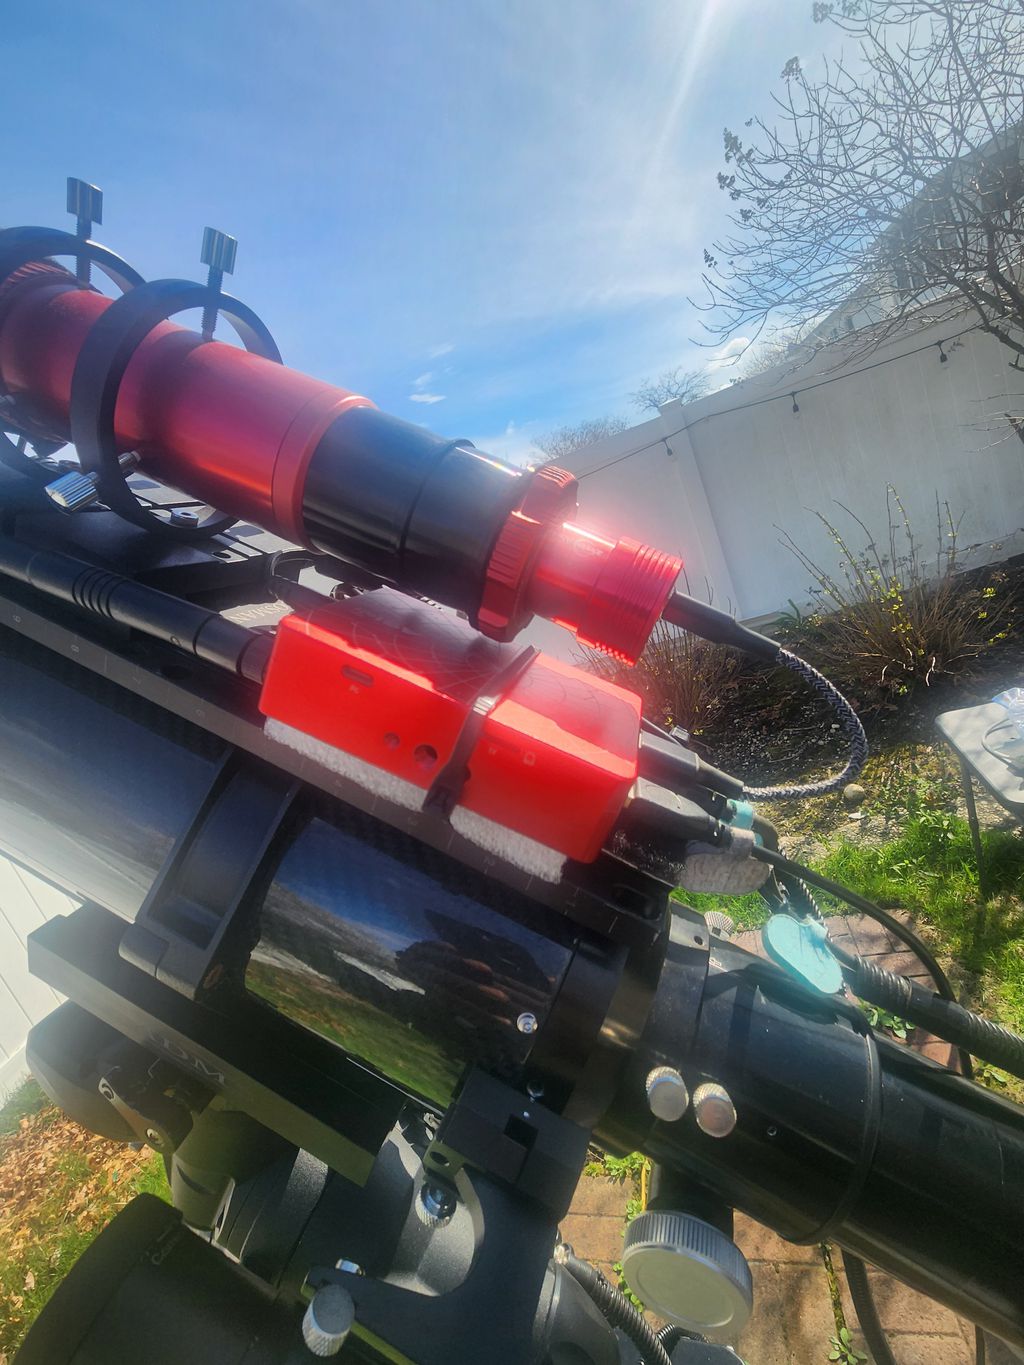 |
You cannot like this item. Reason: "ANONYMOUS".
You cannot remove your like from this item.
Editing a post is only allowed within 24 hours after creating it.
You cannot Like this post because the topic is closed.
Copy the URL below to share a direct link to this post.
This post cannot be edited using the classic forums editor.
To edit this post, please enable the "New forums experience" in your settings.
Aloke Palsikar:
I got a small L shaped metal plate done locally and used one side to connect to my AM5N Mount and other on the ASI Air. The ASI Air moves with the mount and does not create any cable issue. The Cable routing is short and clean and have had no issues sofar. Some pictures attached This is super interesting. no issues? I actually mounted a synta/finder shoe on the side of that saddle and was going to try and put the asiair there, but was concerned it might catch something when slewing.
|
You cannot like this item. Reason: "ANONYMOUS".
You cannot remove your like from this item.
Editing a post is only allowed within 24 hours after creating it.
You cannot Like this post because the topic is closed.
Copy the URL below to share a direct link to this post.
This post cannot be edited using the classic forums editor.
To edit this post, please enable the "New forums experience" in your settings.
Clayton Ostler:
Aloke Palsikar:
I got a small L shaped metal plate done locally and used one side to connect to my AM5N Mount and other on the ASI Air. The ASI Air moves with the mount and does not create any cable issue. The Cable routing is short and clean and have had no issues sofar. Some pictures attached
This is super interesting. no issues? I actually mounted a synta/finder shoe on the side of that saddle and was going to try and put the asiair there, but was concerned it might catch something when slewing. There are no slewing issues. Infact I had one target where the mount had nearly reached the meridian. The cables are short and move nicely with the mount and ASI Air. You need to mount this parallel to the Mount dovetail keeping some gap for the cable bend to move in sync. Everything else should work in my view
|
You cannot like this item. Reason: "ANONYMOUS".
You cannot remove your like from this item.
Editing a post is only allowed within 24 hours after creating it.
You cannot Like this post because the topic is closed.
Copy the URL below to share a direct link to this post.
This post cannot be edited using the classic forums editor.
To edit this post, please enable the "New forums experience" in your settings.
I've got mine on the dovetail mount on my Skywatcher ESPRIT 120, and then 3D printed some clips to go on it for cable management. Looks messy with this view (2nd pic), but I've just routed the existing cables ... some are way too long and need to be wrapped back and forth ... would like to eventually get shorter / better length matching cables, but it's all a work in progress. When I get to it I'll move the top clip so it isn't obstructing power outlet #3, but I don't need that at this stage anyway. All the loose cables in the first pic are now routed through "loom tube" (split corrugated conduit) and much tidier than when this pic was taken. Love those cable holders! Are those custom made/3D printed or did you buy them from somewhere?
|
You cannot like this item. Reason: "ANONYMOUS".
You cannot remove your like from this item.
Editing a post is only allowed within 24 hours after creating it.
You cannot Like this post because the topic is closed.
Copy the URL below to share a direct link to this post.
This post cannot be edited using the classic forums editor.
To edit this post, please enable the "New forums experience" in your settings.
I downloaded the file for the cable clip from Printables and printed them myself at home https://www.printables.com/model/566907-zwo-asiair-cable-clip |
You cannot like this item. Reason: "ANONYMOUS".
You cannot remove your like from this item.
Editing a post is only allowed within 24 hours after creating it.
You cannot Like this post because the topic is closed.
Copy the URL below to share a direct link to this post.
This post cannot be edited using the classic forums editor.
To edit this post, please enable the "New forums experience" in your settings.
I downloaded the file for the cable clip from Printables and printed them myself at home
https://www.printables.com/model/566907-zwo-asiair-cable-clip Or if you don't have a 3D printer, you can buy them off of Etsy. I bought mine there by just looking for "ASIAIR cable organizers".
|
You cannot like this item. Reason: "ANONYMOUS".
You cannot remove your like from this item.
Editing a post is only allowed within 24 hours after creating it.
You cannot Like this post because the topic is closed.
Copy the URL below to share a direct link to this post.
This post cannot be edited using the classic forums editor.
To edit this post, please enable the "New forums experience" in your settings.


