In preparation for installing a Wanderer Astro ETA (Electronic Tilt Adjuster), I want to make sure that I have my camera oriented correctly so that the ETA software will adjust tilt correctly (and not upside down).
What is the correct orientation of the camera (i.e. serial number up and to the right or down to the left), CFW port to the left or right) when the top of the sensor, in landscape mode, is pointing up?
Thank you,
Robert
|
You cannot like this item. Reason: "ANONYMOUS".
You cannot remove your like from this item.
Editing a post is only allowed within 24 hours after creating it.
You cannot Like this post because the topic is closed.
Copy the URL below to share a direct link to this post.
This post cannot be edited using the classic forums editor.
To edit this post, please enable the "New forums experience" in your settings.
I have mine setup that each corner of the sensor is poointed towards one of the motors. AsG says that you can set it up either way (with the flat edges of the sensors towards the motors or the corners pointing towards the motors). Once you get everything installed, the software can be labeled so you know which corner corresponds to which motor. I put number labels that were easy for me to read on each motor. If I recall correctly, there are numbers on each motor that can be seen when installing the camera. I used those same numbers on the outside of the motor since it was hard to see them with the camera installed. I ran Hocus Focus for a baseline and then adjusted a corner in the ASG software and then ran HF again to determine which corner changed according to HF. I updated the ASG software accordingly once I knew which number corresponded to which motor number.
I'm sure there is a better better figuring out which motor corresponds to which motor number but that's how I ran mine. I have a text file on my desktop which has the info on which motor corresponds to which corner of the sensor in case the data in the software is reset.
|
You cannot like this item. Reason: "ANONYMOUS".
You cannot remove your like from this item.
Editing a post is only allowed within 24 hours after creating it.
You cannot Like this post because the topic is closed.
Copy the URL below to share a direct link to this post.
This post cannot be edited using the classic forums editor.
To edit this post, please enable the "New forums experience" in your settings.
Daniel, it sounds like you’re using the ASG EAT device, correct? If so, that seems like a really nice system. I’ll be using a Wanderer Astro ETA, which has its own proprietary software (WandererEmpire). I’m not sure how it works, as I haven’t received it yet, but I’d like to start out with at least knowing that I have the camera oriented correctly.
|
You cannot like this item. Reason: "ANONYMOUS".
You cannot remove your like from this item.
Editing a post is only allowed within 24 hours after creating it.
You cannot Like this post because the topic is closed.
Copy the URL below to share a direct link to this post.
This post cannot be edited using the classic forums editor.
To edit this post, please enable the "New forums experience" in your settings.
Robert Lowenthal:
Daniel, it sounds like you’re using the ASG EAT device, correct? If so, that seems like a really nice system. I’ll be using a Wanderer Astro ETA, which has its own proprietary software (WandererEmpire). I’m not sure how it works, as I haven’t received it yet, but I’d like to start out with at least knowing that I have the camera oriented correctly. Sorry I saw electronic tilt adjustment and assumed the ASG Photon Cage. I didn't realize there was a new one from Wanderer Astro available. I think they are using a 3 point adjustment system instead of a 4 point adjustment. I would think having 2 of the 3 adjustment points at a corner of the sensor and the third on the long edge would make it easier to adjust. I haven't looked at their software to determine if they have the ability to label the points to align with how you have the camera sensor aligned.
|
You cannot like this item. Reason: "ANONYMOUS".
You cannot remove your like from this item.
Editing a post is only allowed within 24 hours after creating it.
You cannot Like this post because the topic is closed.
Copy the URL below to share a direct link to this post.
This post cannot be edited using the classic forums editor.
To edit this post, please enable the "New forums experience" in your settings.
For the kind of money they get for these things I'm would fully expect that ASG could answer this question.
|
You cannot like this item. Reason: "ANONYMOUS".
You cannot remove your like from this item.
Editing a post is only allowed within 24 hours after creating it.
You cannot Like this post because the topic is closed.
Copy the URL below to share a direct link to this post.
This post cannot be edited using the classic forums editor.
To edit this post, please enable the "New forums experience" in your settings.
Tony Gondola:
For the kind of money they get for these things I'm would fully expect that ASG could answer this question. It’s for the new Wanderer Astro Tilt Adjustment not the Photon Cage. I missed what device he had just bought in his original post. I'm sure they will have instructions available soon if they don't have it published yet.
|
You cannot like this item. Reason: "ANONYMOUS".
You cannot remove your like from this item.
Editing a post is only allowed within 24 hours after creating it.
You cannot Like this post because the topic is closed.
Copy the URL below to share a direct link to this post.
This post cannot be edited using the classic forums editor.
To edit this post, please enable the "New forums experience" in your settings.
If we take the electric tilt adjuster out of the question, can someone tell me which way is “up” on the QHY600 camera housing?
|
You cannot like this item. Reason: "ANONYMOUS".
You cannot remove your like from this item.
Editing a post is only allowed within 24 hours after creating it.
You cannot Like this post because the topic is closed.
Copy the URL below to share a direct link to this post.
This post cannot be edited using the classic forums editor.
To edit this post, please enable the "New forums experience" in your settings.
Robert Lowenthal:
If we take the electric tilt adjuster out of the question, can someone tell me which way is “up” on the QHY600 camera housing? Pretty sure the screw on the outer lip is the “top”
|
You cannot like this item. Reason: "ANONYMOUS".
You cannot remove your like from this item.
Editing a post is only allowed within 24 hours after creating it.
You cannot Like this post because the topic is closed.
Copy the URL below to share a direct link to this post.
This post cannot be edited using the classic forums editor.
To edit this post, please enable the "New forums experience" in your settings.
Kevin Morefield:
Robert Lowenthal:
If we take the electric tilt adjuster out of the question, can someone tell me which way is “up” on the QHY600 camera housing?
Pretty sure the screw on the outer lip is the “top” That’s what I’m thinking as well. I think the screw you’re talking about is the desiccation port. On my camera, having the port up places the serial number up as well. And the serial number is directly over the horizontal aspect of the sensor. I’ll orient it this way and platesolve an image with the camera angle at 0 degrees. If platesolve shows rotation at 0, I’m good. If 180, it’s upside down.
|
You cannot like this item. Reason: "ANONYMOUS".
You cannot remove your like from this item.
Editing a post is only allowed within 24 hours after creating it.
You cannot Like this post because the topic is closed.
Copy the URL below to share a direct link to this post.
This post cannot be edited using the classic forums editor.
To edit this post, please enable the "New forums experience" in your settings.
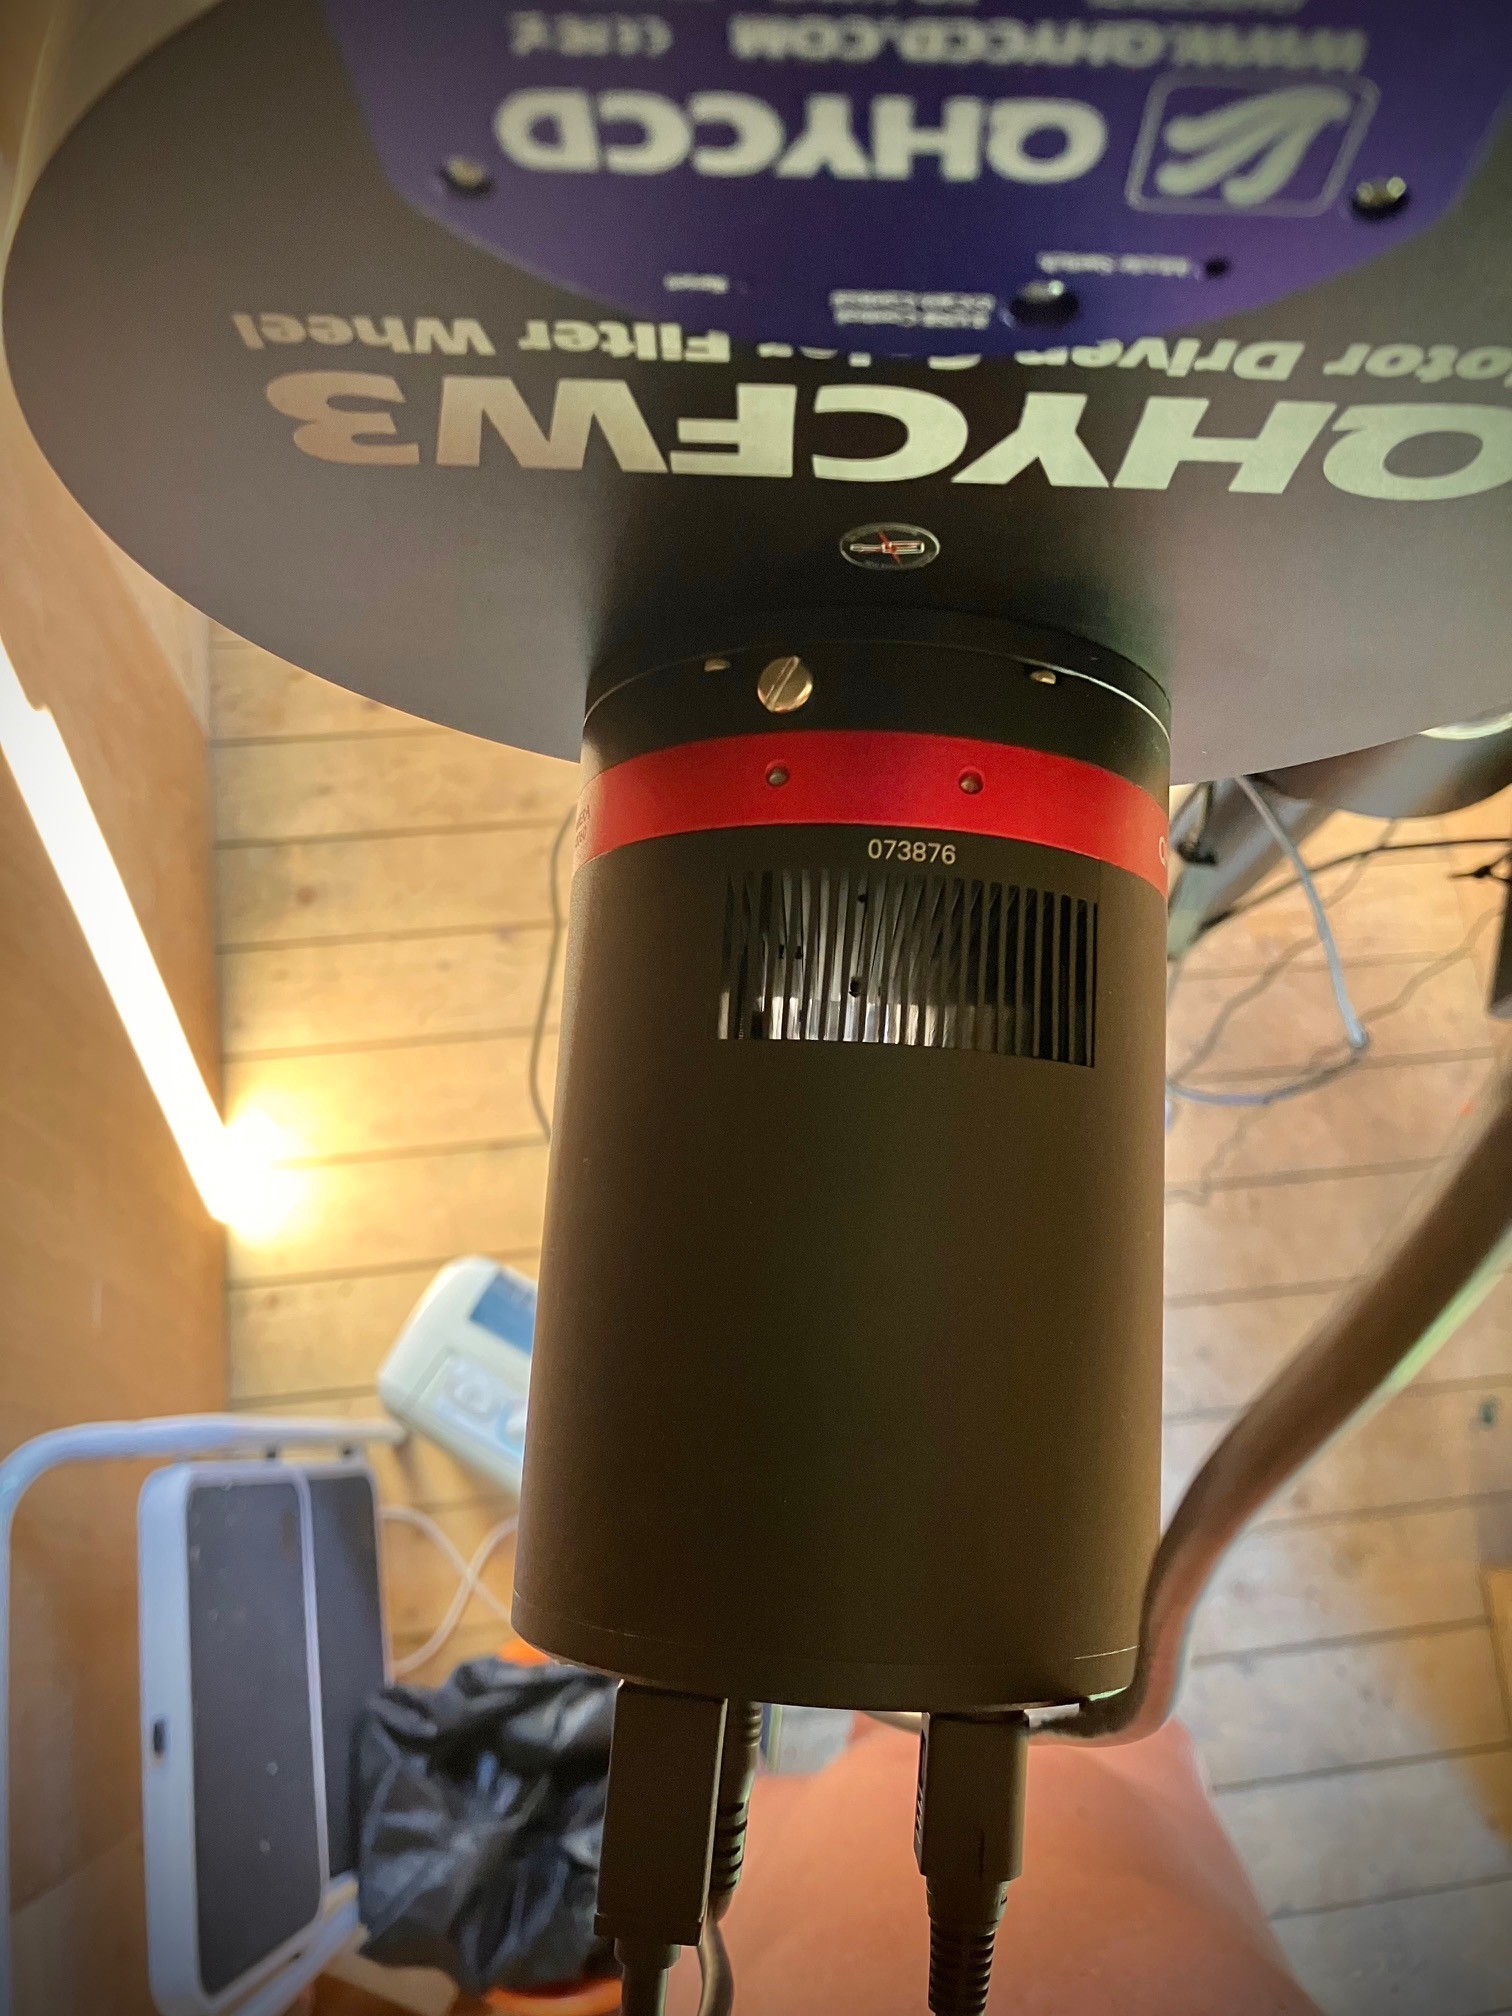
Robert Just taken a few images of my QHY600 in the Obs. Mine is the SBFL. Originally I got installed it upside down, well 180° plate solve To summarise, for 0° plate solve the QHYCCD logo is the 'top' in landscape mode. Also the Chrome dessicant screw is upper. EFW port is to the left. Hope this helps :-) Nigel 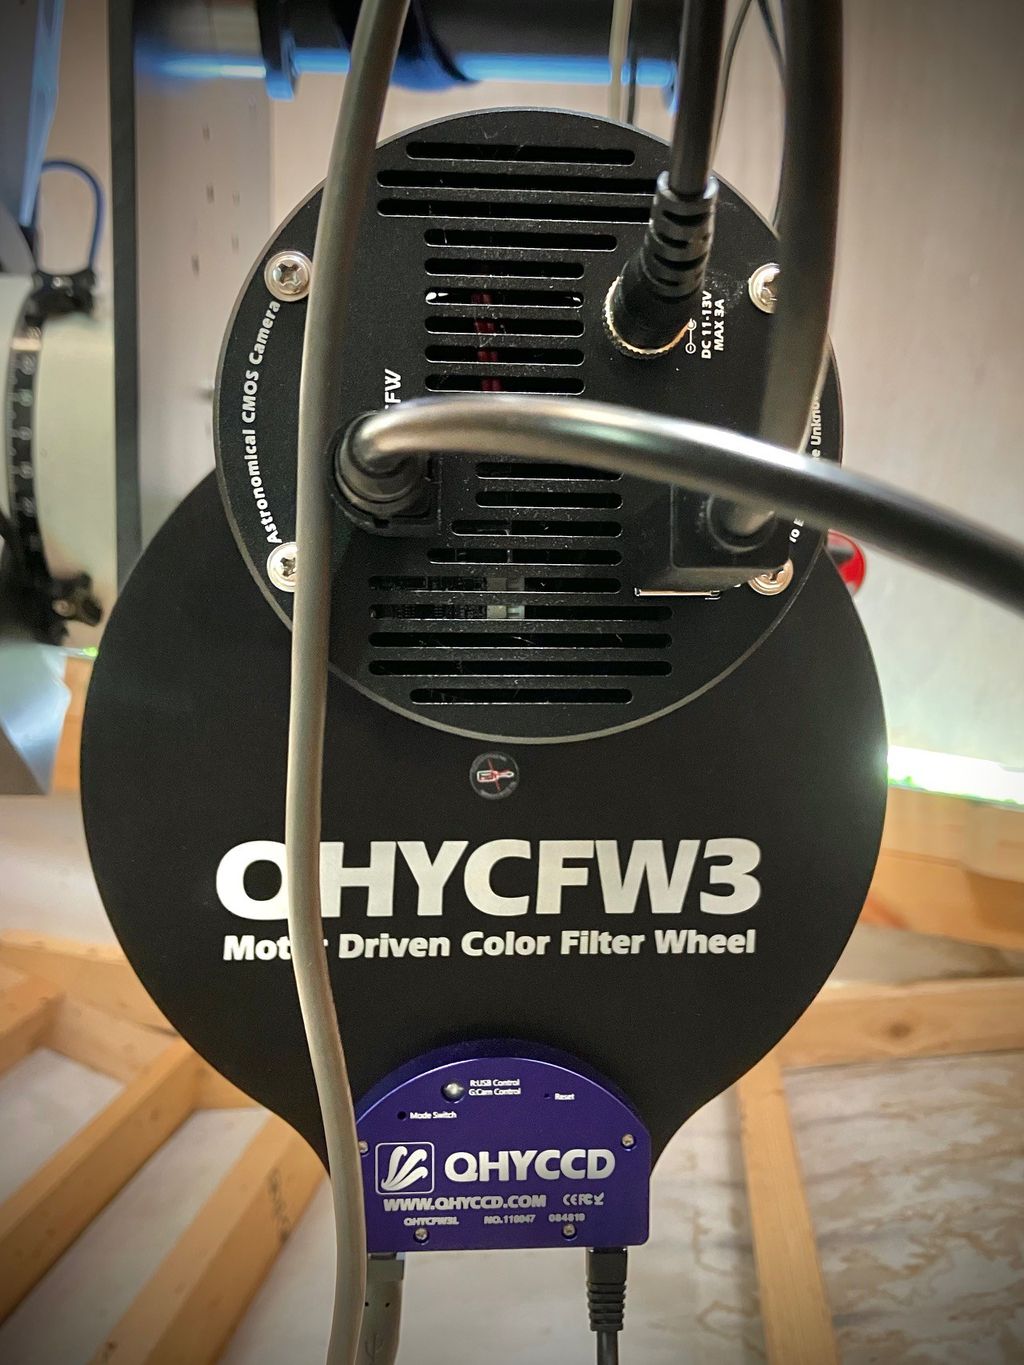 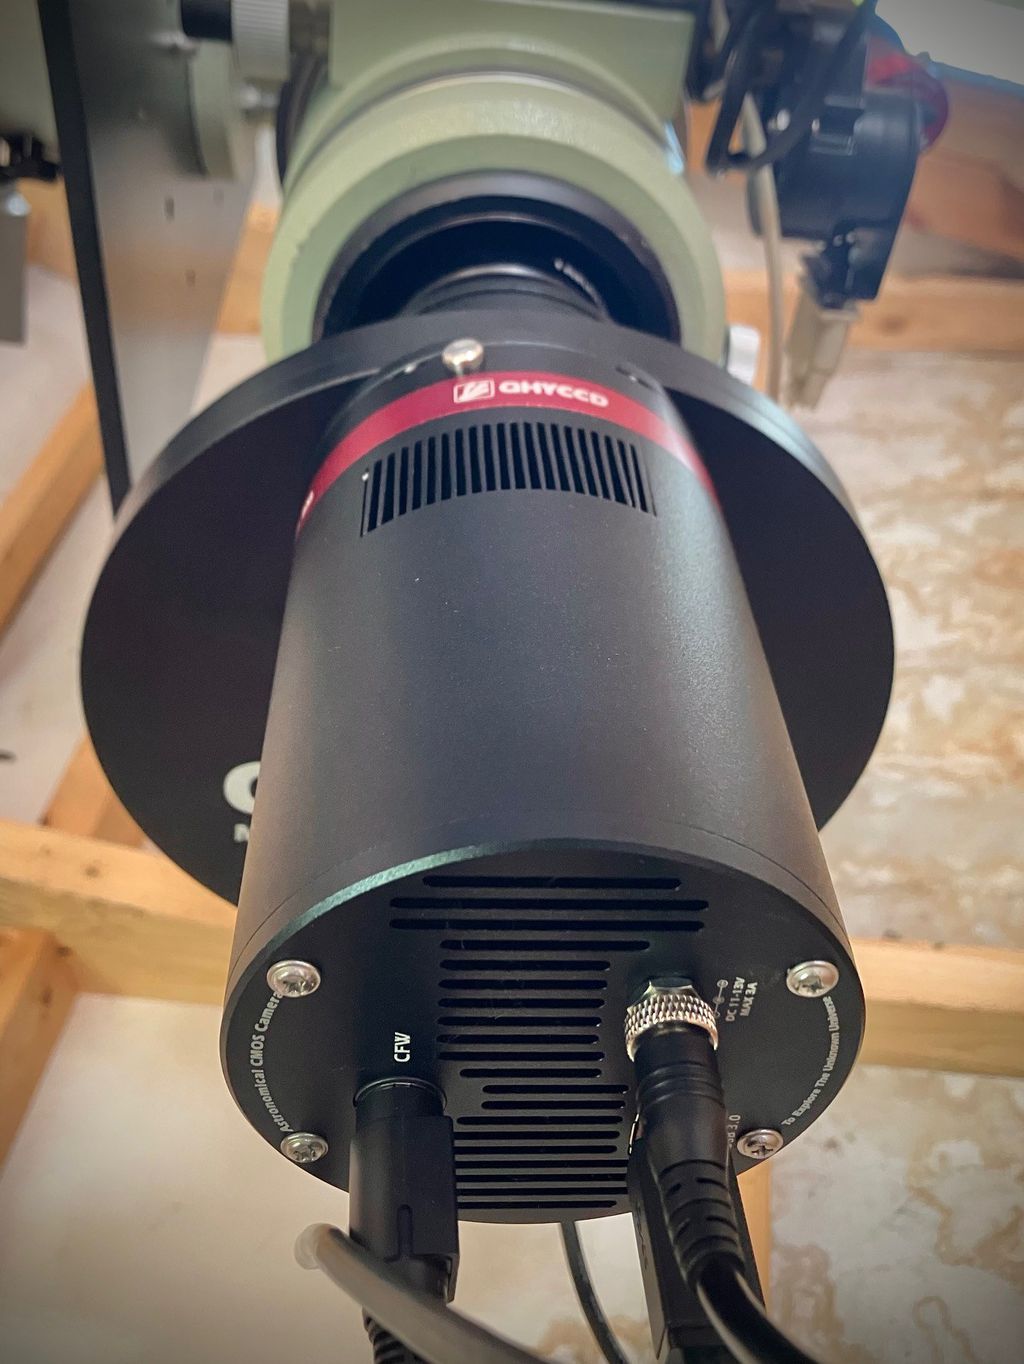  |
You cannot like this item. Reason: "ANONYMOUS".
You cannot remove your like from this item.
Editing a post is only allowed within 24 hours after creating it.
You cannot Like this post because the topic is closed.
Copy the URL below to share a direct link to this post.
This post cannot be edited using the classic forums editor.
To edit this post, please enable the "New forums experience" in your settings.
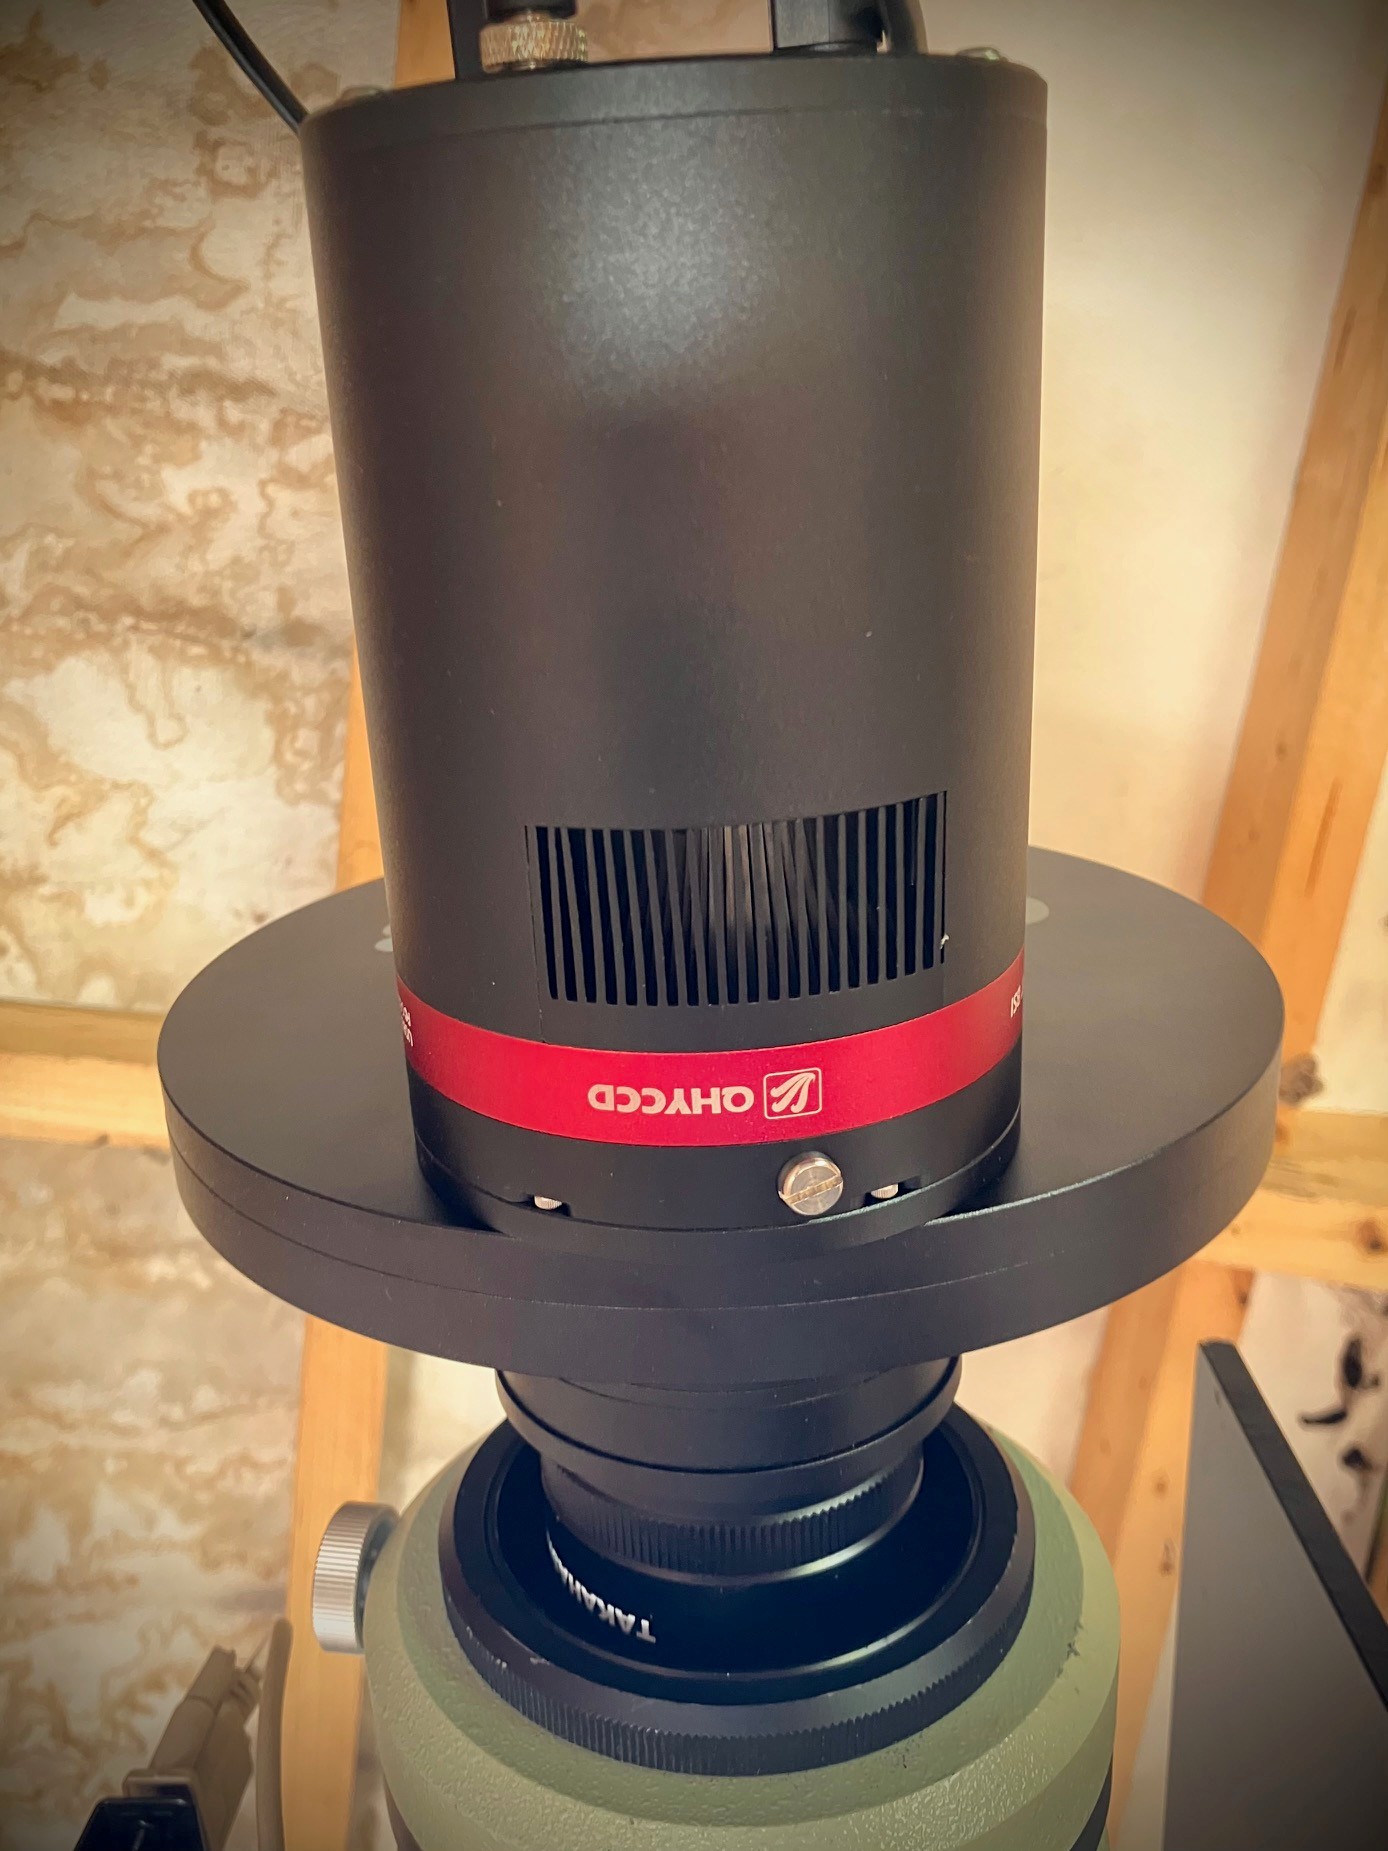
Thanks for the pics, Nigel! I also have a SBFL, but my camera has an inverted appearance compared to yours. I’m guessing that QHYCCD changed the orientation of the housing at some point. I believe mine is upside down. This photo is looking from the “bottom” and I think it needs to be rotated to the “top”.  I’m going to reinstall it rotated 180°, with the screw for the desiccant port facing “up”. This will put the CFW port on the right side (when looking from the back), and the serial number “up”. I’ll the plate solve and see if I get 0°. CS, Robert
|
You cannot like this item. Reason: "ANONYMOUS".
You cannot remove your like from this item.
Editing a post is only allowed within 24 hours after creating it.
You cannot Like this post because the topic is closed.
Copy the URL below to share a direct link to this post.
This post cannot be edited using the classic forums editor.
To edit this post, please enable the "New forums experience" in your settings.
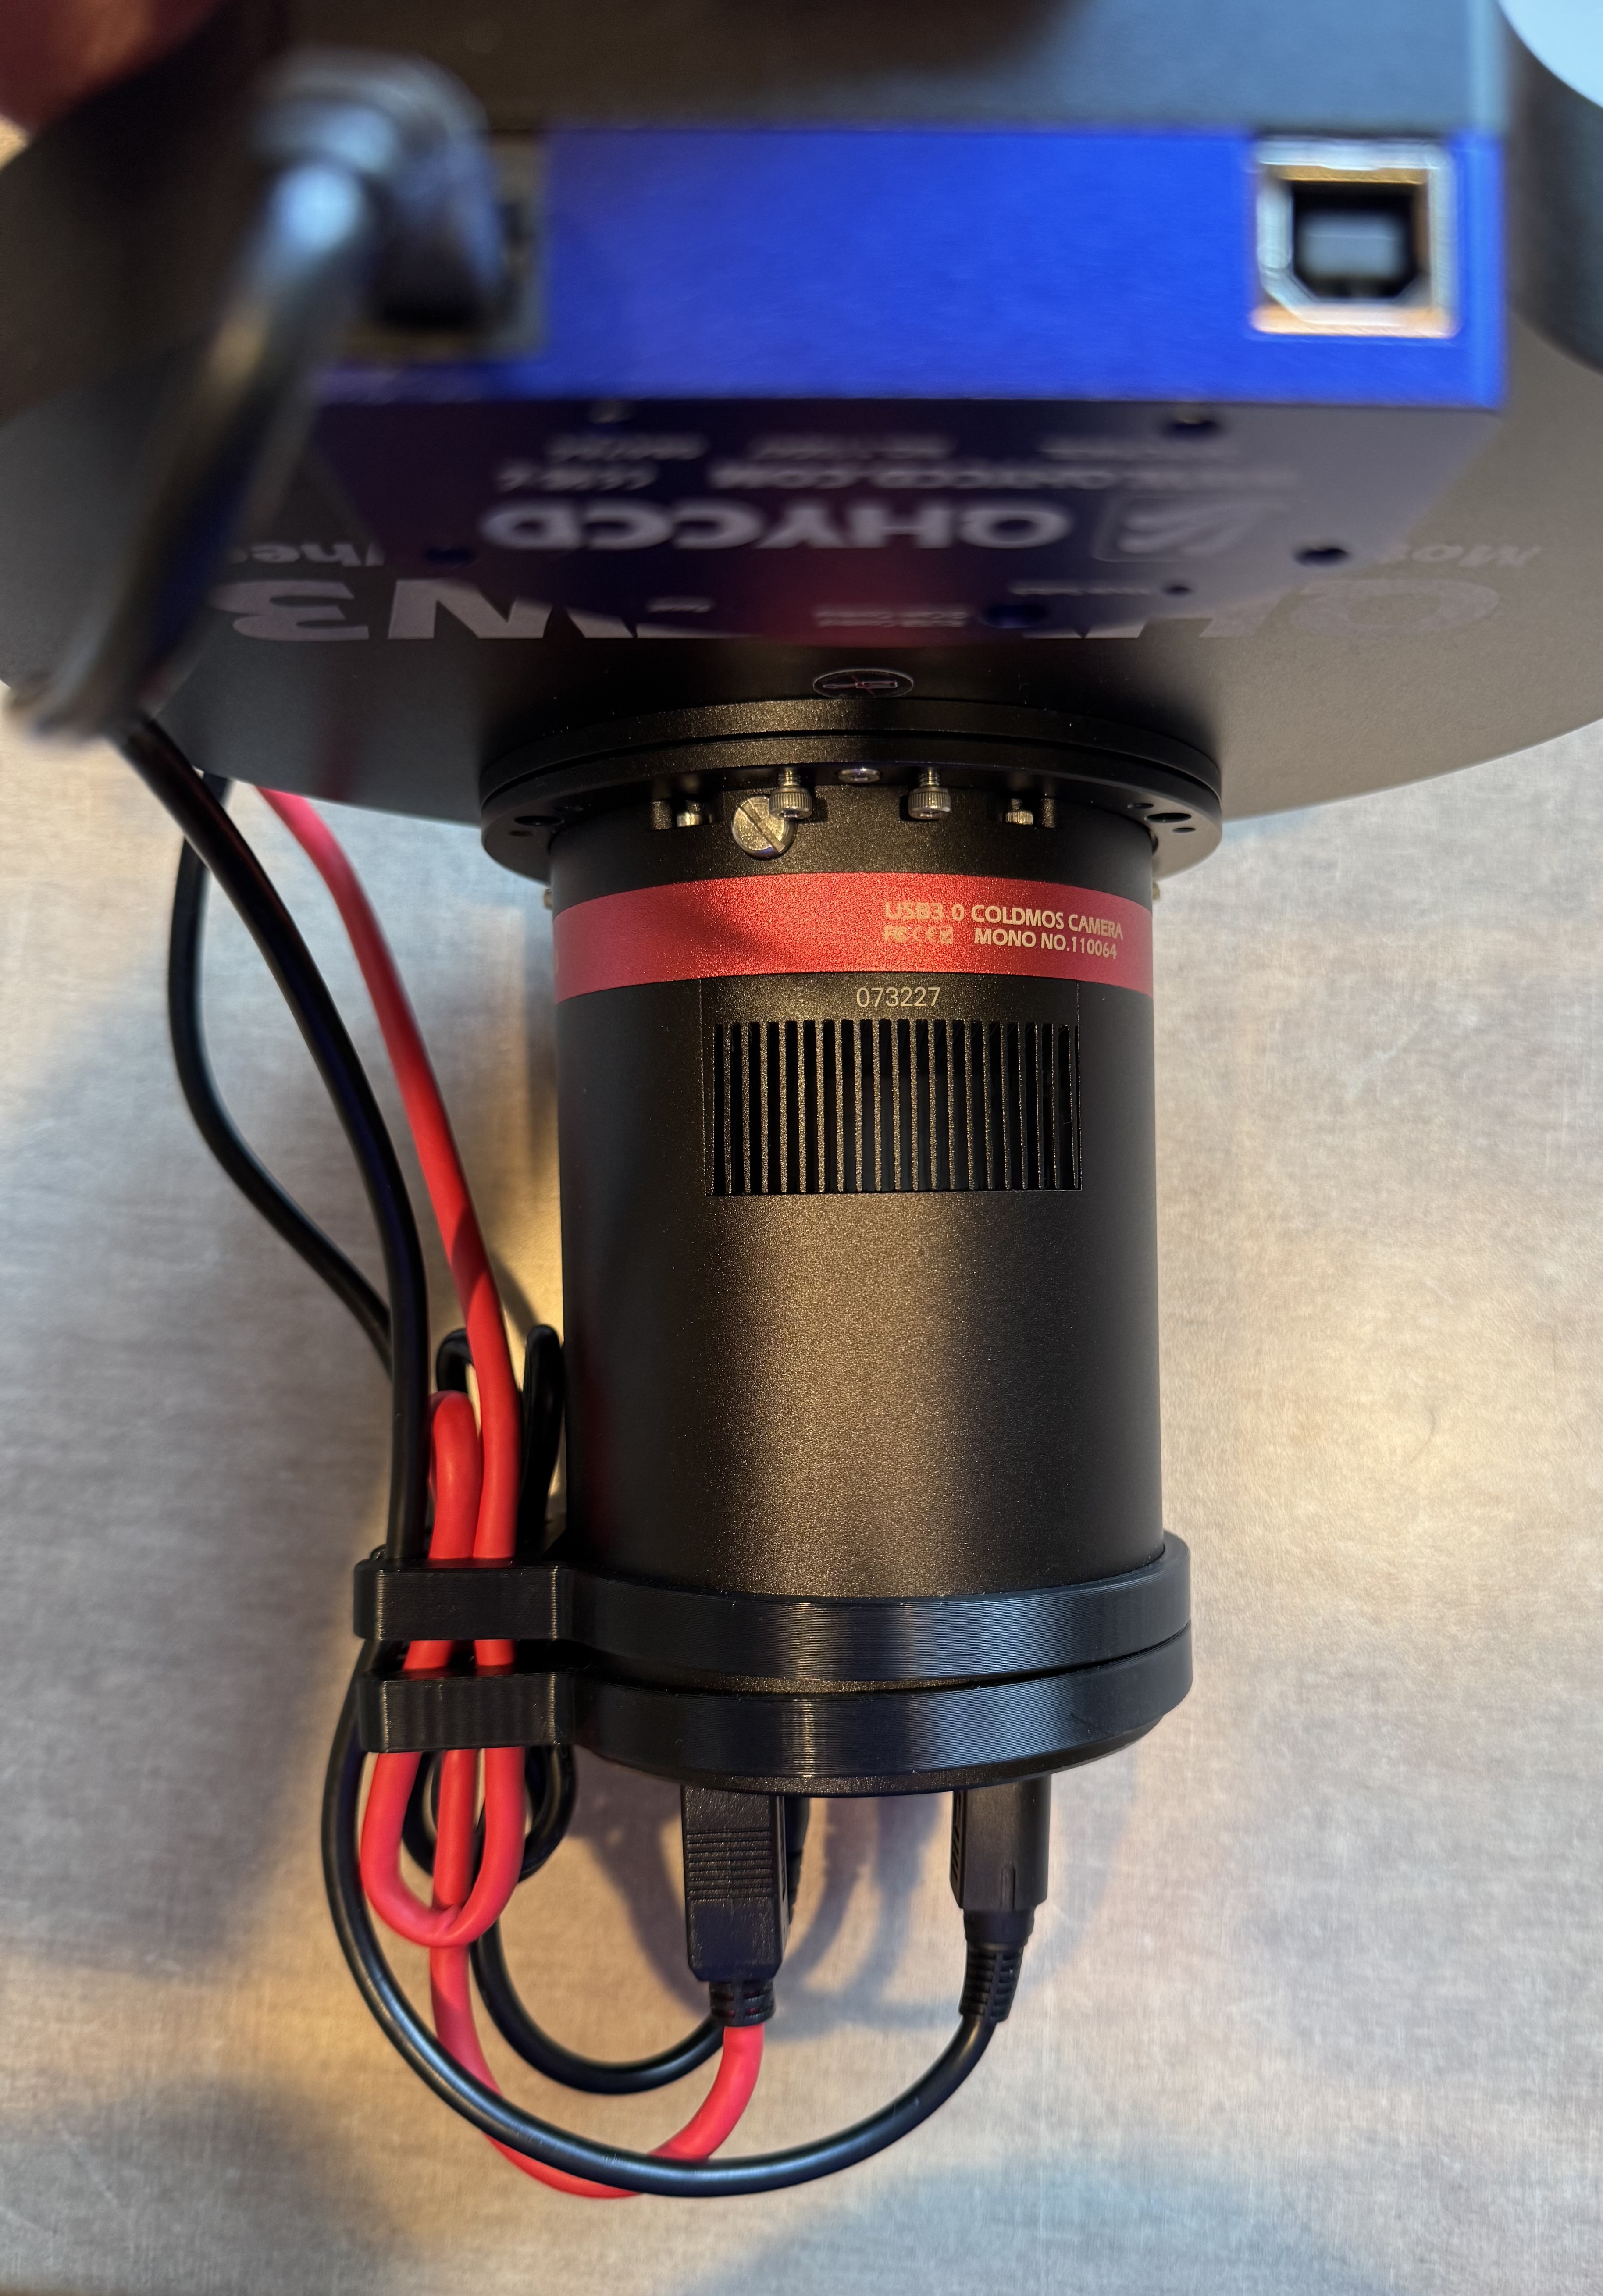
My pleasure Robert, glad to help :-)
Here's a photo of the 'underside' of my camera for completion
|
You cannot like this item. Reason: "ANONYMOUS".
You cannot remove your like from this item.
Editing a post is only allowed within 24 hours after creating it.
You cannot Like this post because the topic is closed.
Copy the URL below to share a direct link to this post.
This post cannot be edited using the classic forums editor.
To edit this post, please enable the "New forums experience" in your settings.
Nigel A Ball:
My pleasure Robert, glad to help :-)
Here's a photo of the 'underside' of my camera for completion Nigel, do images plate solve correctly in that configuration? If so, then I’ll leave mine set as is (which is how yours is in the above photo). I think what’s been confusing me is that my camera has one screw for the desiccant tube (adjacent to the serial number), and yours has two. Plate solving an image would tell me right away, but it’s been so cloudy here I haven’t had a chance.
|
You cannot like this item. Reason: "ANONYMOUS".
You cannot remove your like from this item.
Editing a post is only allowed within 24 hours after creating it.
You cannot Like this post because the topic is closed.
Copy the URL below to share a direct link to this post.
This post cannot be edited using the classic forums editor.
To edit this post, please enable the "New forums experience" in your settings.
Robert Lowenthal:
Nigel A Ball:
My pleasure Robert, glad to help :-)
Here's a photo of the 'underside' of my camera for completion
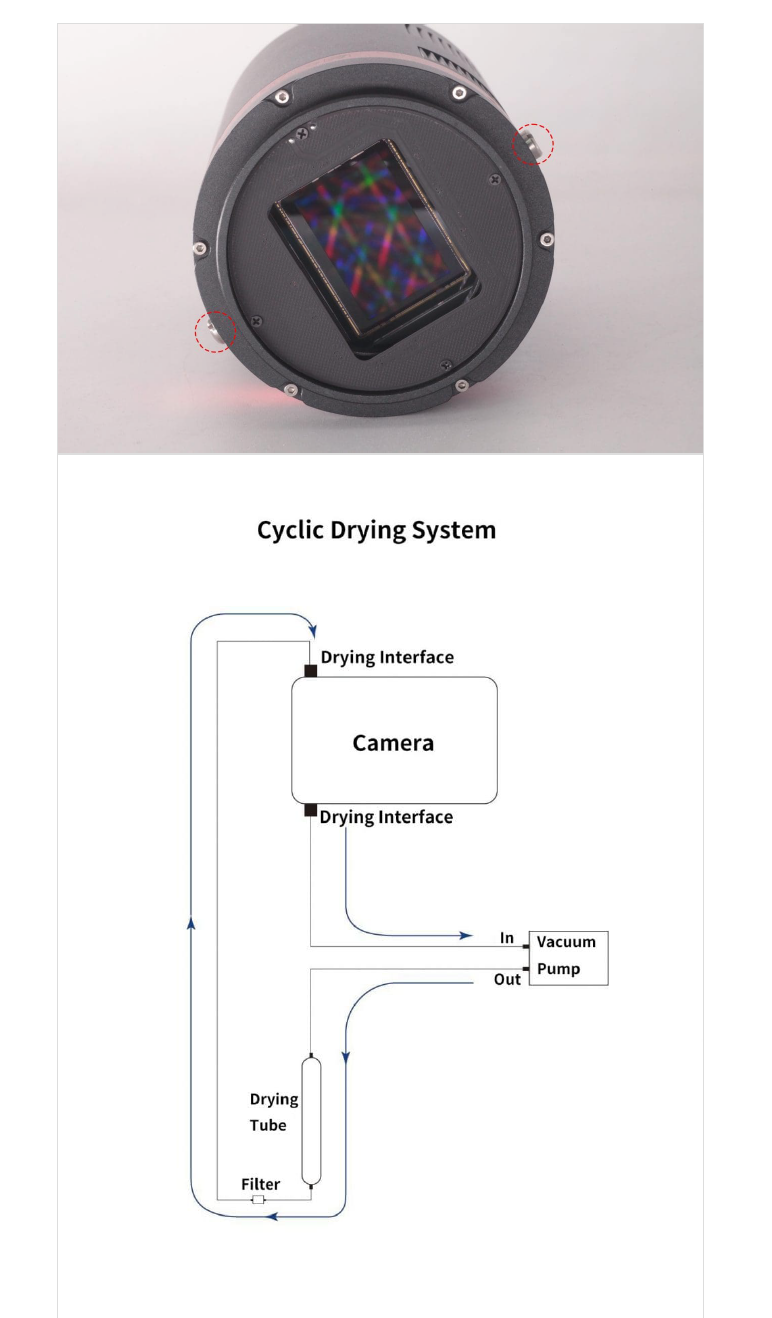
Nigel, do images plate solve correctly in that configuration? If so, then I’ll leave mine set as is (which is how yours is in the above photo). I think what’s been confusing me is that my camera has one screw for the desiccant tube (adjacent to the serial number), and yours has two. Plate solving an image would tell me right away, but it’s been so cloudy here I haven’t had a chance. Yes, the configuration in the last image solved at 0.39° on NGC7000 last night. Looks like you might be okay :-) There are two holes to allow for cyclic drying of the chamber - see extract from QHY website below on 'Maintenance of QHY600'  |
You cannot like this item. Reason: "ANONYMOUS".
You cannot remove your like from this item.
Editing a post is only allowed within 24 hours after creating it.
You cannot Like this post because the topic is closed.
Copy the URL below to share a direct link to this post.
This post cannot be edited using the classic forums editor.
To edit this post, please enable the "New forums experience" in your settings.
I think that’s the newer model with the “high window”. I have the “low window” model and it only has one desiccant port.
|
You cannot like this item. Reason: "ANONYMOUS".
You cannot remove your like from this item.
Editing a post is only allowed within 24 hours after creating it.
You cannot Like this post because the topic is closed.
Copy the URL below to share a direct link to this post.
This post cannot be edited using the classic forums editor.
To edit this post, please enable the "New forums experience" in your settings.
My 600M SBFL has the sensor top lined up to the serial no. print on the housing. It's a model from the last year, I believe. I have mounted it intuitive with filter wheel motor on the same side of serial no. like the pictures above. Therefore, my OAG in front of the filter wheel is oriented “underneath” of the sensor and not on top what would be expected just looking on the combo from the front. I noticed this during adjustment of the OAG shadow on the sensor image, suprisingly the shadow showed up at bottom of the image.
It's a QHY general disease with the documentation and they are tons of needless things printed on this cam's, but not important staff where is the sensor top and the sensor surface position for mounting purposes. Such a pity. If you want to be sure just test on daytime and don’t forget that images are up-side-down in a lens or two mirror systems…
|
You cannot like this item. Reason: "ANONYMOUS".
You cannot remove your like from this item.
Editing a post is only allowed within 24 hours after creating it.
You cannot Like this post because the topic is closed.
Copy the URL below to share a direct link to this post.
This post cannot be edited using the classic forums editor.
To edit this post, please enable the "New forums experience" in your settings.