Hey everyone,
I’ve recently built a Todmorden pier in my back garden and thought I’d share the process with anybody looking to do the same. Keep in mind that there are multiple approaches to building a pier, so feel free to modify any aspects to suit your needs.
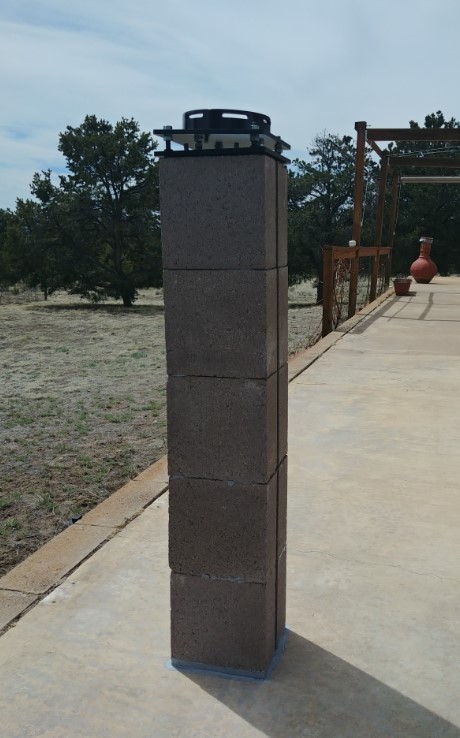
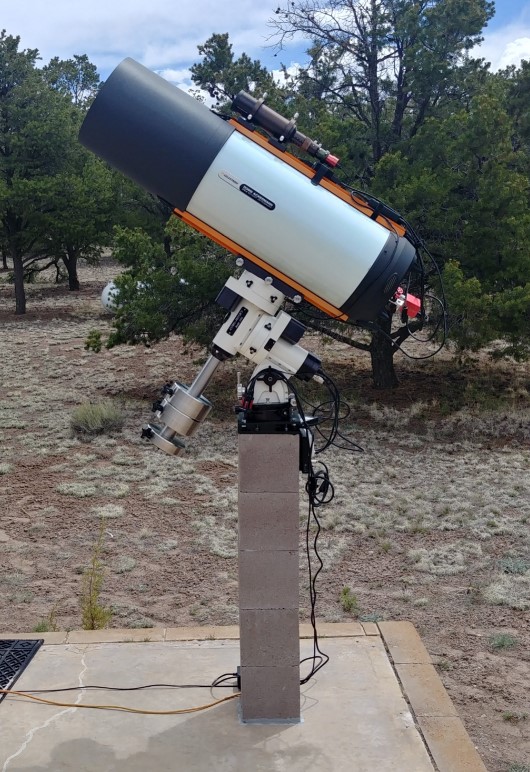
This pier is very sturdy and easily holds my HEQ5 Pro & SW 130PDS with no issues, and it could hold much more, such as an EQ6-R Pro or equivalent.
I have to give some credit to @AstroStace for advice on the concrete blocks as I didn’t know what I needed initially. This pier is based on her build and this forum post was a big help in getting everything put together.
Equipment List
Here is a list of the equipment I purchased for the pier. This doesn’t include things like power tools as I’m assuming you’ll already have these. Please note the prices below are reflective of the time of writing and may change.
- 2 x 215mm Concrete Block - £5.09 each
[url]https://www.travisperkins.co.uk/215mm-blocks/hollow-dense-concrete-block-7-3n-21 5mm/p/988088[/url]
- 3 x 20kg Bags Postcrete (ready-mixed concrete) - £6.09 per bag
https://www.wickes.co.uk/Blue-Circle-Ready-To-Use-Postcrete---20kg/p/221100
- 1m Threaded M10 Rod - £3.12
https://www.toolstation.com/threaded-bar/p86206
- 4 x M8 Socketed Concrete Anchor Bolts - £0.60 each with £12 shipping
https://www.orbitalfasteners.co.uk/products/m6-concrete-anchor-ankerbolt-socket-bolt-m8-thread
- M10 Washers - £4.50
https://www.wickes.co.uk/Wickes-Flat-Square-Washers-M10-Pack-Of-10/p/230970
- M8 Washers - £3.99
https://www.toolstation.com/stainless-steel-washer/p30258
- M10 Nuts - £3.09
https://www.toolstation.com/hexagon-steel-nut/p94238
- Evo-Stik Ultimate Adhesive - £16.50
https://shorturl.at/awAD1 (Amazon)
- Pier Adapter - £87.15 inc. Shipping
https://www.altairastro.com/skywatcher-celestron--ioptron-pier-adapter-442-p.asp
- 4 x M8 Socket Cap Screws (included with pier adapter) - £9.00
https://shorturl.at/dmCKM (Amazon)
- 40mm M10 Threaded Rod - £7.69
https://www.amazon.co.uk/dp/B09L6912QD?psc=1&ref=ppx_yo2ov_dt_b_product_details
- Telegizmos T309 8 - 9" Fork Mounted SCT Cover - £76.95 inc. Shipping
https://www.rothervalleyoptics.co.uk/telegizmos-365-series-telescope-covers.html
Price
The pier materials cost around £82.00 in total inc. VAT.
Including the pier adapter and cover, the total cost was around £250.00 (including the various shipping costs to myself in the UK).
These two components are the most expensive parts of the whole build and can be substituted for cheaper alternatives, such as a DIY adapter if you have the means to make one. In my case, I found it easier to simply purchase the adapter with the holes pre-drilled.
The Build Process
Step 1. Dig a hole
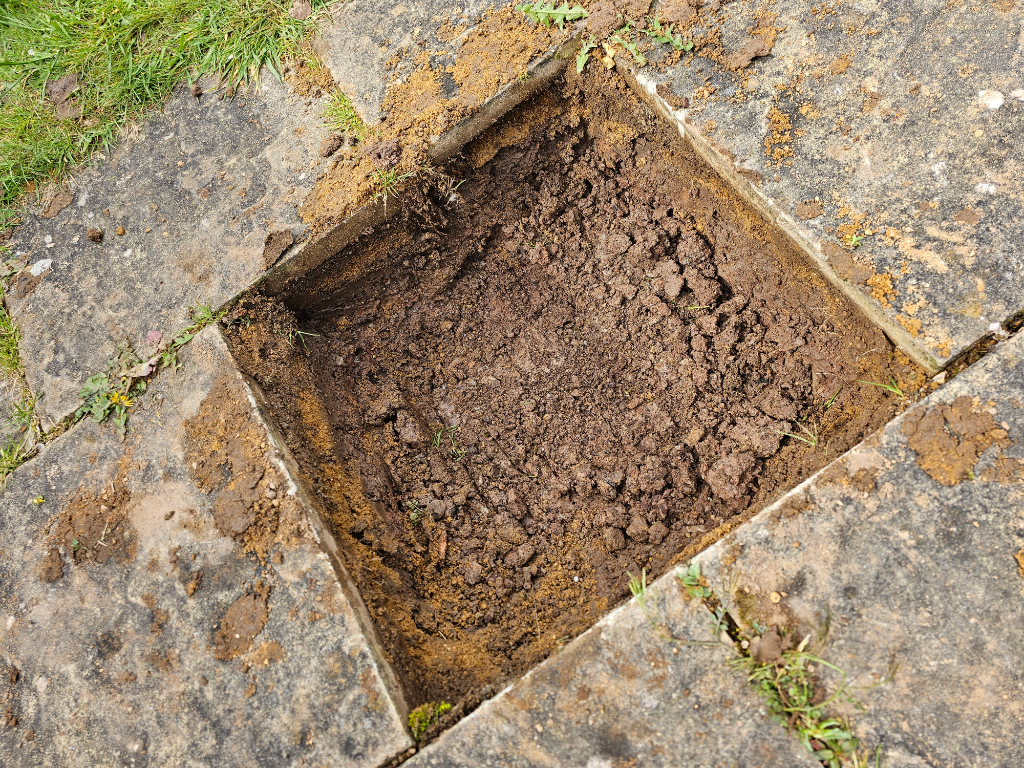
I have a slabbed section of my garden where I usually sit my telescope. I removed a slab where it usually sits to place the pier and dug about 400mm deep. I would have dug a bit deeper but I hit some solid clay. Even at this depth, the pier isn’t going anywhere.
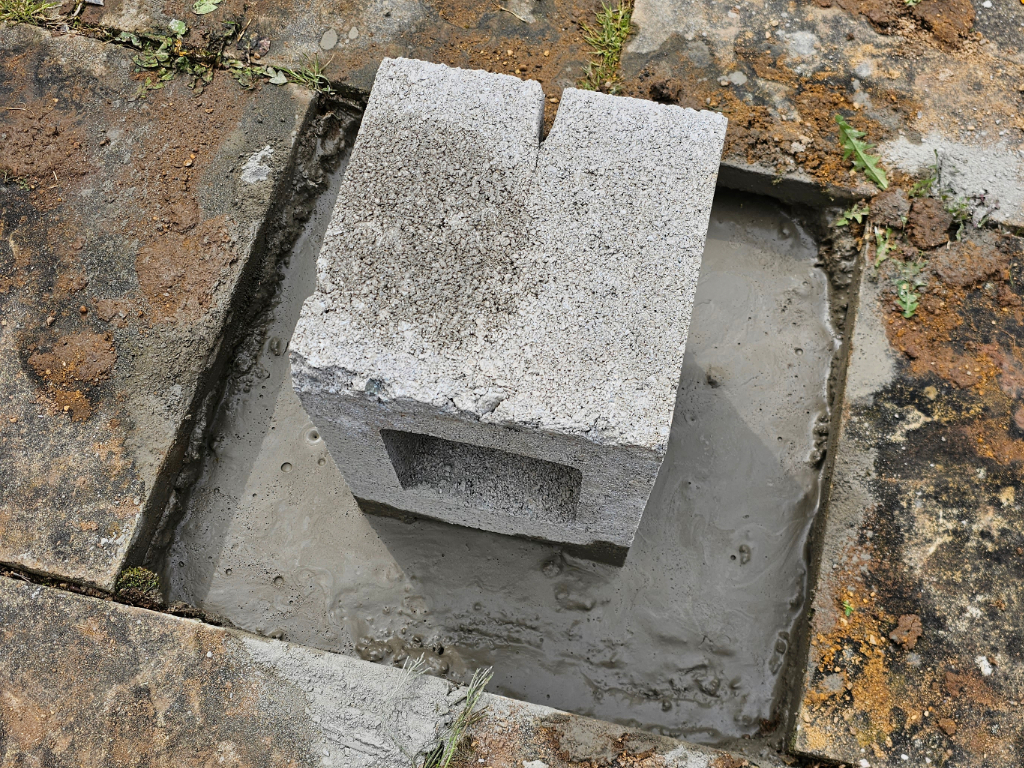
Step 2. Insert foundation block anchor rods
I drilled a hole horizontally through the foundation block to route some M8 1m threaded rods through. This would act as extra support in the concrete.
Step 3. Place the foundation block and concrete
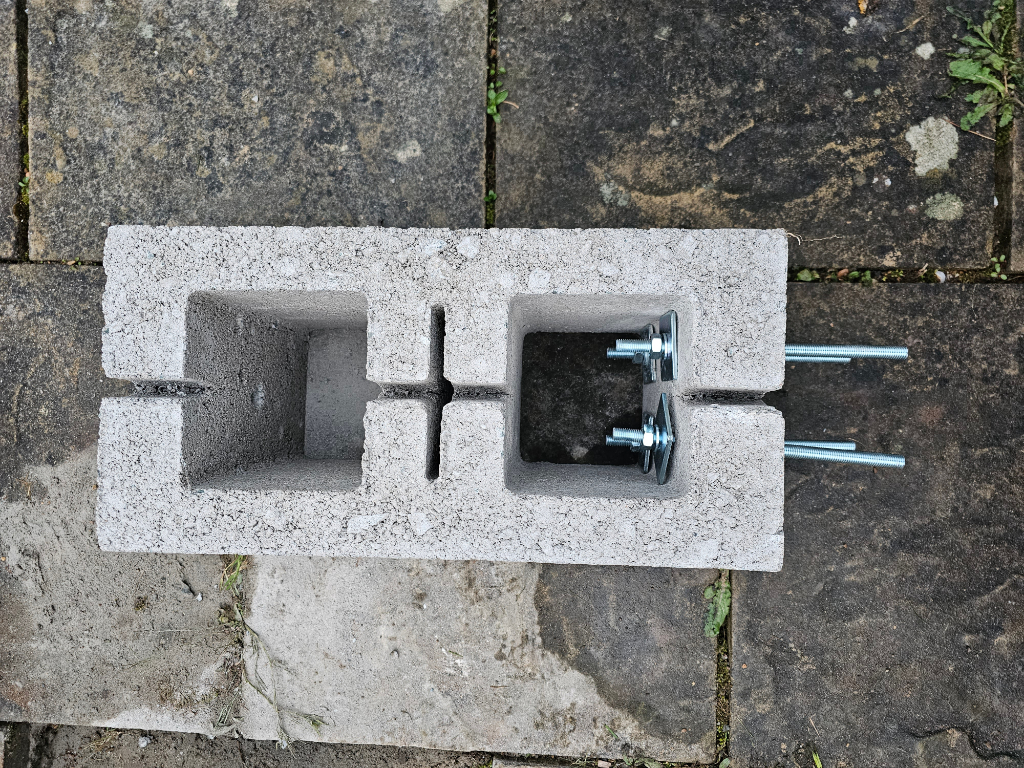
Step 4. Drill connecting holes in the blocks.
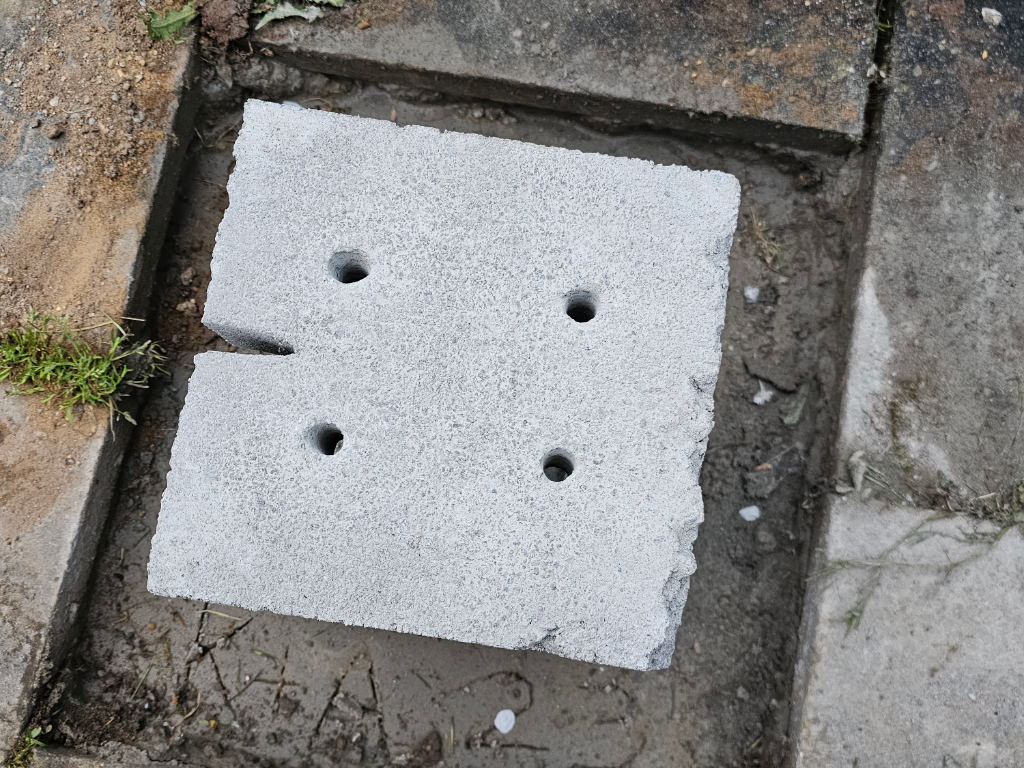
Please ensure you mirror the holes when drilling into the blocks as once they are stacked, they won’t line up if you simply copy the placement like for like.
I measured the distance of the holes as accurately as I could but there was some slippage when drilling which led to one of the holes being slightly out. To ensure the second block lined up, I laid a piece of paper on the foundation block, poked through where the holes were and stuck this to the second block, ensuring the paper was flipped to the other side, and used it as a template.
Step 5. Drilling the holes for the pier adapter
For the anchor bolts, I found a 6mm Masonry screw offered the best fit.
Step 6. Cutting the threaded rod to size
I purchased a 1m length of M10 threaded rod as it was cheaper than buying pre-cut rod. I cut this into 5 x 200mm lengths. This was to be used to connect the two blocks together, and to fix the mount head in place. The HEQ5 uses M10 thread, but check your mount as this could differ.
Step 7. Connecting the concrete blocks
In addition to clamping the blocks with the rod & nuts, I applied a generous amount of the Evo-Stik glue for some extra bonding. This glue is incredibly strong once set and is weatherproof.
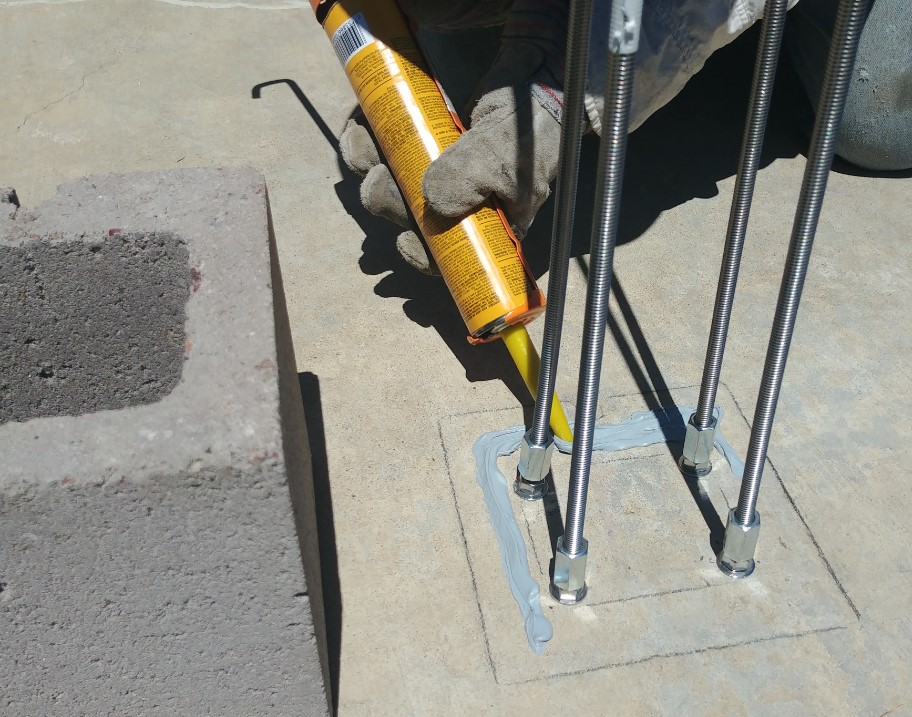
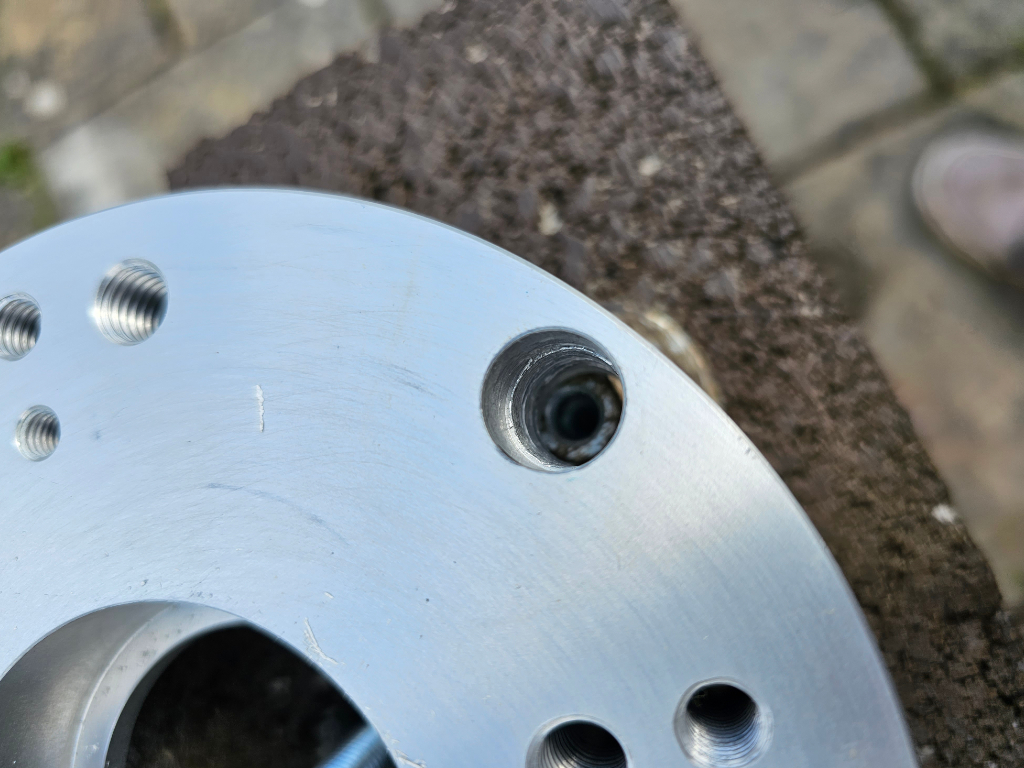
Step 8. Attaching the pier adapter
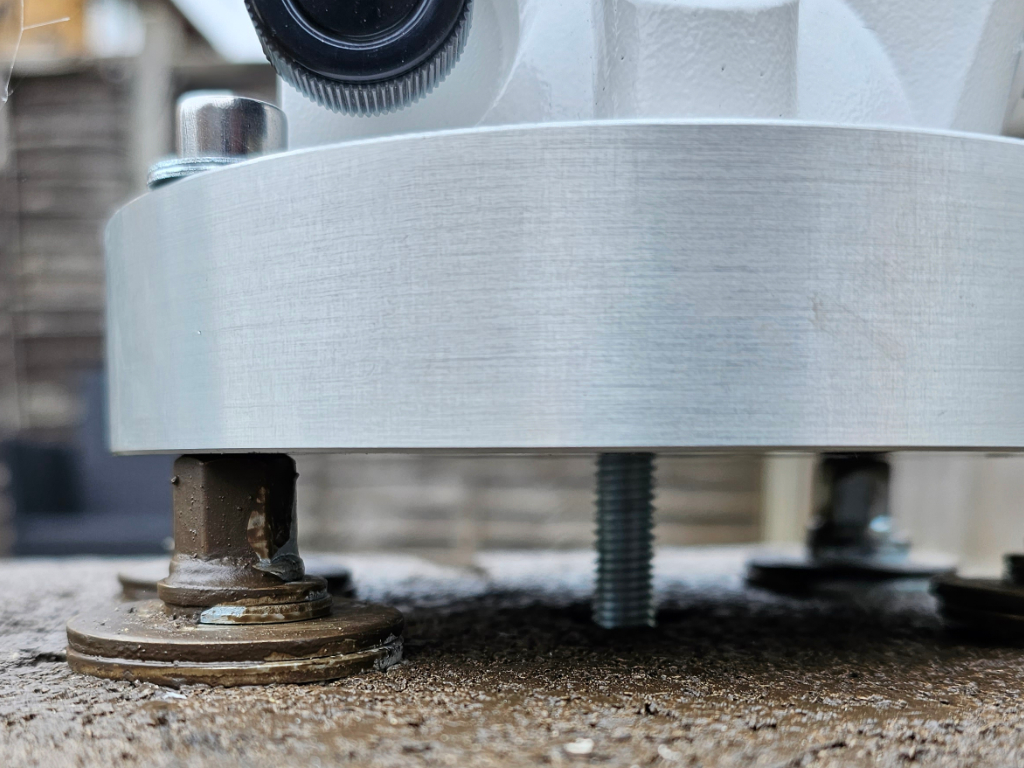
Before screwing in the anchor bolts I added a bit of Evo-Stik to ensure they will stay in place and to fill in any small cracks.
Unfortunately, the holes in the block were slightly out of alignment so I had to mill the holes in the adapter in order to give it some more wiggle room. This meant the socket screws no longer fit snug in the adapter, but with some m8 washers they could still be used with the socket head exposed. If you do a better job of aligning everything you won’t have to do this!
Step 9. Attach the mount
With all the above complete it’s time to attach the mount. I used a 40mm piece of M10 rod to screw into the top of the adapter for the AZ adjustment, and the remaining piece of 200mm M10 rod to screw into the bottom of the mount, held in place with a large washer & nut.
Pier complete!

You can paint the pier too like I did to add some additional weatherproofing.
This took me about a week to complete in-between work and the rainy English weather but it can be easily completed in a single weekend.
I hope this helps if you’re looking to build an affordable pier. If you have any questions please just give me a shout.
Thanks,
Kieran