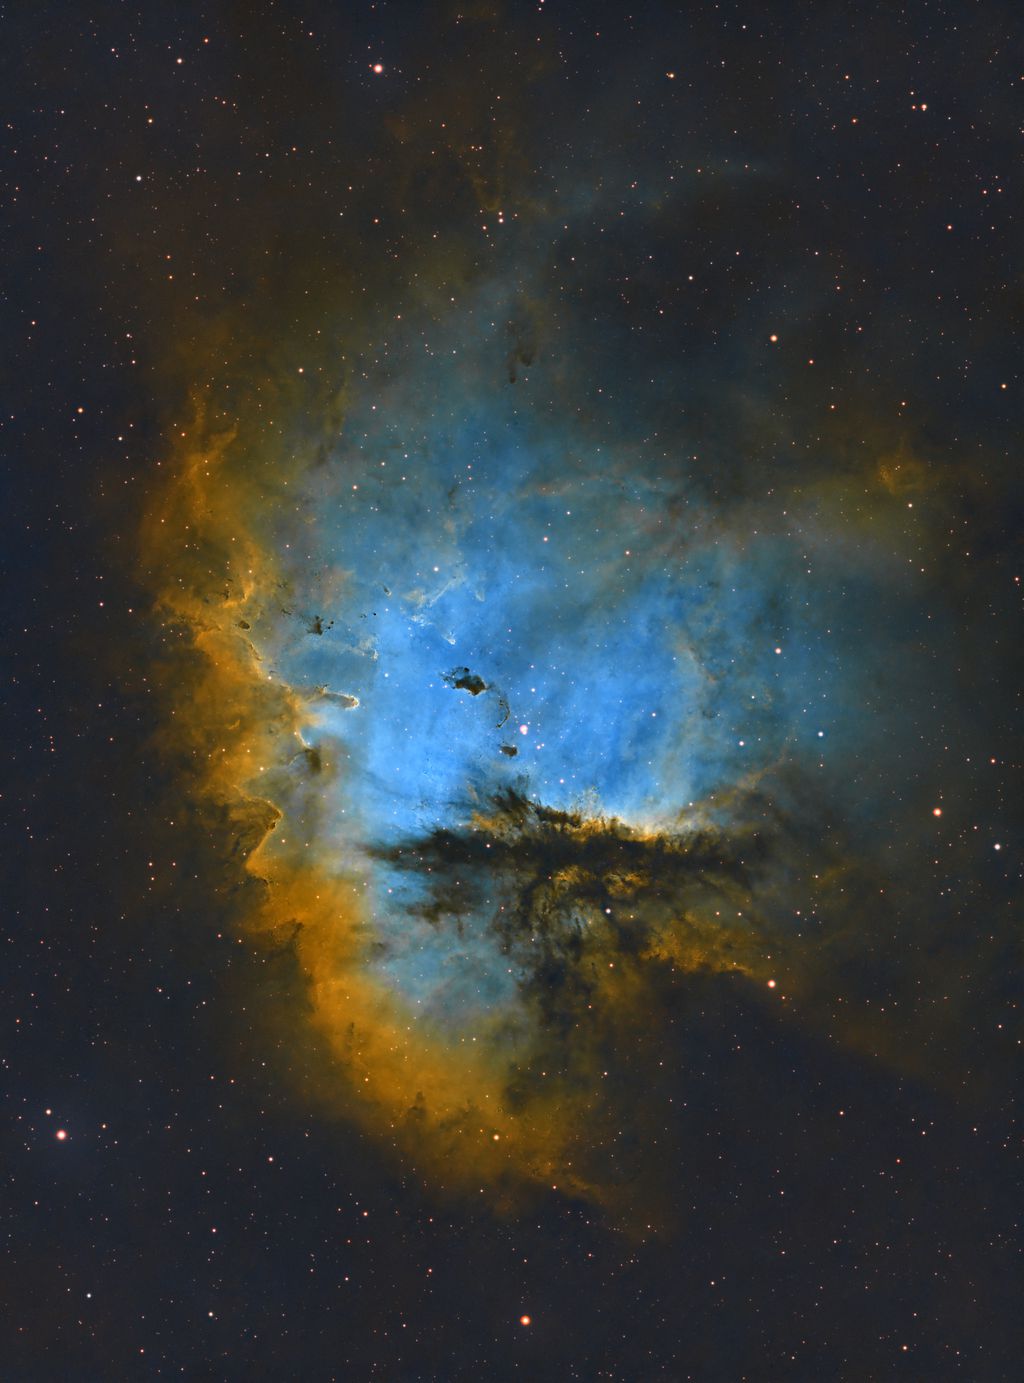
I'm offering up 3 Tiffs of the Pacman nebula roughly 17 hours of data and time! Why? because I think I've reached a point where my processing skills arent getting me the results I'd like, and I think from the data there should be more to get. So, I give it to you to do your best and show me what I might be missing. I ve stacked the tiff files in DSS, roughly 5 hours of each filter, Ha, Oiii, Sii, with darks, flats, bias frames, I have only performed a star align and saved from pixinsight as a standard tif, any difficulty let me know, they are located on my Drive Here: https://drive.google.com/drive/folders/1Z9jy_4IshEHXLY6nncD6H5fdI7nPQSVF?usp=sharingplease post your results either in the Forum or on your own astrobin page referencing me. Thank you! Richard Taken with an asi1600gt and a WO FLT132, astrodon filters from a bortle 5, heres the link to my version of the pacman, look forward to critique! https://www.astrobin.com/thz931/ |
You cannot like this item. Reason: "ANONYMOUS".
You cannot remove your like from this item.
Editing a post is only allowed within 24 hours after creating it.
You cannot Like this post because the topic is closed.
Copy the URL below to share a direct link to this post.
This post cannot be edited using the classic forums editor.
To edit this post, please enable the "New forums experience" in your settings.
I took a quick run at this using my normal SHO workflow. Nice dataset to work with. I might go for a bit more data to clean up the noise but certainly on the right track. Thanks for sharing the data.  |
You cannot like this item. Reason: "ANONYMOUS".
You cannot remove your like from this item.
Editing a post is only allowed within 24 hours after creating it.
You cannot Like this post because the topic is closed.
Copy the URL below to share a direct link to this post.
This post cannot be edited using the classic forums editor.
To edit this post, please enable the "New forums experience" in your settings.
Dowloaded ! I'll give it a try !  jb
|
You cannot like this item. Reason: "ANONYMOUS".
You cannot remove your like from this item.
Editing a post is only allowed within 24 hours after creating it.
You cannot Like this post because the topic is closed.
Copy the URL below to share a direct link to this post.
This post cannot be edited using the classic forums editor.
To edit this post, please enable the "New forums experience" in your settings.
Hi Richard: I didn't spend a ton of time on this, but I wanted to give you some feedback. First, I personally feel that narrow band stars should be white. The color is never going to be accurate with NB, so my opinion is, remove it. I use a tonemap technique where the color data from the 3 channels is separated from the stars and the detail. Colors are processed then the detail and stars are added back by applying a synthetic L layer (which is primarily from the Ha). My result is shown below. Again, I did this quickly (30 minutes or so), so the results could be improved if you wanted to spend more time on it. I just wanted to give you an idea of the direction that I take. I have saved the entire PI project. If you are interested in it (or anyone else) please let me know and I'll gladly share it. Thanks for sharing the data. I'm happy to give you as much information about how I approach this as you want, if you are interested. Tim.  |
You cannot like this item. Reason: "ANONYMOUS".
You cannot remove your like from this item.
Editing a post is only allowed within 24 hours after creating it.
You cannot Like this post because the topic is closed.
Copy the URL below to share a direct link to this post.
This post cannot be edited using the classic forums editor.
To edit this post, please enable the "New forums experience" in your settings.
Thanks for the data! Here is what I did with it. Yes, I am aware that if pixel peeped some of the stars are not exactly great looking.  |
You cannot like this item. Reason: "ANONYMOUS".
You cannot remove your like from this item.
Editing a post is only allowed within 24 hours after creating it.
You cannot Like this post because the topic is closed.
Copy the URL below to share a direct link to this post.
This post cannot be edited using the classic forums editor.
To edit this post, please enable the "New forums experience" in your settings.
Awesome! keep them coming! There are certainly some sharpening tips I could @Tim HutchisonLove the different approaches to color too! I ve just uploaded a more traditional version of my picture today with a bit more work on stars, although they kind of turned out diamonds...more practice needed! 
NGC 281 Pacman |
You cannot like this item. Reason: "ANONYMOUS".
You cannot remove your like from this item.
Editing a post is only allowed within 24 hours after creating it.
You cannot Like this post because the topic is closed.
Copy the URL below to share a direct link to this post.
This post cannot be edited using the classic forums editor.
To edit this post, please enable the "New forums experience" in your settings.
Tim Hutchison:
Hi Richard:
I didn't spend a ton of time on this, but I wanted to give you some feedback. First, I personally feel that narrow band stars should be white. The color is never going to be accurate with NB, so my opinion is, remove it.
I use a tonemap technique where the color data from the 3 channels is separated from the stars and the detail. Colors are processed then the detail and stars are added back by applying a synthetic L layer (which is primarily from the Ha). My result is shown below. Again, I did this quickly (30 minutes or so), so the results could be improved if you wanted to spend more time on it. I just wanted to give you an idea of the direction that I take.
I have saved the entire PI project. If you are interested in it (or anyone else) please let me know and I'll gladly share it.
Thanks for sharing the data. I'm happy to give you as much information about how I approach this as you want, if you are interested.
Tim.
Really like the purple coming through! and particularly the structure on the far left, this is very faint on my image. Stars look great, would love to know your technique there!
|
You cannot like this item. Reason: "ANONYMOUS".
You cannot remove your like from this item.
Editing a post is only allowed within 24 hours after creating it.
You cannot Like this post because the topic is closed.
Copy the URL below to share a direct link to this post.
This post cannot be edited using the classic forums editor.
To edit this post, please enable the "New forums experience" in your settings.
Here is my attempt! Warning! This is my first narrowband image EVER  ! IMHO the only problem with your data is the framing. Thank you for giving us the opportunity to work with your data set. I should probably put some more work and care to achieve more variation in colors. What do you narrowband guys think?  Clear skies!  |
You cannot like this item. Reason: "ANONYMOUS".
You cannot remove your like from this item.
Editing a post is only allowed within 24 hours after creating it.
You cannot Like this post because the topic is closed.
Copy the URL below to share a direct link to this post.
This post cannot be edited using the classic forums editor.
To edit this post, please enable the "New forums experience" in your settings.
Richard:
would love to know your technique there! Hi Richard: Happy to share. I use a Tone Mapping technique to process my narrow band images. As I briefly said above, the technique involves separating the nebula from the stars so that you can process the colors in the nebula without damaging the stars. When processing the tonemap you are concerned with COLOR and not so much with detail. The important thing to do with the colors is balance them so that you have a contribution from each of the three channels impacting the image. That is where the "reddish" tones in the center of my image come from...having a balanced tone map. One thing you SHOULD NOT DO is make the mistake that I see SOOOOO many imagers (including the so called "experts" on YouTube) make. That mistake is using the SCNR tool to rip out all of the green in the image, then inverting and applying SCNR again to yank out all of the magenta. You absolutely KILL all of the color that is possible in a three channel image. If you want a bi-color image, just shoot 2 channels. If you're shooting 3 channels, WHY kill it??? That never made any sense to me. Eric Coles and I did a presentation on The Astro Imaging Channel that details the entire process. Here is a link to our video: https://www.youtube.com/watch?v=ECavLqDKs0E&t=4243sTo summarize, start in PixInsight and do your typical things to stack your channels. Then combine using ChannelCombination and stretch using an UNLINKED ScreenTransferFunction applied using the HistogramTransformation tool. Remove the stars using StarNet. (Alternately...you could stretch each channel independently, remove the stars from each, then combine all 3 stretched images. And a third approach would be to use StarXTerminator to remove the stars from the linear images, then combine and stretch the starless SHO image. All three are variations on the same theme.) Save the resulting SHO starless image as a TIF and open it in PhotoShop. Use the techniques that Eric demonstrates to balance the colors across the different areas of the nebula (I use his technique, modified slightly for my own style...). When done, save the edited SHO image and return to PixInsight. Use a copy of the Original Ha image and go through the steps that I show for Deconvolution, Stretching, HDRMultiscaleTransform, LocalHistogramEqualization, and Sharpening on the Original Ha image. Extract the luminance from the SHO image and combine with the Original Ha as I show in the video to form your final synthetic luminance layer. Add the luminance to the SHO image and do any final color adjustments (color saturation, contrast, etc.) to finish off the image. Eric's presentation starts around the 9 minute mark and runs for 20 minutes or so. He covers the PhotoShop color balancing part. My presentation starts immediately after his and I cover all of the "detail" stuff. I also have the PixInsight and PhotoShop project files for this image. If you would like to have those, let me know and I'll find a way to post them on Google Drive or something so that you can download them. Please let me know if you find the video helpful. Also, if you have ANY questions I am happy to answer them directly. Contact me either through this post or via a direct message. We can even start a google meeting and chat live if you think that would be helpful. Best. Tim.
|
You cannot like this item. Reason: "ANONYMOUS".
You cannot remove your like from this item.
Editing a post is only allowed within 24 hours after creating it.
You cannot Like this post because the topic is closed.
Copy the URL below to share a direct link to this post.
This post cannot be edited using the classic forums editor.
To edit this post, please enable the "New forums experience" in your settings.
Richard:
Awesome for a first time!! Thanks! But I think sometime in the future I should revisit the data in order to improve the colors. From the images posted so far, I mostly like @SemiPro's result.
|
You cannot like this item. Reason: "ANONYMOUS".
You cannot remove your like from this item.
Editing a post is only allowed within 24 hours after creating it.
You cannot Like this post because the topic is closed.
Copy the URL below to share a direct link to this post.
This post cannot be edited using the classic forums editor.
To edit this post, please enable the "New forums experience" in your settings.
Dear Richard, Thanks for sharing your data. Here is my take on your Pacman https://www.astrobin.com/full/aihcjv/0/CS Axel  |
You cannot like this item. Reason: "ANONYMOUS".
You cannot remove your like from this item.
Editing a post is only allowed within 24 hours after creating it.
You cannot Like this post because the topic is closed.
Copy the URL below to share a direct link to this post.
This post cannot be edited using the classic forums editor.
To edit this post, please enable the "New forums experience" in your settings.
I have used the Data to push my RGB-Data. Hope you like it. CS Marcus  
NGC281 Pacmanonly RGB
|
You cannot like this item. Reason: "ANONYMOUS".
You cannot remove your like from this item.
Editing a post is only allowed within 24 hours after creating it.
You cannot Like this post because the topic is closed.
Copy the URL below to share a direct link to this post.
This post cannot be edited using the classic forums editor.
To edit this post, please enable the "New forums experience" in your settings.
Richard, thanks for sharing your data. Here is the process I followed using PixInsight with your images: 1.) StarAlignment of My RGB stars to your Ha image for later insertion: I prefer to insert RGB stars rather than try to get them looking right with narrowband data. You can get the RGB Star image with much less exposure times, like 60s each in Red, Blue and Green. 2.) DynamicCropped all the image frames so they were the same. 3.) BlurXTerminator: Ha, OIII and SII Images 4.) StarXTerminator: Ha, OIII and SII Images 5.) NoiseXTerminator: Ha, OIII and SII Images 6) HistogramTransformation: Ha, OIII and SII Images 7) Curves - tone down background and brighten highlights 8) Channel Combination - SHO 9) NarrowbandNormalization 10) SCNR: tone down the green a bit 10) Curves to adjust background, highlights and color 11) Deconvolution to sharpen image 12) NoiseXTerminator to reduce noise once more 13) PixelMath to combine RGB Stars with SHO image 14) Save image 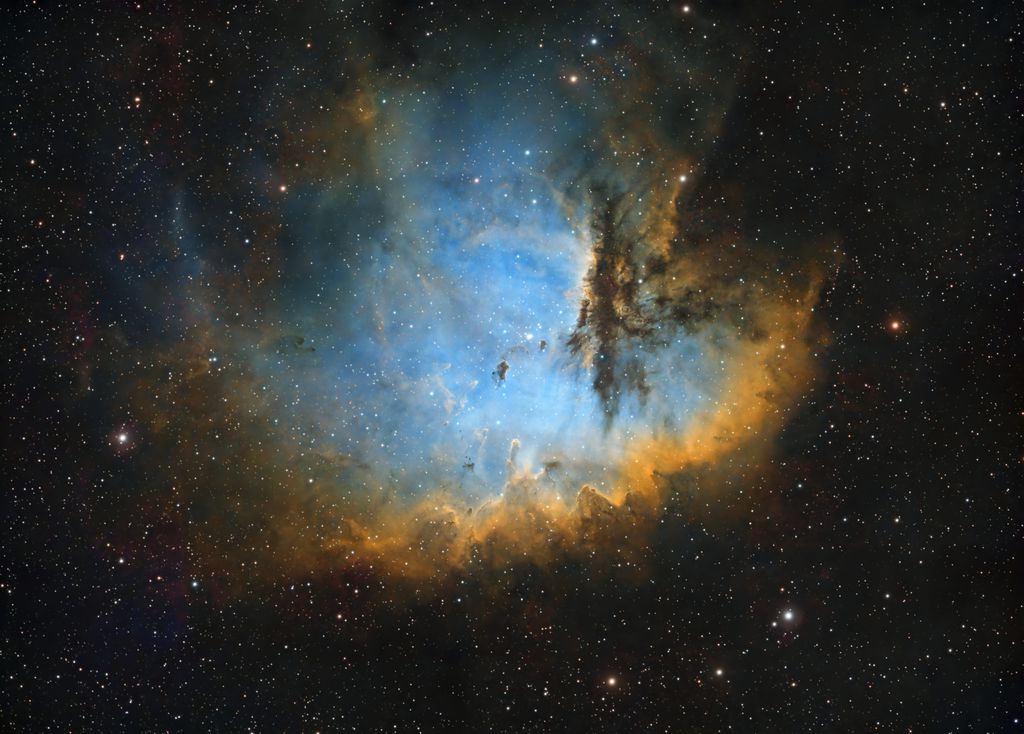 I hope this helps Richard, I have learned that in Astrophotography a lot of time "less is more" Michael Maas
|
You cannot like this item. Reason: "ANONYMOUS".
You cannot remove your like from this item.
Editing a post is only allowed within 24 hours after creating it.
You cannot Like this post because the topic is closed.
Copy the URL below to share a direct link to this post.
This post cannot be edited using the classic forums editor.
To edit this post, please enable the "New forums experience" in your settings.
thanks for sharing your data thats my first try working with narrowband proccesing 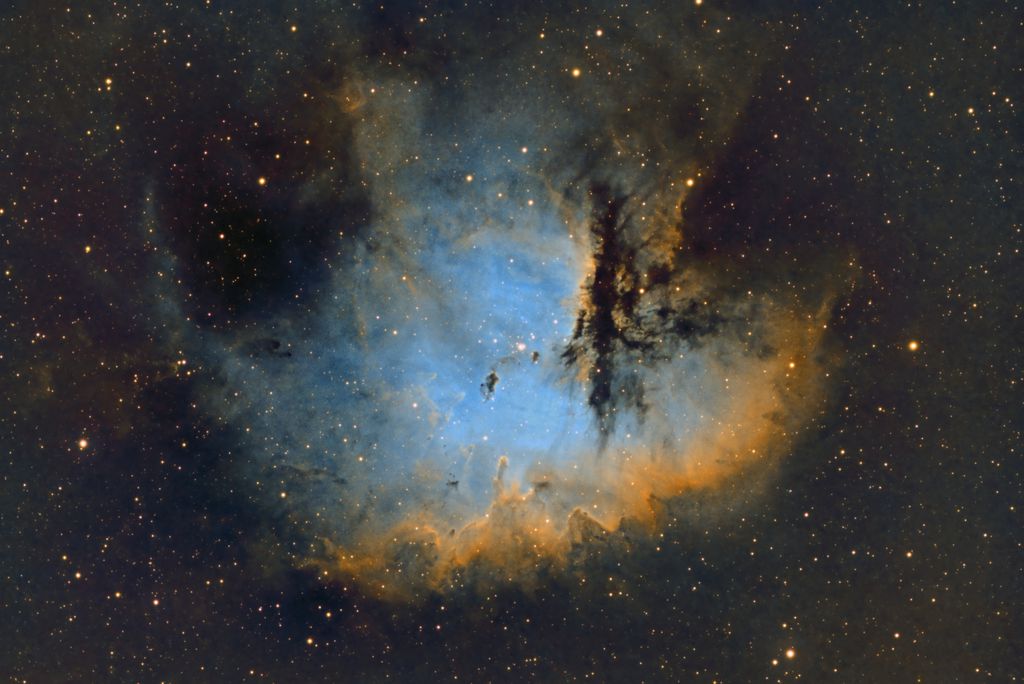 |
You cannot like this item. Reason: "ANONYMOUS".
You cannot remove your like from this item.
Editing a post is only allowed within 24 hours after creating it.
You cannot Like this post because the topic is closed.
Copy the URL below to share a direct link to this post.
This post cannot be edited using the classic forums editor.
To edit this post, please enable the "New forums experience" in your settings.
Well, it's raining here... Thanks for the opportunity to keep my workflows trained! 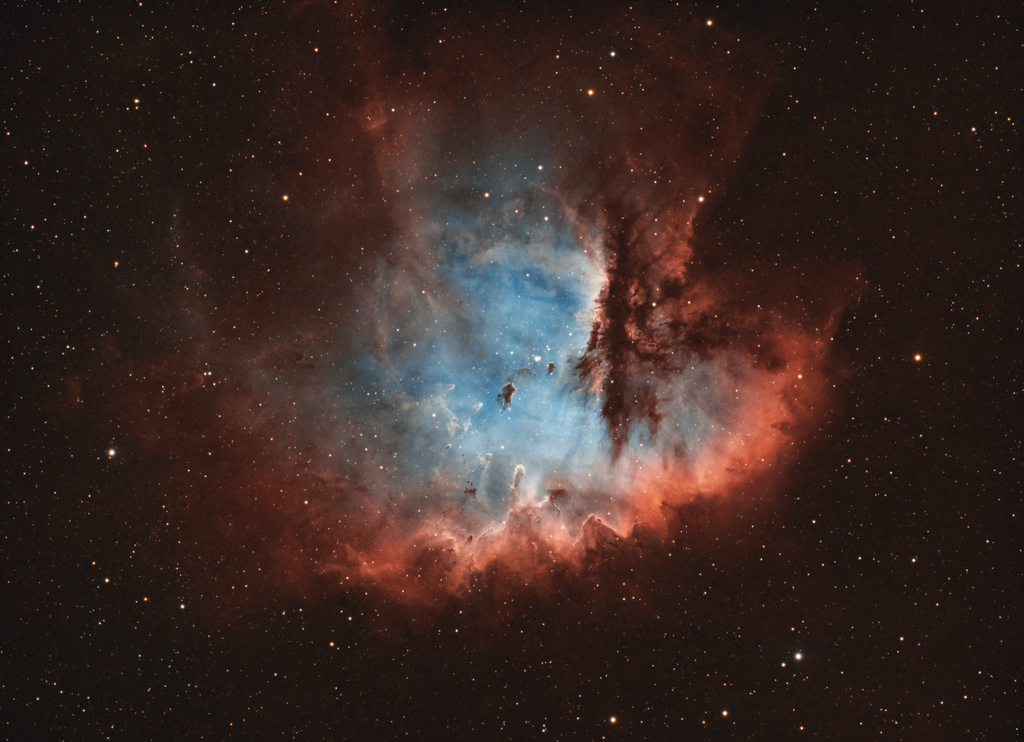 |
You cannot like this item. Reason: "ANONYMOUS".
You cannot remove your like from this item.
Editing a post is only allowed within 24 hours after creating it.
You cannot Like this post because the topic is closed.
Copy the URL below to share a direct link to this post.
This post cannot be edited using the classic forums editor.
To edit this post, please enable the "New forums experience" in your settings.
 A quicky. Processed with PI
|
You cannot like this item. Reason: "ANONYMOUS".
You cannot remove your like from this item.
Editing a post is only allowed within 24 hours after creating it.
You cannot Like this post because the topic is closed.
Copy the URL below to share a direct link to this post.
This post cannot be edited using the classic forums editor.
To edit this post, please enable the "New forums experience" in your settings.
HHOO + S with HOO stars  processed in PI
|
You cannot like this item. Reason: "ANONYMOUS".
You cannot remove your like from this item.
Editing a post is only allowed within 24 hours after creating it.
You cannot Like this post because the topic is closed.
Copy the URL below to share a direct link to this post.
This post cannot be edited using the classic forums editor.
To edit this post, please enable the "New forums experience" in your settings.
Here is mine. Pretty quick and dirty, but data is nice. Didn't work on the stars at all, so these are simple luminance stars.  |
You cannot like this item. Reason: "ANONYMOUS".
You cannot remove your like from this item.
Editing a post is only allowed within 24 hours after creating it.
You cannot Like this post because the topic is closed.
Copy the URL below to share a direct link to this post.
This post cannot be edited using the classic forums editor.
To edit this post, please enable the "New forums experience" in your settings.
Here's my spin using your data set. I used Seti Astro's NB to RGB stars tool using just your H and O channels. That seemed to provide a much better result than using the SHO. The SHO data was combined using a dynamic SHO combination in Pixel Math. Thanks for the fun data set - all my scopes are packed up since I might be moving so it was fun to have something to process. CS Bob 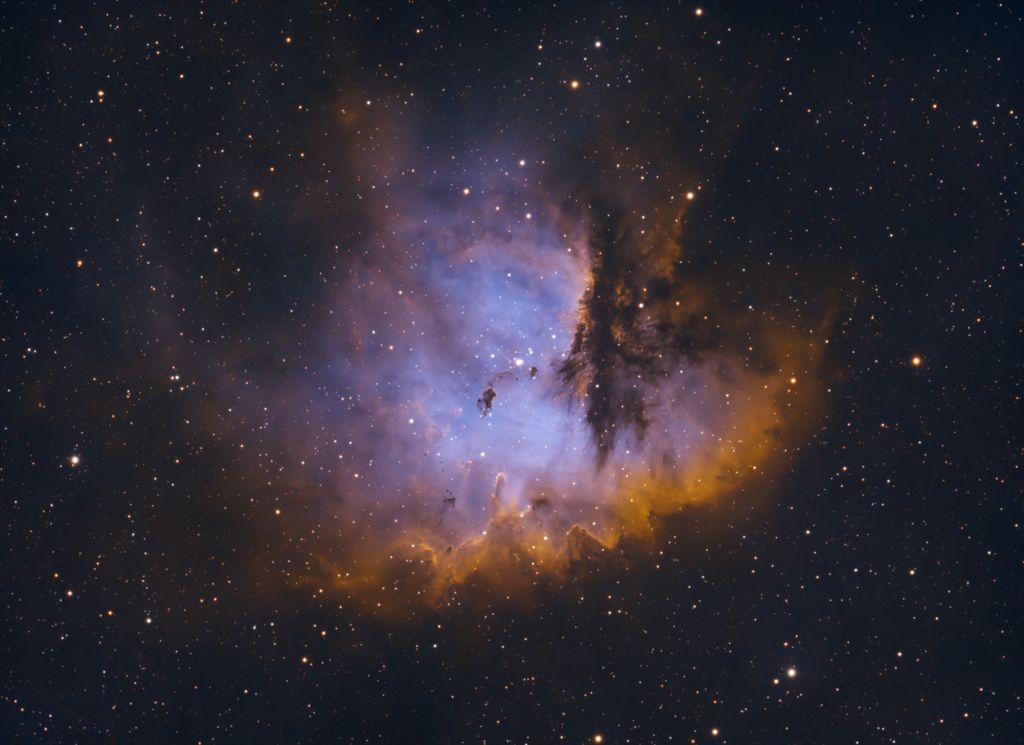 |
You cannot like this item. Reason: "ANONYMOUS".
You cannot remove your like from this item.
Editing a post is only allowed within 24 hours after creating it.
You cannot Like this post because the topic is closed.
Copy the URL below to share a direct link to this post.
This post cannot be edited using the classic forums editor.
To edit this post, please enable the "New forums experience" in your settings.
It is fun looking at the different results from the same data. I did my normal workflow with Astro Pixel Processor. I am posting it to give you a reason to stick with your workflow! My only advice would be to capture some RGB data of the field when doing narrow band imaging to use for the stars. I am pretty new to this approach but am hooked. Here is my recent Pac-Man Nebula with RGB stars: https://www.astrobin.com/d3vf5y/ |
You cannot like this item. Reason: "ANONYMOUS".
You cannot remove your like from this item.
Editing a post is only allowed within 24 hours after creating it.
You cannot Like this post because the topic is closed.
Copy the URL below to share a direct link to this post.
This post cannot be edited using the classic forums editor.
To edit this post, please enable the "New forums experience" in your settings.
My take on this fantastic data,processed in Pixinsight and finished in Adobe Lightroom. 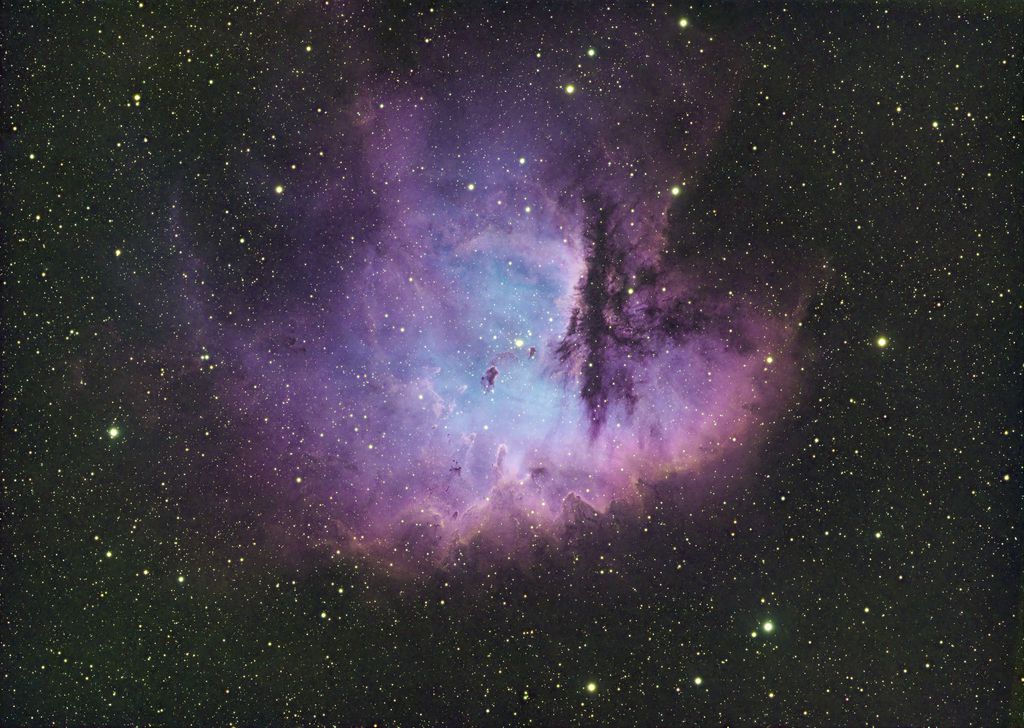 |
You cannot like this item. Reason: "ANONYMOUS".
You cannot remove your like from this item.
Editing a post is only allowed within 24 hours after creating it.
You cannot Like this post because the topic is closed.
Copy the URL below to share a direct link to this post.
This post cannot be edited using the classic forums editor.
To edit this post, please enable the "New forums experience" in your settings.
Hi Richard. Thanks for the data. That was fun   |
You cannot like this item. Reason: "ANONYMOUS".
You cannot remove your like from this item.
Editing a post is only allowed within 24 hours after creating it.
You cannot Like this post because the topic is closed.
Copy the URL below to share a direct link to this post.
This post cannot be edited using the classic forums editor.
To edit this post, please enable the "New forums experience" in your settings.