[RCC] Rosette Nebula with Samyang 135mm and ZWO ASI664MC Requests for constructive critique · PedroPierre · ... · 13 · 758 · 4

PedroPierre 0.00
...
· 
·  1 like
·  Share link
Hi All, 
Happy to get some constructive feedback on my image especially I expect the processing.  

First a bit of background,  I’m based a few miles from Manchester airport in the UK.   I’m in a built up area so a limited view of the sky between neighbours houses.    So on the rare clear nights I need to make the most of the few hours imaging time that are available. So the plan is to image as fast as possible. 

This image is the best data I’ve got so far from a new samyang 135mm rig.   I’m using a bit of an unconventional camera in the Zwo asi664mc.   I really like the field of view and being a small sensor I don’t need to worry about the corners and tilt to the same degree as those using big sensors,   It seems a shame to me to have a blazing fast lens only then to stop it down to make the corners work. 

This was the fourth outing with the rig. 

 I read somewhere in a super useful post that the actual focal length of the samyang 135mm is actually 130mm.   So when you plate solve your images at 130mm then the backspace is right.  After some trial and messing with spacers this now plate solves at almost exactly 130mm.

This image is approx 2hrs of 30 second guided and dithered subs wide open at f2.  

I didn’t use any calibration subs on the basis that the camera is not supposed to have any amp glow and as it’s such a small lens I figured that vignetting would be very limited so no lights either. On the basis of trial and error I used gain 255 on the ASI664mc to get into the HCG low noise read out area.

 Because there isn’t a massive full well on this camera I limited subs to 30sec.  Maybe I could have gone longer. 

This was first outing with 2” Astronomik CLSCCD filter.   I think it’s doing a good job with halo.  F2 is a challenge for some filters.    The thinking is that the wide bands of the CLSCCD would get all the emission bands.   So far I think it’s probably doing a better job than the lenhance I used in earlier sessions.

 I think my data is prob not too bad.   Focus and guiding were ok I think. Stars look good to me in the corners,  so I think tilt and backspace are prob ok given the tiny sensor. 

I can always get more data but 2 hours at F2 feels like a decent chunk, and with uk weather is as much as is possible some nights. 

My workflow is all in PI.
WBPP with drizzle.
Graxpert
SPCC
BlurX
sNCR
NarrowbandNormalization
NoiseX
STF—> HT 

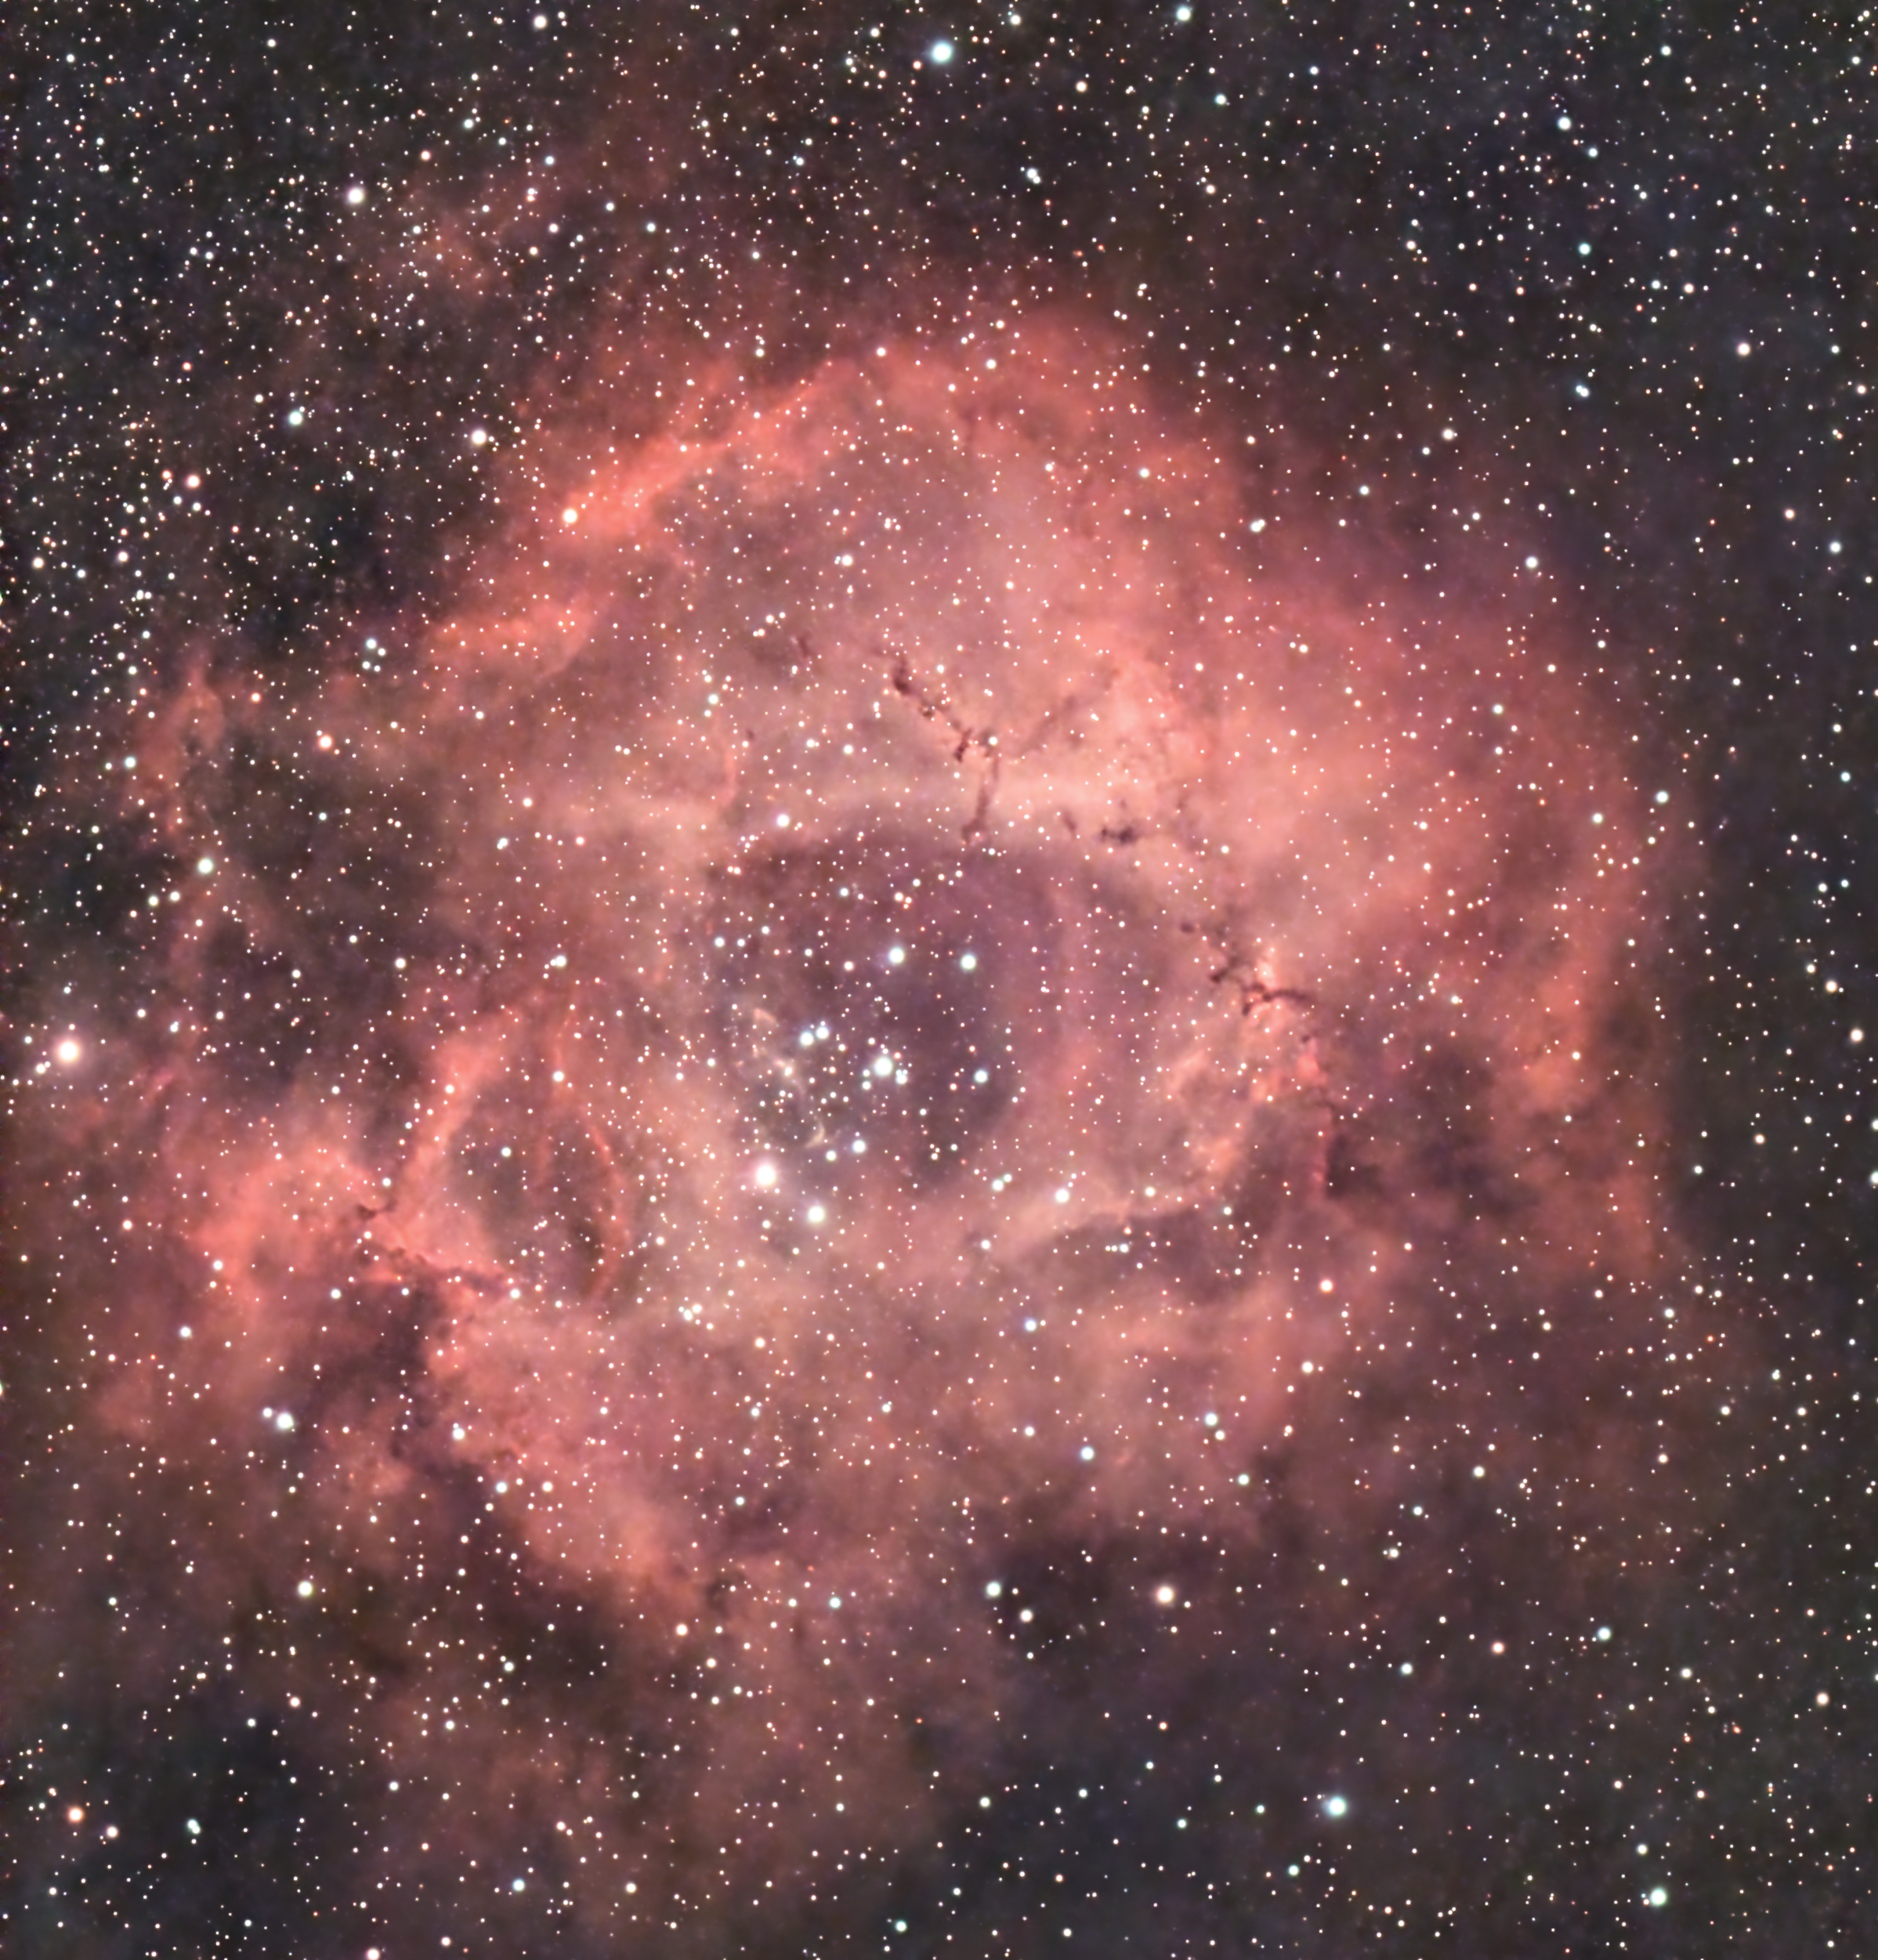
Anyway here is the image Rosette

 I wonder how black the sky should be?   There seems to be a lot of nebulosity everywhere so I didn’t want to make the background too black.


Thanks all.    happy to post the stacked data if anyone wants to put my PI processing to shame?
Edited ...
Like
andreatax 9.89
...
· 
·  Share link
I thought it was a B&W image then I realized there is a faint whiff of yellow in there. Which brings the main issue I have: you're trying to get a NB sort of SHO palette from a broadband camera/filter combo?
Like
MikeHuerto 2.39
...
· 
·  Share link
I have the same lens that I use with a ZWOASI294MC as a travel rig on a SW GTi Star adventurer. I also use it full open at F2. Gives me a magnificent 8 degree FOV. I agree with Andrea, you need to up the color.  What settings are you using in NBN? Try processing without NBN, and playing around with curves might give you a fuller and richer pallet of colors.
Like
PedroPierre 0.00
Topic starter
...
· 
·  1 like
·  Share link
Thanks for the feedback.   Yes agreed the first attempt with narrowbandnormalization wasnt so good.   

i tried again with STF-->HT which was a bit better.  That one is revision 2 in my gallery.

This evening i tried to  learn about GHS and re processed using

WBPP
Graxpert
BlurX
SPCC
NoiseX
3 stretches in GHS
A little bit of curves
NoiseX

I think its a wee bit better.   Still lots to learn....
rosette 3rd.jpg
Like
andreatax 9.89
...
· 
·  Share link
It is still vastly monochrome. I wonder how you balance colors…
Like
PedroPierre 0.00
Topic starter
...
· 
·  Share link
i obviously don't balance them very well.   :-)

I've tried curves / coloursaturation / GHS / HT but dont seem to get very good colourful results.   i think those are the right type of tools.   so back to youtube this evening for some more learning.

if anyone has a cloudy night and wants to have a go at processing the stacked data is linked below. 

https://drive.google.com/file/d/1YRQdKrGseDCCb2oEpbFaDVfBMaU5cQks/view?usp=drive_link
Like
andreatax 9.89
...
· 
·  1 like
·  Share link
I had a look but I can't process it properly right now but the following can be recommended:

1. Do not drizzle. You are oversampled as it is don't need to make it worse.
2. You have tilt in your optical train. You really need to correct it, big time.
3. Color is there but the filter does you no favor. You need a more selective one.
Like
PedroPierre 0.00
Topic starter
...
· 
·  Share link
Thx.   I'll check the the tilt.  Make sure everything is tight.

​​​​​​Samyang - FLO 48mm adapter - zwo filter drawer v2 - spacers - camera
Edited ...
Like
Habib_Sekha 1.51
...
· 
·  1 like
·  Share link
Hi @PedroPierre , did a quick processing of your stack. Well actiually not that very quick because the background was problematic. I had to keep it on the dark side and could not stretch the nebula as far as I would have liked to. Probably not much you can do about considering the light pollution and the filter you are using. However, for nebula you might really want to consider a far more narrower dual-band filter.

I used more or less the workflow you used, except didn't use Graxpert (used gradient correction twice in PI).

I did not use narrowbandnormalization. It is a dual band filter you used but it has a very large band pass., not "narrow" at all.

Hope that you can see there is more potential for colours when stretched in a better way (not pretending that I  did it good).

Uncropped and not rotated:

Astrobib_rosetta_masterLight_BIN-1_2704x1536_EXPOSURE-30.00s_FILTER-NoFilter_RGB_drizzle_2x_autocrop.png
Edited ...
Like
PedroPierre 0.00
Topic starter
...
· 
·  1 like
·  Share link
That’s nice.  Thanks for taking the time.

 I did previously use the l’enhance filter but the halo on bright starts were horrible.    

I understand there aren’t many narrow filter that work well at f2.    Looks like I might be splashing for and Ida’s nbz 2.
Like
RDMOAstronomy 1.81
...
· 
·  2 likes
·  Share link
I think your attempt is quite good.  I took your stacked image and did the following processing on it:

0) Ran Channel Separation and then LinearFit to remove the green cast contained within the image.
1) Ran BlurXTerminator - Correct only to improve the performance of ImageSolver
2) Ran ImageSolver to Plate Solve the image (130mm and 2.9um pixels)                Focal distance ........... 259.95 mm                Pixel size ............... 2.90 um                Field of view ............ 3d 25' 33.7" x 1d 55' 44.6"                Image center ............. RA: 6 30 56.410 Dec: +5 02 18.19
3) Ran SpectroPhotometricFluxCalibration (a requirement to applied the MultiSpectralGradientCorrection tool with the MARS database for background correction)
4) Ran MultiSpectralGradientCorrection to cleanup the gradients within the image.
              The stacked image seems to show you are dealing with considerable light pollution as well as your image has a fair amount of vignetting (Do you calibrate with Bias, Darks
              and Flats?
5)  Ran PhotometricColorCalibration  to get a realistic color calibration using the 2000 plus stars within the image.
6) Ran BlurXTerminator again to make stellar and non-stellar adjustments
7) Ran StarXTerminator to make a star only image and a background only image.
8) Ran NoiseXTerminator on the Background image
9) Ran GradientCorrection with defaults and Automatic Convergence checked.
10) Ran HistogramTransformation on the stars image - not too much just enough stretching to start to bring out the dimmer stars
10) Ran SCRN on the stars image to remove any remaining green
11) Ran curves on the stars image to increase color saturation of the stars
12) Ran Convolution on the stars image to blur them just a bit (Standard Deviation of 1) as the faint ones were just a few pixels and looked blocky

13) Ran HistogramTransformation on the Background Image to stretch it
14) Ran ACDNR to reduce noise in the background image
14) Ran Curves to reduce the background noise and increase the brightness of the nebula and increase color saturation
15) Ran LocalHistogramEqualization (100, 1.3 and 0.6)

Finally, ran pixelmath to combine the stars image with the background image "~((~BackgroundImageName)*(~StarsImageName))

Here is the result

ImageSameCrop.jpg

I think the color is more natural and shows more of the OIII green and blue mixed with the Ha red than your original image.  I find processing the nebula separated from the stars works the best

This image is aligned and cropped the same as your original image so you can compare.  Good luck, your images are off to a great start - just keep working on them and learning to do better each time

Michael
Like
PedroPierre 0.00
Topic starter
...
· 
·  Share link
Thanks for taking the time to do that and step through your process.   More PI tools for me to learn!
Like
andreatax 9.89
...
· 
·  Share link
This is as far as it goes given sensor and length of exposure (and the other issues mentioned before):
masterLight_processed.png
Nota bene: the blueish streaks are down to the sensor response and not easily fixed in post.
Like
PedroPierre 0.00
Topic starter
...
· 
·  Share link
Thanks
Like
 
Register or login to create to post a reply.