Hey all, I’m pretty new to the AP game. Previously I did Planetary Imaging on my C8 along with some EAA. A few weeks ago I got my first real AP rig. My Gear is as follows: - Redcat 71 WIFD - William Optics Uniguide 30mm - ZWO AM5 / TC 40 - ZWO ASIair Plus - ZWO 533mc (main camera) - ZWO 174mm mini (guide camera) - ZWO EFW (Filter used - Optolong L - Ultimate) - ZWO EAF - Processing software: GraXpert, Pixinsight, BlurX, StarX, NoiseX, Adobe PS & Adobe Lightroom Target: M16 - Eagle Nebula Exposure: Multi-Night data consisting of 300s and 420s subframes. Total Integration Time: Approx 4.5 hours Bortle: 8/9 // Target located at about 30° So far I have trying to collect data on M-16 Eagle Nebula. I have watched a few YouTube Video’s on OSC narrowband processing and did the best I could on it but would really like some feedback on what I messed up on or could do better with in the future. I’m sure I need much more data collected but figured I would ask for what I’ve done so far. I’ve also included the version that is not “colorful”, in that I just processed it using SPCC with no false color channel extractions in case that helps in your feedback. Also here is the link to the FITS file. Thanks in advance! Link: https://drive.google.com/file/d/1D7vRPZhsJEaLipis4zaL_73B3NnCx_Dq/view?usp=drivesdk 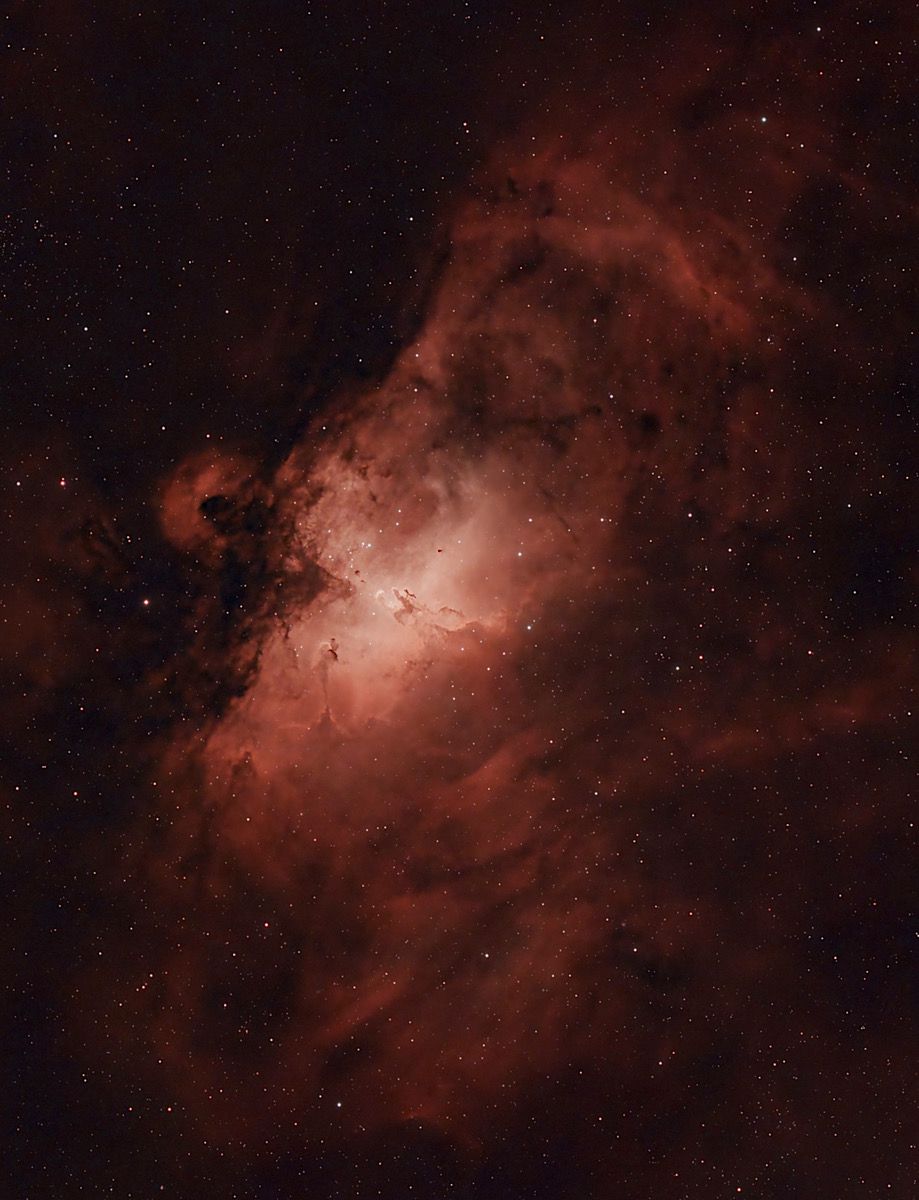 |
You cannot like this item. Reason: "ANONYMOUS".
You cannot remove your like from this item.
Editing a post is only allowed within 24 hours after creating it.
You cannot Like this post because the topic is closed.
Copy the URL below to share a direct link to this post.
This post cannot be edited using the classic forums editor.
To edit this post, please enable the "New forums experience" in your settings.
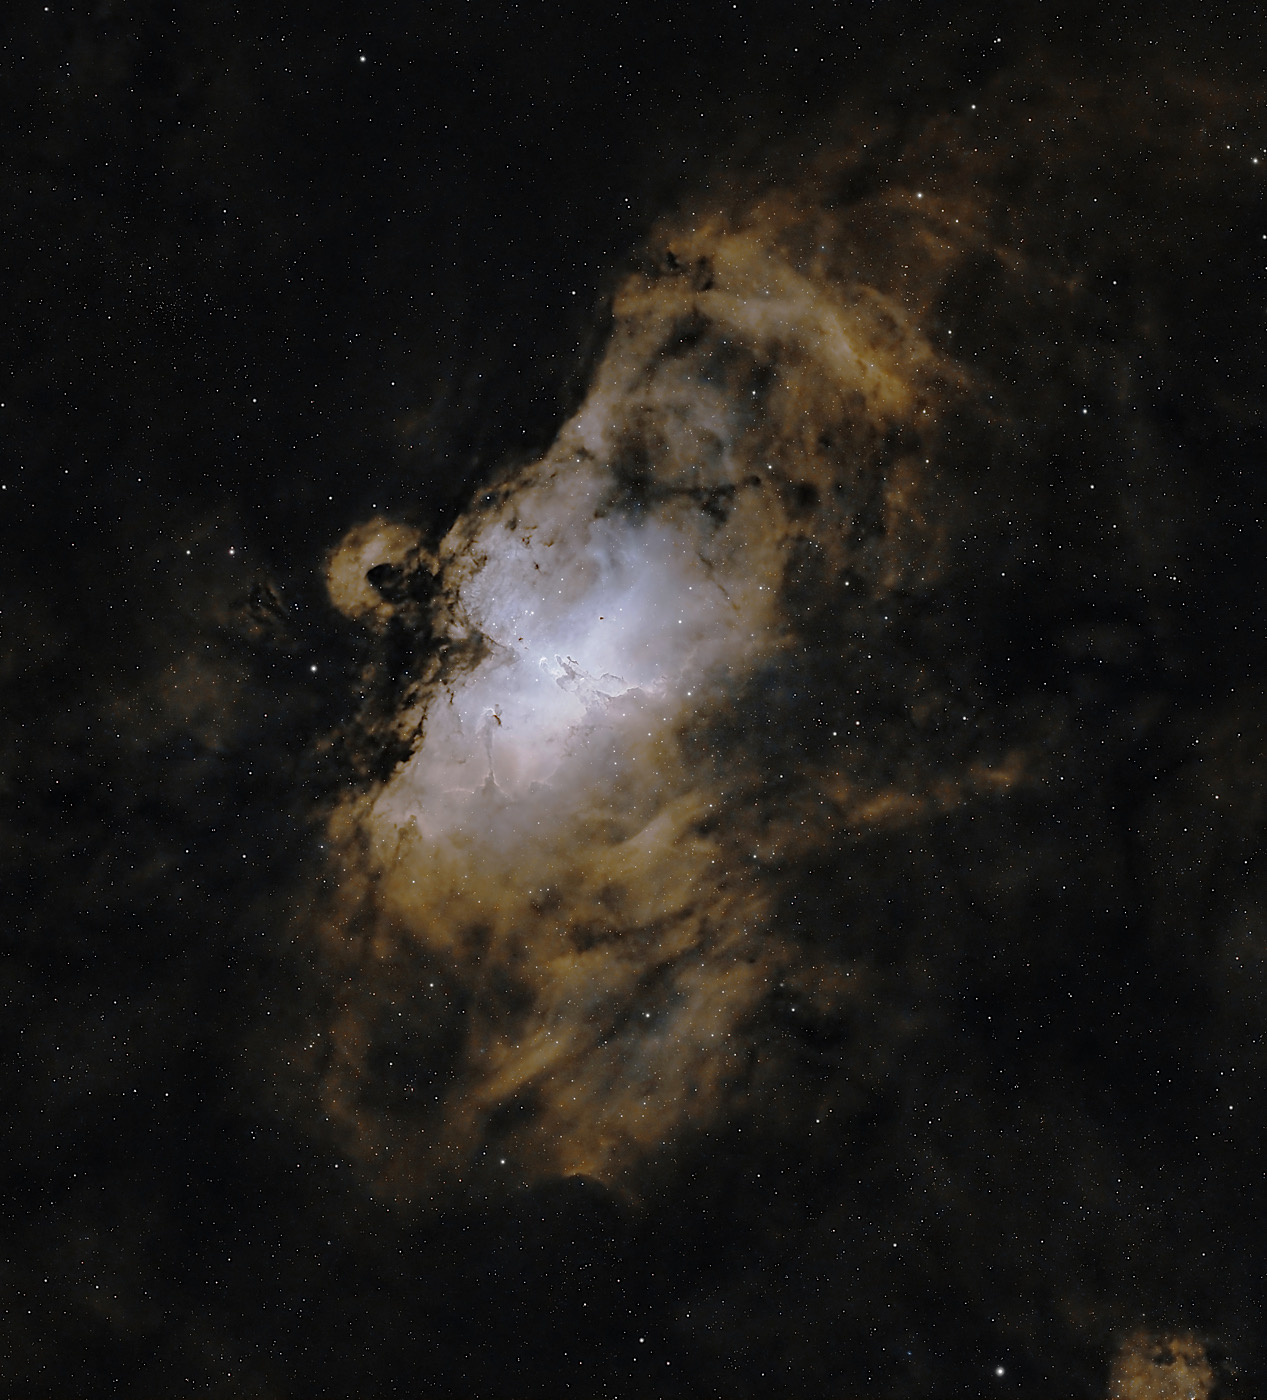
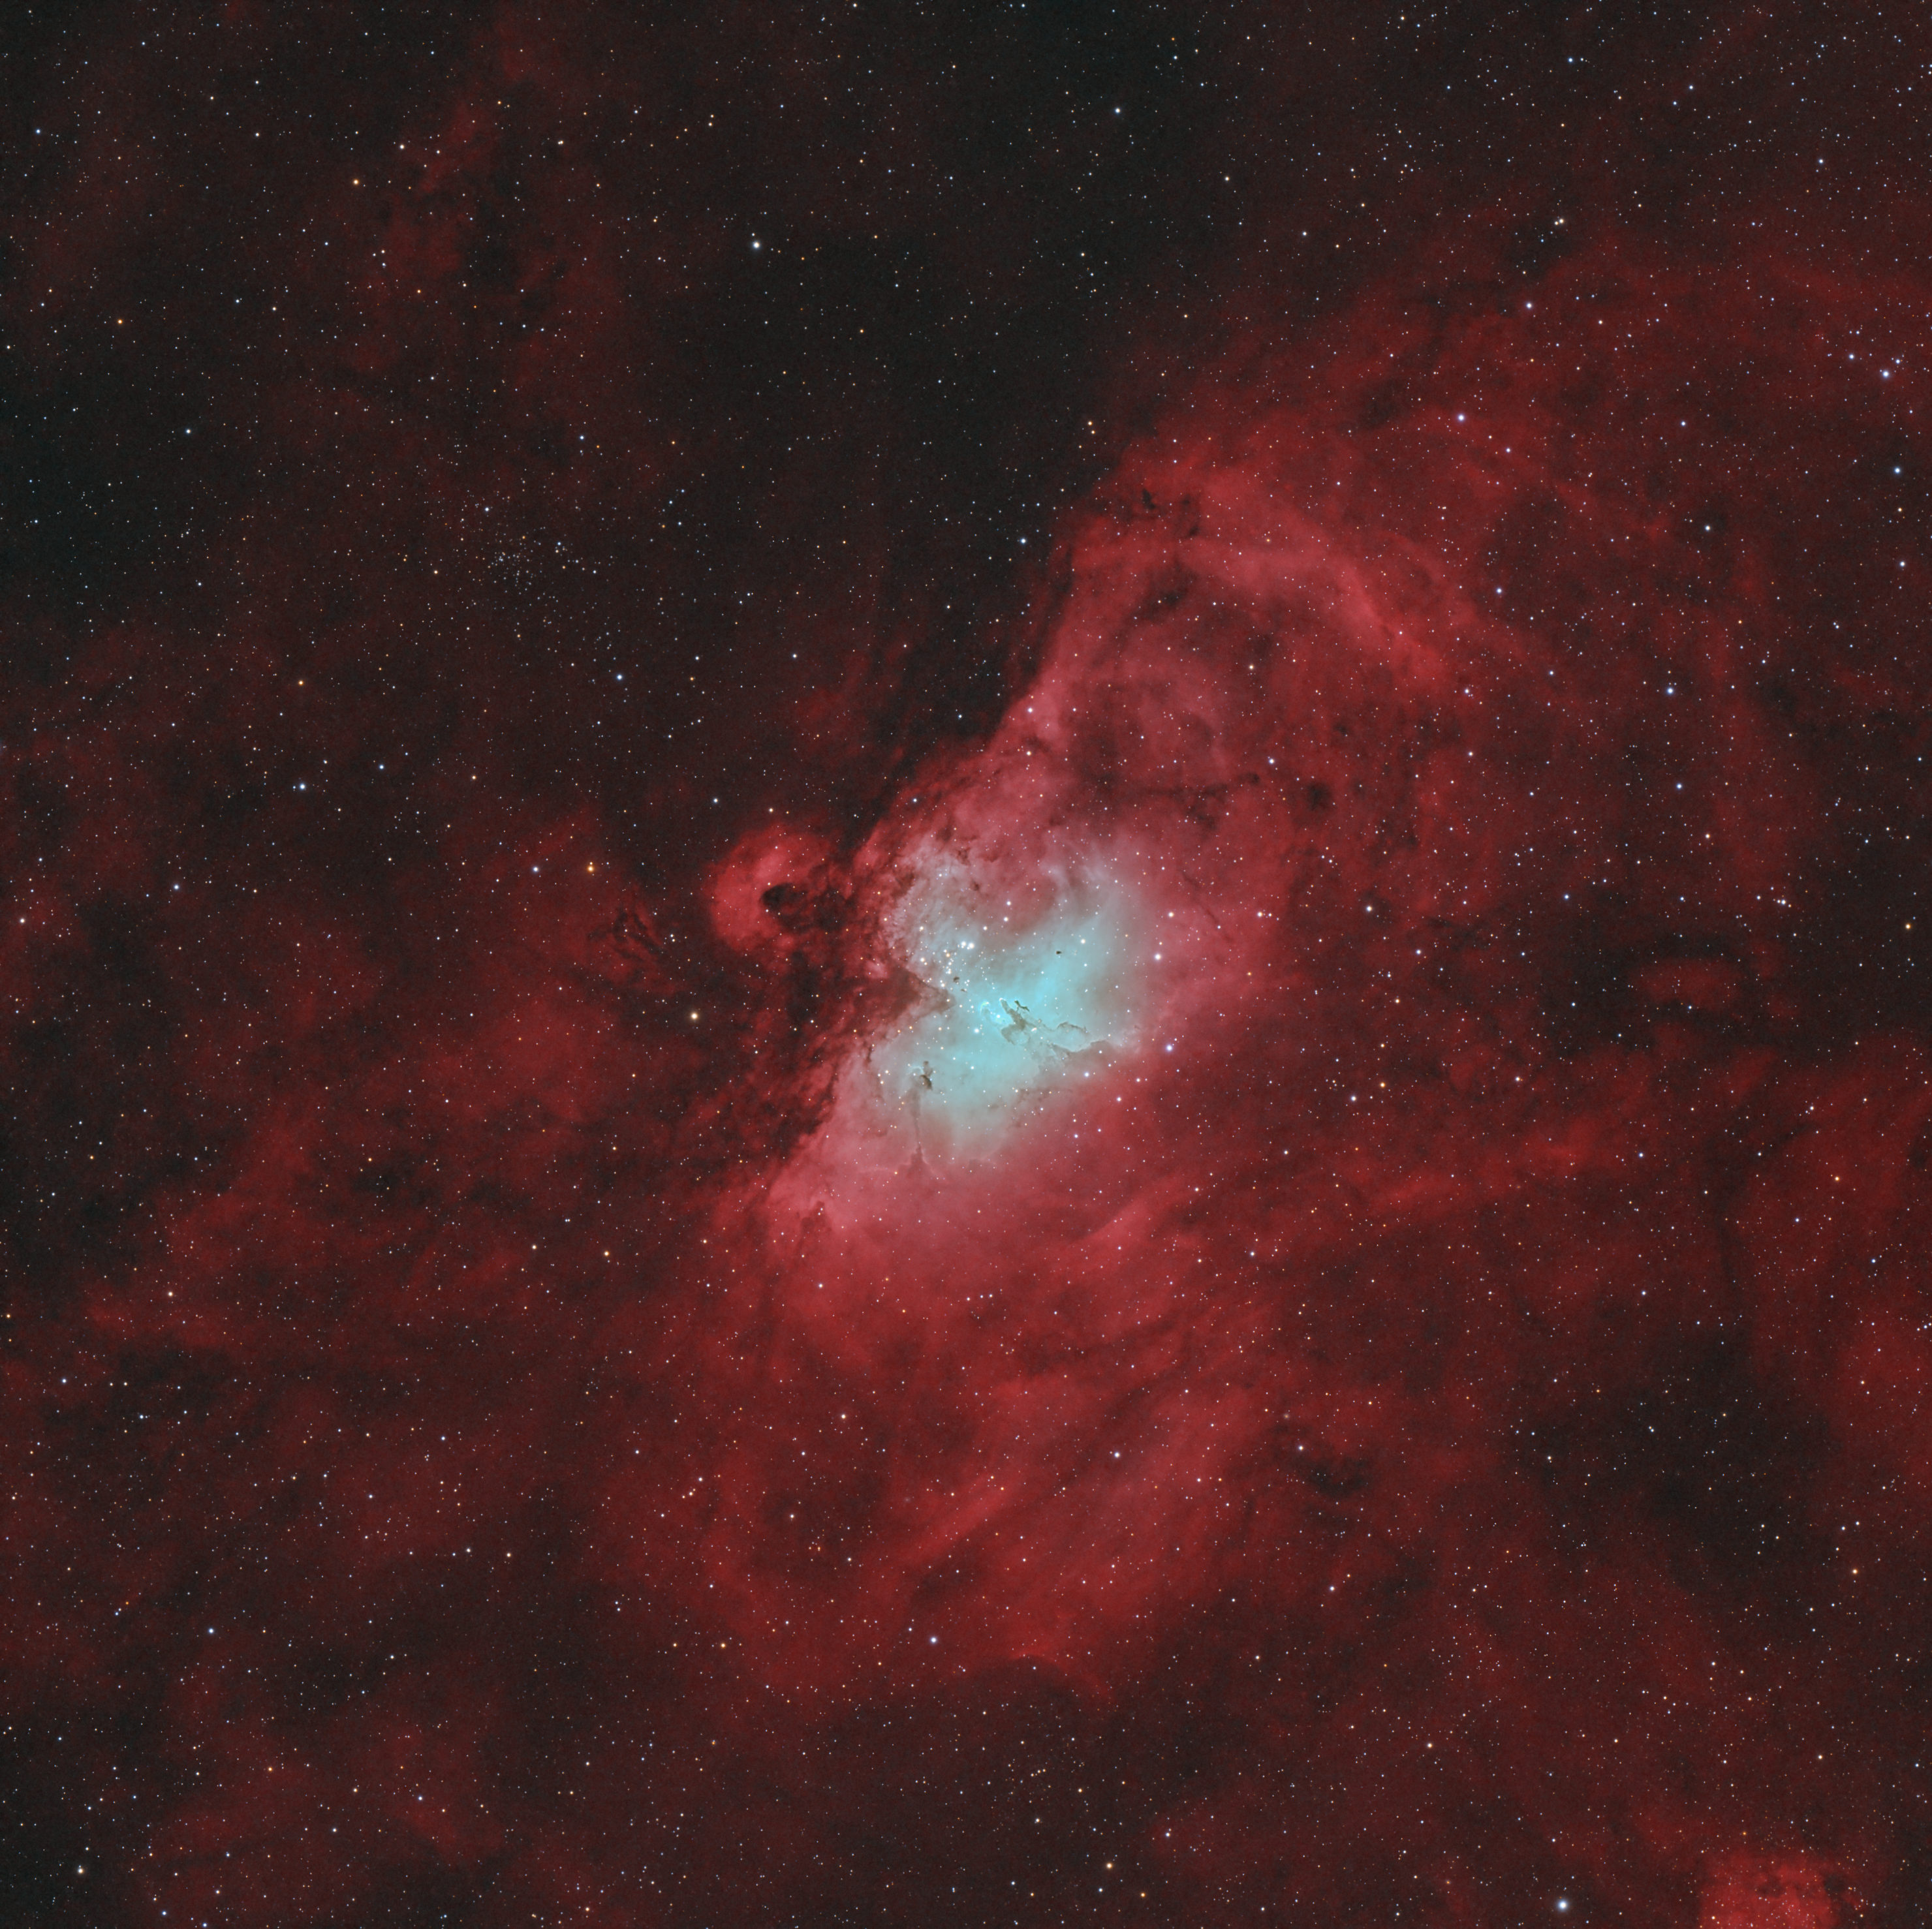
I don't have much to say, because I think both your versions look just fine, especially for just starting out. I did give the data a go myself though since you posted it. You can compare/contrast what I did with what you did. Mines a bit bluer than I would normally do, but it was a quick and dirty edit while I was eating dinner. For what it's work, I used BlurX, SPCC< NoiseX, StarX, GHS, and Narrowband normalization. The stars were just stretched with histogram transformation before adding them back in.  |
You cannot like this item. Reason: "ANONYMOUS".
You cannot remove your like from this item.
Editing a post is only allowed within 24 hours after creating it.
You cannot Like this post because the topic is closed.
Copy the URL below to share a direct link to this post.
This post cannot be edited using the classic forums editor.
To edit this post, please enable the "New forums experience" in your settings.
Thanks Quinn! I love the color in yours and you have much more nebulosity throughout the image. It definitely pops more.
I have to be doing something wrong when it comes to GHS. I have a script for it but it always just blows everything out. I’m not the best at doing it manually either. I tend to blow out the bright spot in the middle, definitely need for more practice.
I’m guessing the use of GHS is what allows you to pull out the extra nebulosity in the image?
|
You cannot like this item. Reason: "ANONYMOUS".
You cannot remove your like from this item.
Editing a post is only allowed within 24 hours after creating it.
You cannot Like this post because the topic is closed.
Copy the URL below to share a direct link to this post.
This post cannot be edited using the classic forums editor.
To edit this post, please enable the "New forums experience" in your settings.
Most likely. I'm not the best with it either, but definitely learning. Using multiple small steps and keeping an eye on the preview window are key. It's easy to over do things. I even probably over did it a bit looking at the noise again in the photo I did. More integration time would be needed to get the same detail with less noise. This video was pretty helpful for me, although I use the protect highlights slider to keep things more towards the left of the histogram. Whether that's good or bad, I don't know, but it helps keep things form getting blown out. I also don't usually set the blackpoint in GHS like he does, mostly because I forgot how. https://www.youtube.com/watch?v=WXY5kOFaxaI |
You cannot like this item. Reason: "ANONYMOUS".
You cannot remove your like from this item.
Editing a post is only allowed within 24 hours after creating it.
You cannot Like this post because the topic is closed.
Copy the URL below to share a direct link to this post.
This post cannot be edited using the classic forums editor.
To edit this post, please enable the "New forums experience" in your settings.
Maybe something like this? 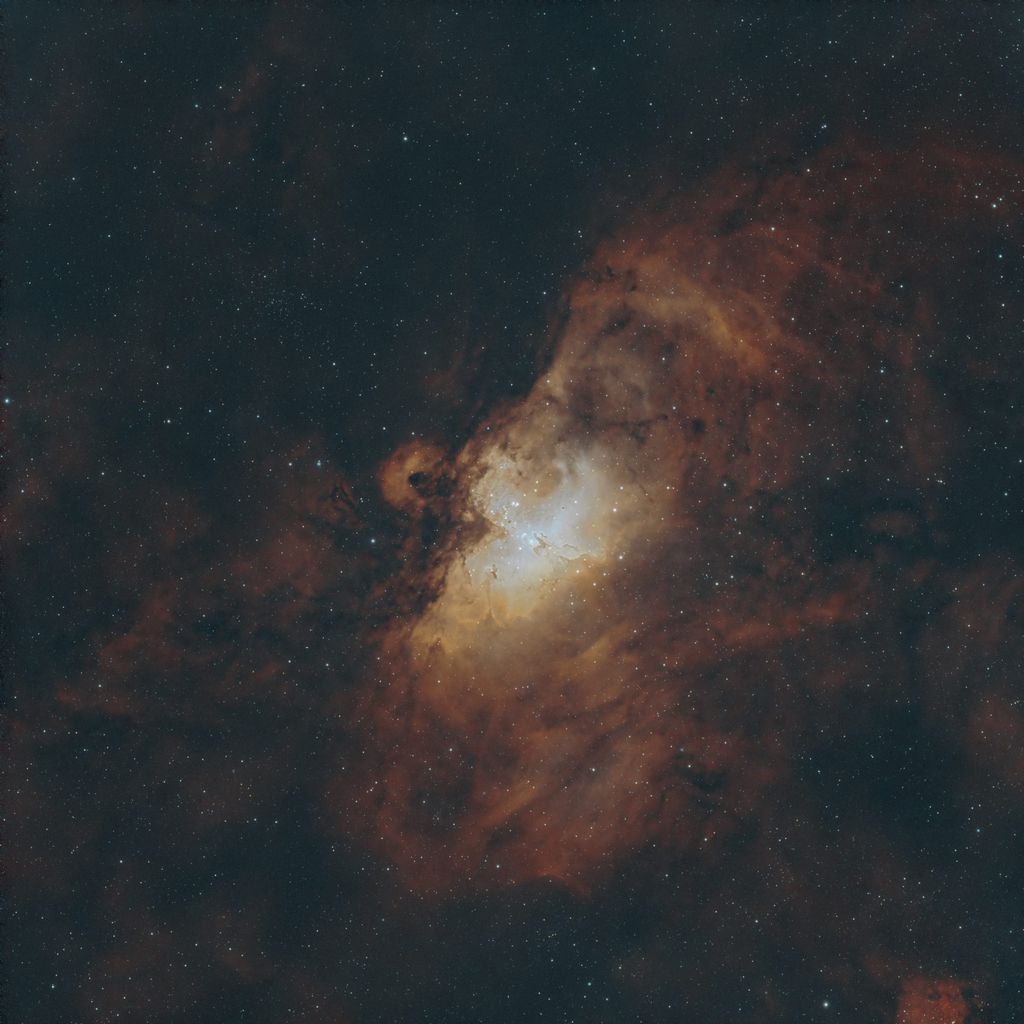 |
You cannot like this item. Reason: "ANONYMOUS".
You cannot remove your like from this item.
Editing a post is only allowed within 24 hours after creating it.
You cannot Like this post because the topic is closed.
Copy the URL below to share a direct link to this post.
This post cannot be edited using the classic forums editor.
To edit this post, please enable the "New forums experience" in your settings.
andrea tasselli:
Maybe something like this?
Thank you Andrea! I like your colors and your background. I think I got too dark on my backgrounds which causes me to loose the faint details you keep in your image. Also you seemed to have tamed the brightness in the core very well where it doesn’t look like it was altered at all but somehow kept the details in the pillars. May I ask how please? I felt it was a constant push - pull. If I brought down the brightness in the center it helped accentuate the pillars by making them a bit dark and they stood out more. But then the center looked overcooked in terms it blatantly had a brightness reduction done. Conversely, if I didn’t touch the brightness in the middle or did so ever so slightly you lost the detail of the pillars and they got washed out.
|
You cannot like this item. Reason: "ANONYMOUS".
You cannot remove your like from this item.
Editing a post is only allowed within 24 hours after creating it.
You cannot Like this post because the topic is closed.
Copy the URL below to share a direct link to this post.
This post cannot be edited using the classic forums editor.
To edit this post, please enable the "New forums experience" in your settings.
Quinn Groessl:
Most likely. I'm not the best with it either, but definitely learning. Using multiple small steps and keeping an eye on the preview window are key. It's easy to over do things. I even probably over did it a bit looking at the noise again in the photo I did. More integration time would be needed to get the same detail with less noise.
This video was pretty helpful for me, although I use the protect highlights slider to keep things more towards the left of the histogram. Whether that's good or bad, I don't know, but it helps keep things form getting blown out. I also don't usually set the blackpoint in GHS like he does, mostly because I forgot how. https://www.youtube.com/watch?v=WXY5kOFaxaI I watched this video last night before I went to bed. Really good video. I’m going to try and follow him along today and give it a try. Thank you for the link!
|
You cannot like this item. Reason: "ANONYMOUS".
You cannot remove your like from this item.
Editing a post is only allowed within 24 hours after creating it.
You cannot Like this post because the topic is closed.
Copy the URL below to share a direct link to this post.
This post cannot be edited using the classic forums editor.
To edit this post, please enable the "New forums experience" in your settings.
Vinny Vent:
Thank you Andrea! I like your colors and your background. I think I got too dark on my backgrounds which causes me to loose the faint details you keep in your image.
Also you seemed to have tamed the brightness in the core very well where it doesn’t look like it was altered at all but somehow kept the details in the pillars. May I ask how please?
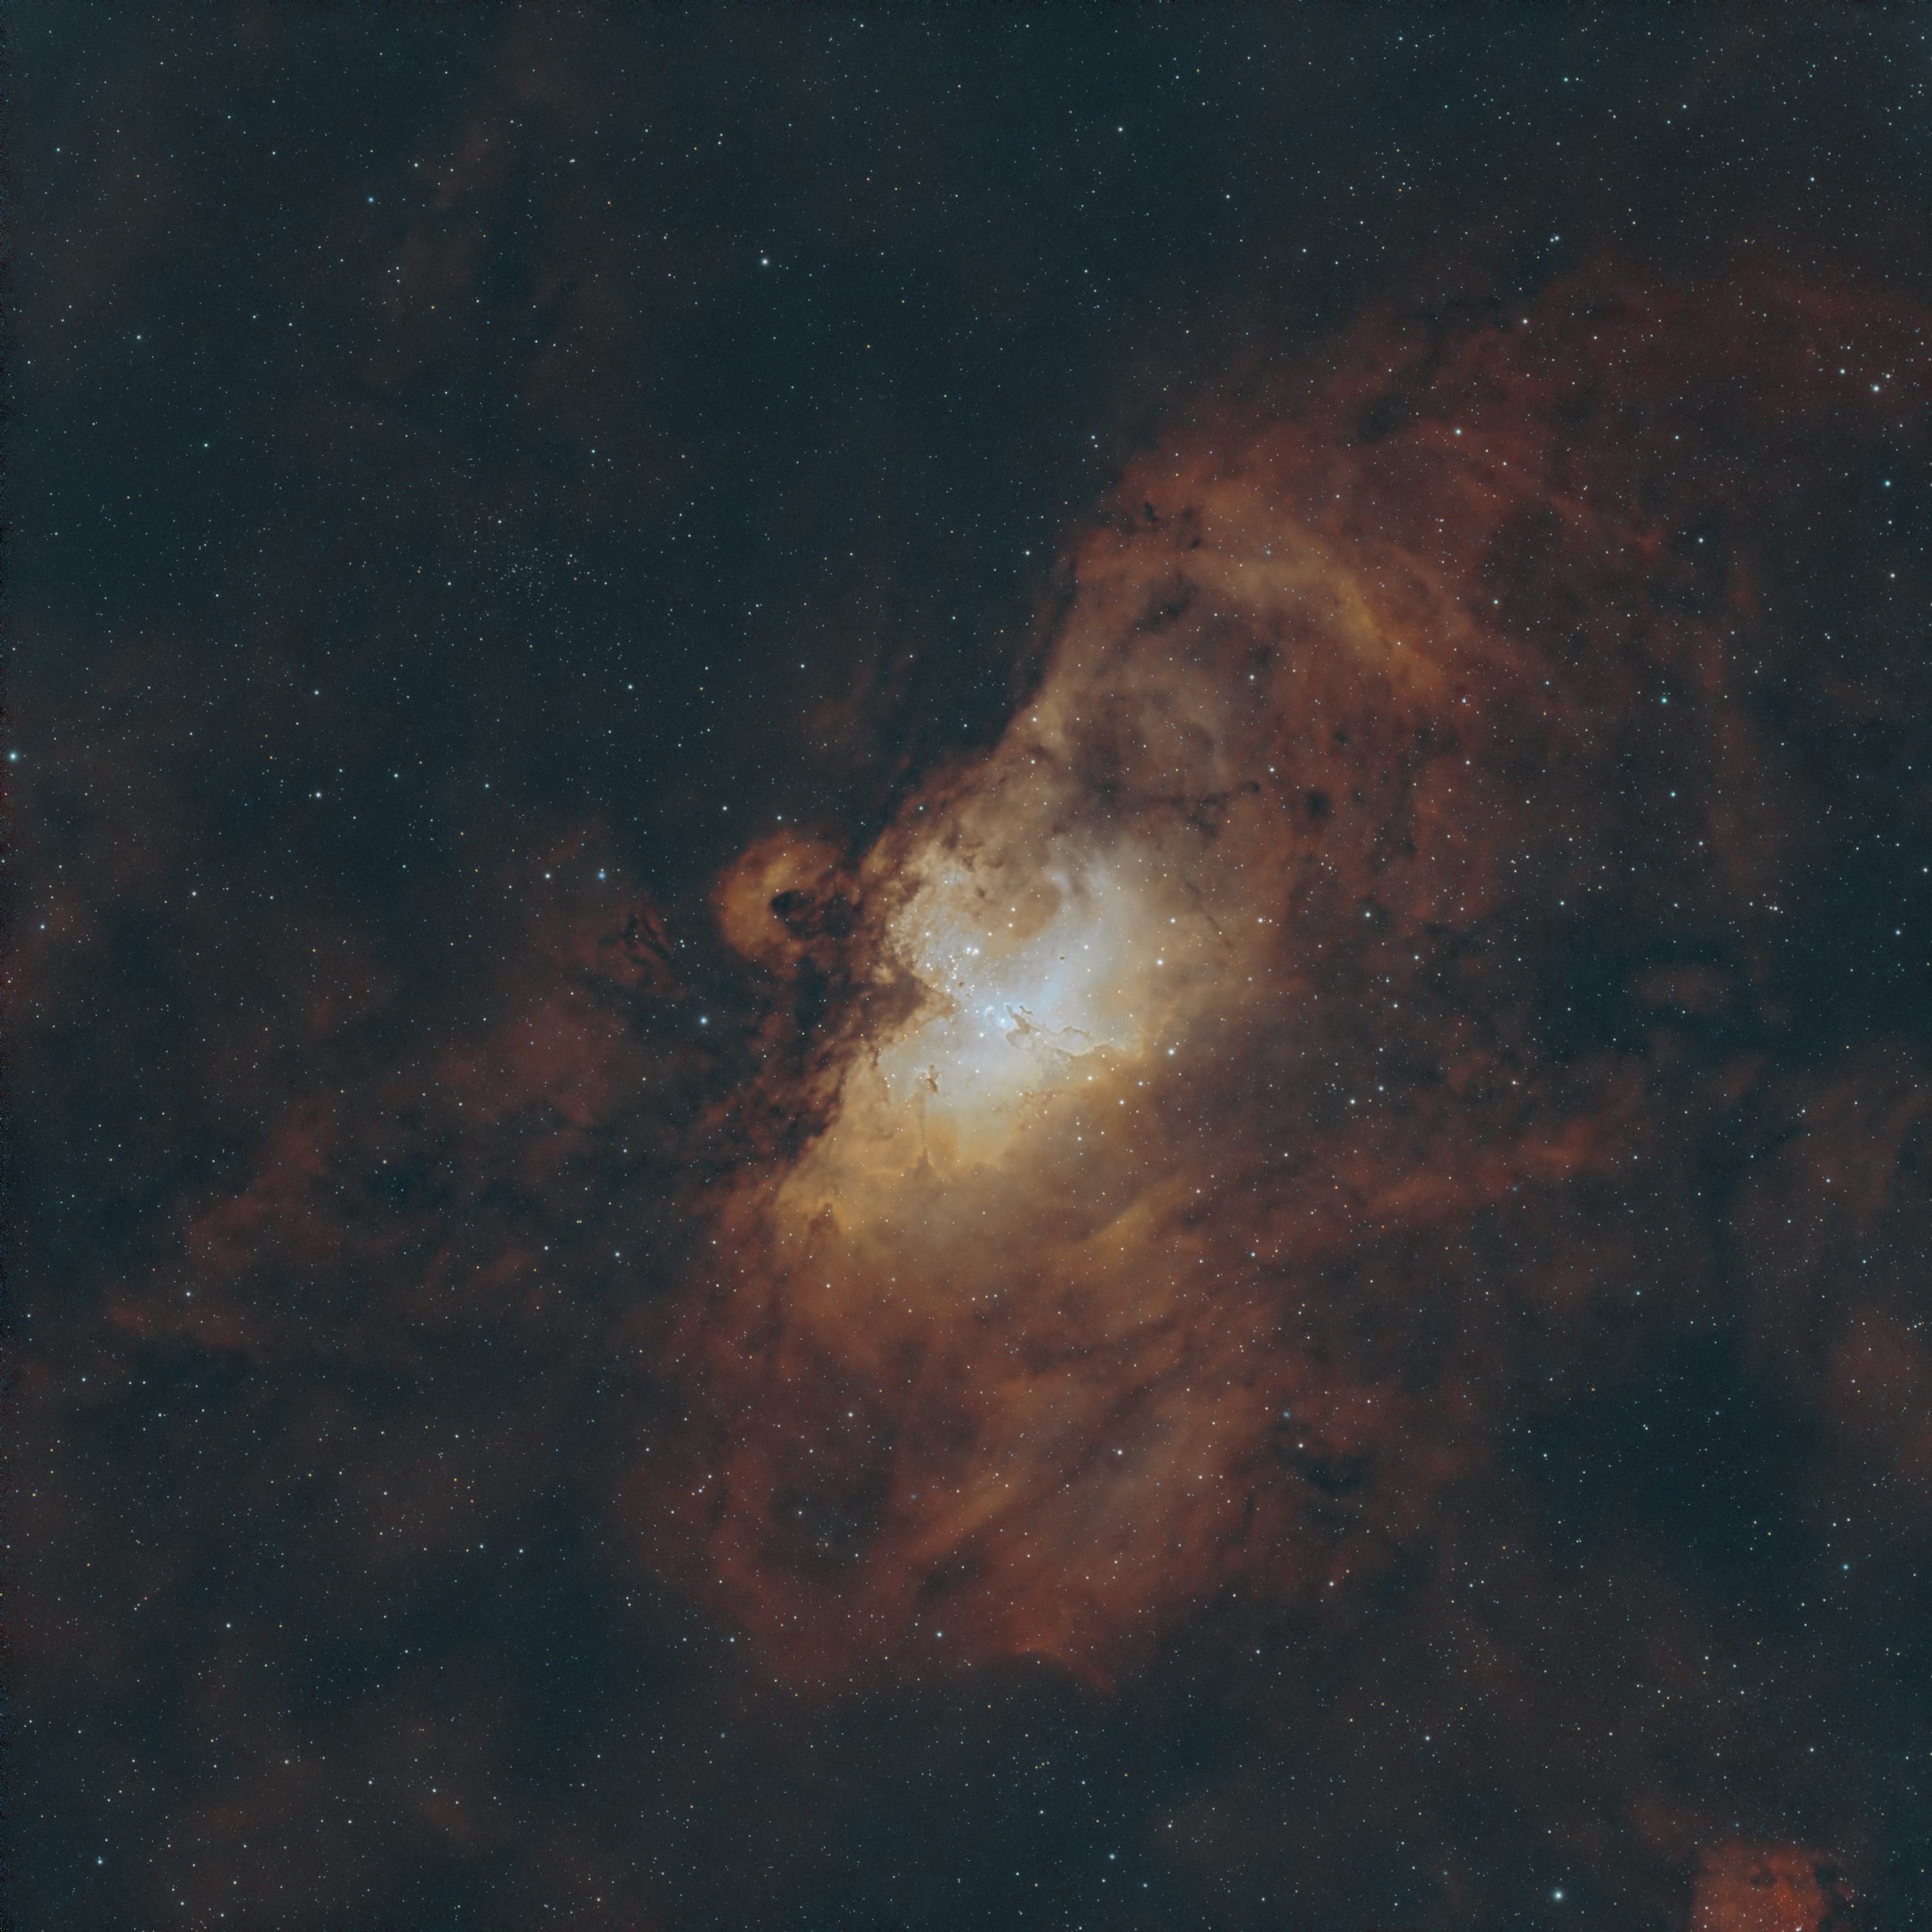
I felt it was a constant push - pull. If I brought down the brightness in the center it helped accentuate the pillars by making them a bit dark and they stood out more. But then the center looked overcooked in terms it blatantly had a brightness reduction done. Conversely, if I didn’t touch the brightness in the middle or did so ever so slightly you lost the detail of the pillars and they got washed out. Hi Vinny, Let's say it is complicated... First off, I extracted the R, B and G layers from your image (after SPCC) and removed 10% of R layer from the G layer and then LinearFit B onto the modified G layer and averaged the two (Modded G and B). This was saved as the OIII layer. R layer went on to the Ha layer. Then I used the ForaxxPalette script after stretching both layers (without stars) using MaskedStretch and ArcsinhStretch. I felt the results were too yellow and created an HOO image from the two layers. This I felt it was too violet in the core so in the end I averaged the two and saved as the final HOO image. Further on I used HT to compress the dynamic raneg to suits my need and added a couple of NXT iterations to tame the noise. To control the brightness in the core I created a mask of it, inverted it and applied to the image so that I could use curves to tame the brightness and bring out a bit of teal color from the OIII layer. After that I extracted the stars from the orginal images, stretched that stars' image, increased saturation a bit, BXT'd it in correction mode only and used a S-curve (rather more like a inverted Z to be honest) to control stars colors and pasted into the starless HOO image and, voila', job's done.
|
You cannot like this item. Reason: "ANONYMOUS".
You cannot remove your like from this item.
Editing a post is only allowed within 24 hours after creating it.
You cannot Like this post because the topic is closed.
Copy the URL below to share a direct link to this post.
This post cannot be edited using the classic forums editor.
To edit this post, please enable the "New forums experience" in your settings.
I'll be happy to give this a go. There's a lot of nice data here so keeping the black point clipping and noise reduction at a minimal would be one of my suggestions. Always hold back on clipping the dark side of the histogram. There is a bit of noise here though, so getting more integration would solve a lot of problems. But as i said, there is a lot of nice signal in there.  |
You cannot like this item. Reason: "ANONYMOUS".
You cannot remove your like from this item.
Editing a post is only allowed within 24 hours after creating it.
You cannot Like this post because the topic is closed.
Copy the URL below to share a direct link to this post.
This post cannot be edited using the classic forums editor.
To edit this post, please enable the "New forums experience" in your settings.
lol wow - bingo on “it’s complicated”! I would love to say you make it sound easy; but it doesn’t  I do appreciate the in depth response. It is helpful and at least now the things I don’t quite understand or know that you listed I will now be able to research on my own. To make the “colorful” image I uploaded I did the following: I split the channels and deleted the Blue; keeping only the green and red. I then used HT & curves to stretch the Green channel to try and make it look as close to the Red channel as I could. Then I used Pixel Math to create a new image using R (60%) and G (40%) to create a new B channel. I used LRGB combination and since the R channel was the cleanest of the 3 I used that as my Luminance channel. So the inputs went L=R, R=R, G=B and B=G and checked off chrominance reduction. If I may ask, when you made the mask and used curves to control the brightness is it strictly by using the luminance option? That’s how I tried but if utilizing the other choices in curves helps I will do that. And in regard to NSX… do you ever adjust the detail setting value? I have played with it and sometimes by upping the detail it helps but it’s easily to get carried away and it looks overdone. Again, thank you Andrea!
|
You cannot like this item. Reason: "ANONYMOUS".
You cannot remove your like from this item.
Editing a post is only allowed within 24 hours after creating it.
You cannot Like this post because the topic is closed.
Copy the URL below to share a direct link to this post.
This post cannot be edited using the classic forums editor.
To edit this post, please enable the "New forums experience" in your settings.
I'll be happy to give this a go. There's a lot of nice data here so keeping the black point clipping and noise reduction at a minimal would be one of my suggestions. Always hold back on clipping the dark side of the histogram. There is a bit of noise here though, so getting more integration would solve a lot of problems. But as i said, there is a lot of nice signal in there.
Thank you! Tonight was supposed to be clear skies for me but that changed quickly. Tonight and tomorrow (if it doesn’t take a turn) look to be great conditions here. Problem is I’m in Brooklyn, NY so aside from being a Bortle 8/9 I also have a limited horizon. For this target I’m only getting about 1hr and 45 minutes of imaging time before astronomical dawn. I’ve utilized both 300s and 420s exposures, honestly not sure what’s better. I’ve now leaned into maybe just keeping it at 300s since I have a small window and it would afford me more subs, also if a plane flies through one of the 420s it’s a an even bigger loss.
|
You cannot like this item. Reason: "ANONYMOUS".
You cannot remove your like from this item.
Editing a post is only allowed within 24 hours after creating it.
You cannot Like this post because the topic is closed.
Copy the URL below to share a direct link to this post.
This post cannot be edited using the classic forums editor.
To edit this post, please enable the "New forums experience" in your settings.
Vinny Vent:
For this target I’m only getting about 1hr and 45 minutes of imaging time before astronomical dawn.
I’ve utilized both 300s and 420s exposures, honestly not sure what’s better. I’ve now leaned into maybe just keeping it at 300s since I have a small window and it would afford me more subs, also if a plane flies through one of the 420s it’s a an even bigger loss. I know the feeling, we have no darkness at all anymore now. I agree that more subs rather than longer would probably be beneficial. It depends on how long you're spending on the object of course.
|
You cannot like this item. Reason: "ANONYMOUS".
You cannot remove your like from this item.
Editing a post is only allowed within 24 hours after creating it.
You cannot Like this post because the topic is closed.
Copy the URL below to share a direct link to this post.
This post cannot be edited using the classic forums editor.
To edit this post, please enable the "New forums experience" in your settings.
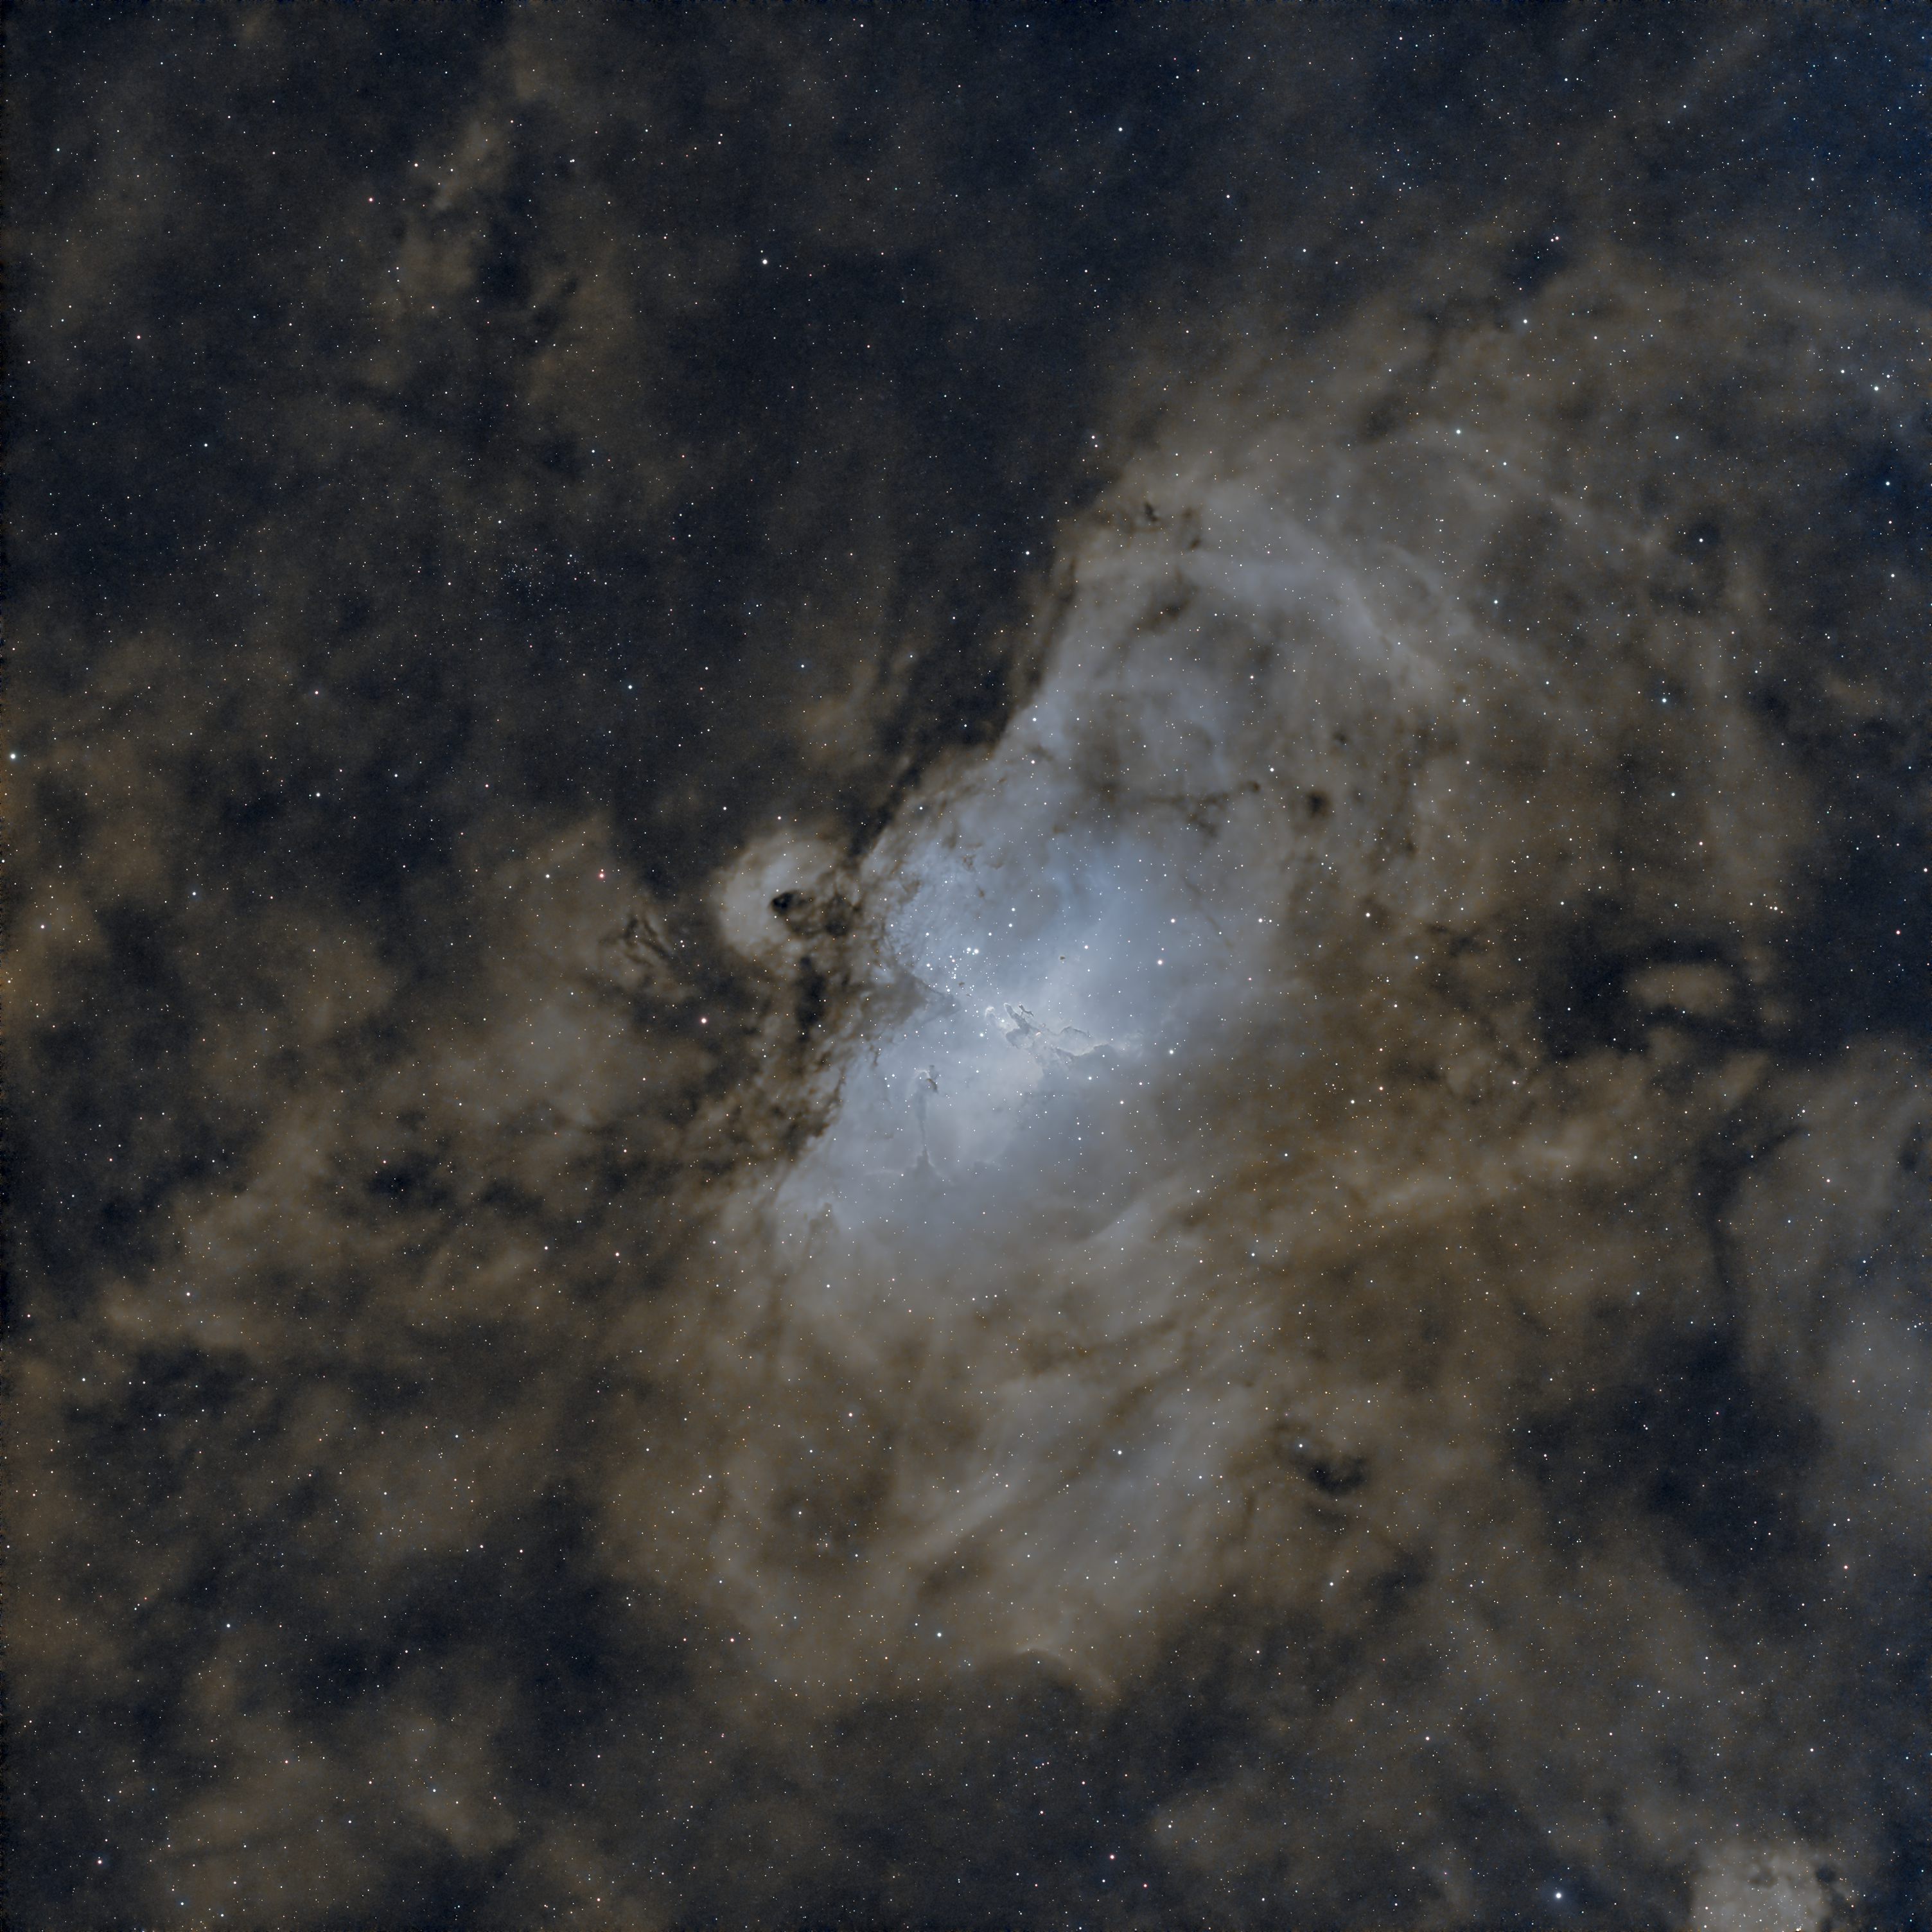
Hi Vinny, Here is my approach. Since it needs more hours of signal, and thus postprocessing reveals a lot of noise, what I did is create an HST-simulated palette with stars removed and then create an LRGB separating the R, G and B channels and a softly strecthed luminance to recover cleaner data. That's why the result is not very noisy. Then I added the stars back. You cannot stretch the faint nebulosity a lot because the data does not support it. That's a technique you can use if you like it when you haven't been able to collect a lot of photons  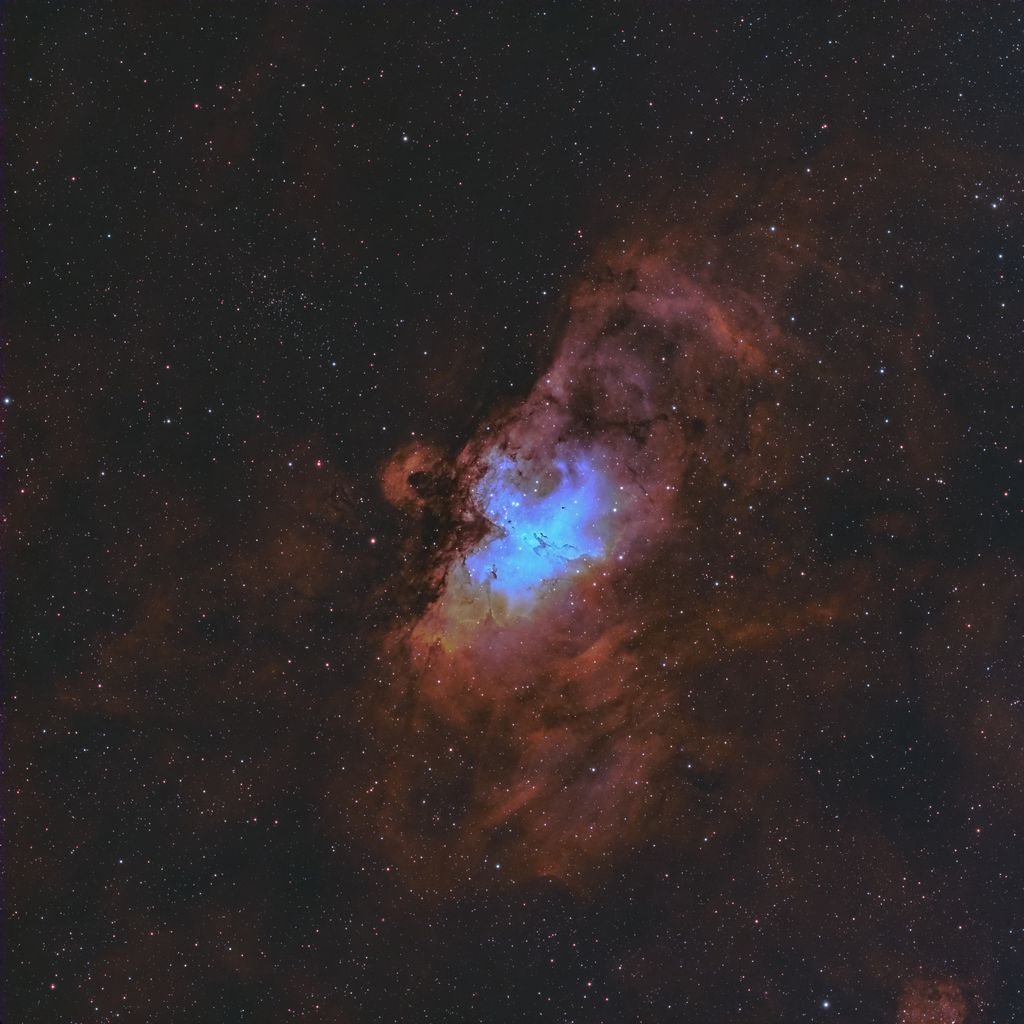 |
You cannot like this item. Reason: "ANONYMOUS".
You cannot remove your like from this item.
Editing a post is only allowed within 24 hours after creating it.
You cannot Like this post because the topic is closed.
Copy the URL below to share a direct link to this post.
This post cannot be edited using the classic forums editor.
To edit this post, please enable the "New forums experience" in your settings.
Vinny Vent:
For this target I’m only getting about 1hr and 45 minutes of imaging time before astronomical dawn.
I’ve utilized both 300s and 420s exposures, honestly not sure what’s better. I’ve now leaned into maybe just keeping it at 300s since I have a small window and it would afford me more subs, also if a plane flies through one of the 420s it’s a an even bigger loss.
I know the feeling, we have no darkness at all anymore now. I agree that more subs rather than longer would probably be beneficial. It depends on how long you're spending on the object of course.
Exactly. I’m trying to be disciplined in my imaging and avoiding the itch of jumping from target to target. Right now I am going to try and use my C8 to get time on Whirlpool and it works out well because I can get about 3 hours of data on that, run out and swap to the Redcat and use plan mode to make it grab that 1.45 hours of Eagle. My goal is to try and get at least 10-12 hours per target I image.
|
You cannot like this item. Reason: "ANONYMOUS".
You cannot remove your like from this item.
Editing a post is only allowed within 24 hours after creating it.
You cannot Like this post because the topic is closed.
Copy the URL below to share a direct link to this post.
This post cannot be edited using the classic forums editor.
To edit this post, please enable the "New forums experience" in your settings.
Álvaro Méndez:
Hi Vinny,
Here is my approach. Since it needs more hours of signal, and thus postprocessing reveals a lot of noise, what I did is create an HST-simulated palette with stars removed and then create an LRGB separating the R, G and B channels and a softly strecthed luminance to recover cleaner data. That's why the result is not very noisy. Then I added the stars back. You cannot stretch the faint nebulosity a lot because the data does not support it.
That's a technique you can use if you like it when you haven't been able to collect a lot of photons
Nice image! And thanks for the advice I appreciate it! I know I need more data, in fact I was just saying before my goal is to get at least 10-12 hours on the target (hopefully that makes for a noticeable improvement) right now I’m under 5 so I expected it to have a fair amount of noise - I just couldn’t help myself to see how it was coming along and do some preliminary processing lol
|
You cannot like this item. Reason: "ANONYMOUS".
You cannot remove your like from this item.
Editing a post is only allowed within 24 hours after creating it.
You cannot Like this post because the topic is closed.
Copy the URL below to share a direct link to this post.
This post cannot be edited using the classic forums editor.
To edit this post, please enable the "New forums experience" in your settings.
Vinny Vent:
If I may ask, when you made the mask and used curves to control the brightness is it strictly by using the luminance option? That’s how I tried but if utilizing the other choices in curves helps I will do that. And in regard to NSX… do you ever adjust the detail setting value? I have played with it and sometimes by upping the detail it helps but it’s easily to get carried away and it looks overdone. Yep, just luminace rgb/k. My NX settings are 0.5 and 0.15 (denoise/detail) and I change them quite rarely .
|
You cannot like this item. Reason: "ANONYMOUS".
You cannot remove your like from this item.
Editing a post is only allowed within 24 hours after creating it.
You cannot Like this post because the topic is closed.
Copy the URL below to share a direct link to this post.
This post cannot be edited using the classic forums editor.
To edit this post, please enable the "New forums experience" in your settings.
andrea tasselli:
Vinny Vent:
If I may ask, when you made the mask and used curves to control the brightness is it strictly by using the luminance option? That’s how I tried but if utilizing the other choices in curves helps I will do that. And in regard to NSX… do you ever adjust the detail setting value? I have played with it and sometimes by upping the detail it helps but it’s easily to get carried away and it looks overdone.
Yep, just luminace rgb/k. My NX settings are 0.5 and 0.15 (denoise/detail) and I change them quite rarely . Thanks!
|
You cannot like this item. Reason: "ANONYMOUS".
You cannot remove your like from this item.
Editing a post is only allowed within 24 hours after creating it.
You cannot Like this post because the topic is closed.
Copy the URL below to share a direct link to this post.
This post cannot be edited using the classic forums editor.
To edit this post, please enable the "New forums experience" in your settings.
And if you were wondering why a subtracted 10% of the Ha signal from the G layer that's because of Ha leak into G color dye used in the camera and I know that because I measured it.
|
You cannot like this item. Reason: "ANONYMOUS".
You cannot remove your like from this item.
Editing a post is only allowed within 24 hours after creating it.
You cannot Like this post because the topic is closed.
Copy the URL below to share a direct link to this post.
This post cannot be edited using the classic forums editor.
To edit this post, please enable the "New forums experience" in your settings.
Wow interesting, may I ask how you did that?
|
You cannot like this item. Reason: "ANONYMOUS".
You cannot remove your like from this item.
Editing a post is only allowed within 24 hours after creating it.
You cannot Like this post because the topic is closed.
Copy the URL below to share a direct link to this post.
This post cannot be edited using the classic forums editor.
To edit this post, please enable the "New forums experience" in your settings.
Something along these lines: 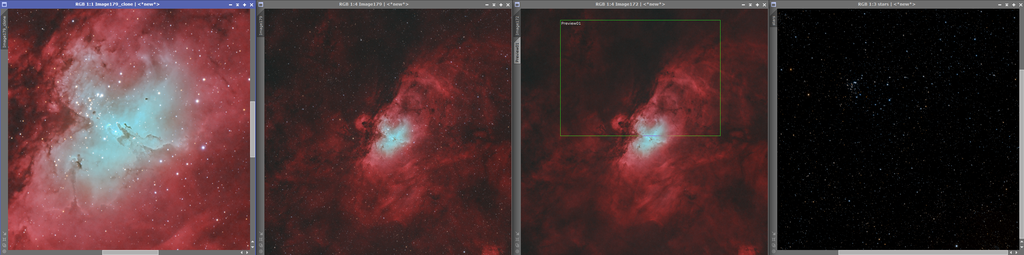 Pixinsight: - Separated master into R - G - B and tossed the B image. - BXT Correct only - followed by BXT deconvolution. - SXT > Then used Foraxx to integrate the stars image. - DynamicCrop on all images to remove stacking artefacts. - DBE on R and G. - NBColourMapper to colorize the Ha and Oiii separately. - Histogram stretching - Two instances per image, the stars to taste with small adjustments. - ColorSaturation to adjust star color. - Minor noise reduction scaled to the images particular noise level (only Ha and Oiii, not the stars). - Pixelmath to combine HOO. - Masked HDRMT to bring back some of the details in the core. - Masked curves adjustments on color/saturation. - ACDNR with lightness mask - Screened stars back in. Normally I wouldn't stretch each channel separately. The Ha easily overpowers the Oiii in this image though, so I wanted to try something. EDIT: Forgot to mention SCNR which I used after colourmapping the Ha and Oiii, to various degree - but only slightly. About 20-30% I believe. Also, in stead of subtracting something I actually added 15% Ha into the G channel in the HOO blend.
|
You cannot like this item. Reason: "ANONYMOUS".
You cannot remove your like from this item.
Editing a post is only allowed within 24 hours after creating it.
You cannot Like this post because the topic is closed.
Copy the URL below to share a direct link to this post.
This post cannot be edited using the classic forums editor.
To edit this post, please enable the "New forums experience" in your settings.
Noticed that the previews were a bit small, these should be full size.  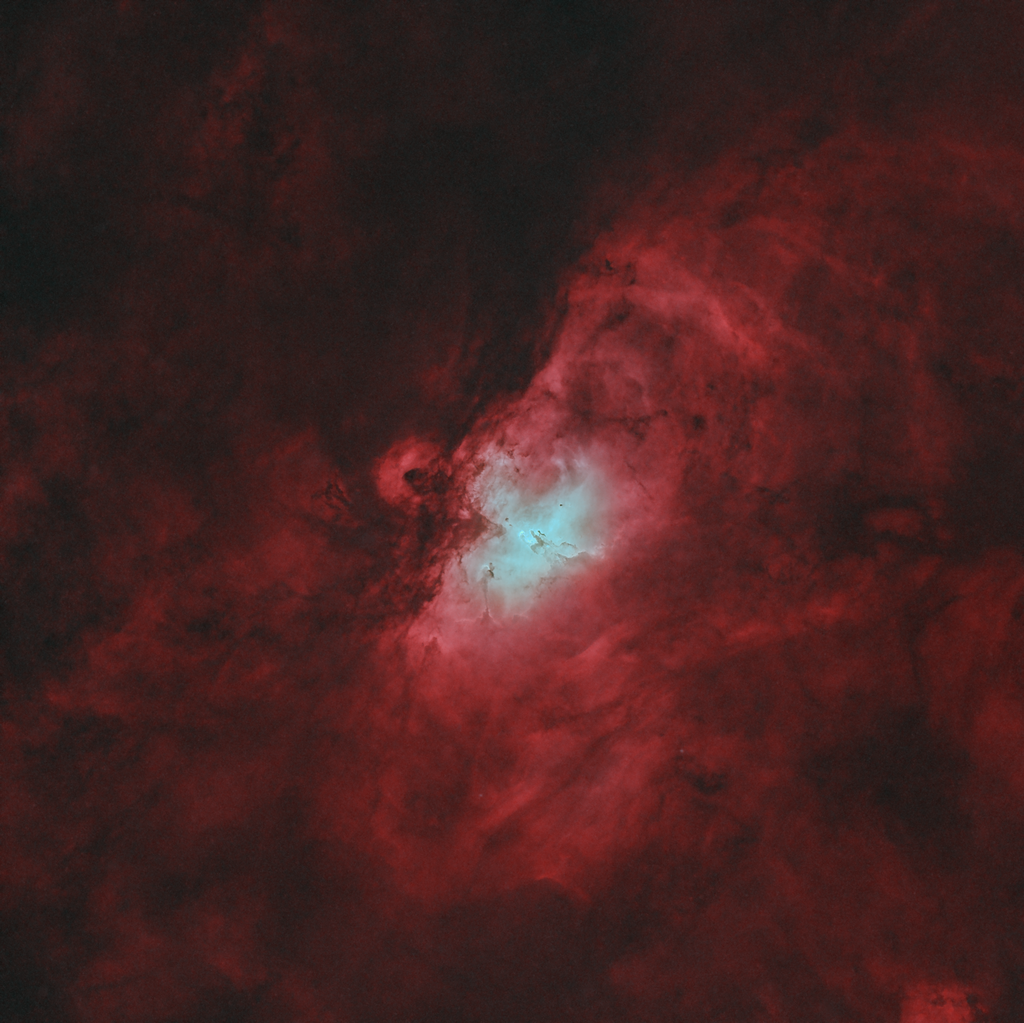 |
You cannot like this item. Reason: "ANONYMOUS".
You cannot remove your like from this item.
Editing a post is only allowed within 24 hours after creating it.
You cannot Like this post because the topic is closed.
Copy the URL below to share a direct link to this post.
This post cannot be edited using the classic forums editor.
To edit this post, please enable the "New forums experience" in your settings.
Thank you for the detailed step by step!
A few questions if I may…
- Do you find DBE superior to GraXpert? Thus far I have been using GraXpert for background extraction.
- Is there a specific reason to running DBE after separating the channels and doing it on them independently vs DBE and then channel separation?
- Guessing NBColorMapper is a downloadable script as I don’t seem to have it in my PI?
|
You cannot like this item. Reason: "ANONYMOUS".
You cannot remove your like from this item.
Editing a post is only allowed within 24 hours after creating it.
You cannot Like this post because the topic is closed.
Copy the URL below to share a direct link to this post.
This post cannot be edited using the classic forums editor.
To edit this post, please enable the "New forums experience" in your settings.
Vinny Vent:
Wow interesting, may I ask how you did that? I used an Ha filter and measured against my L-Extreme how much Ha emission was recorded, with an object with negligible OIII, in the G channel. L-Ultimate is half as much in width as the L-Extreme so there you go...
|
You cannot like this item. Reason: "ANONYMOUS".
You cannot remove your like from this item.
Editing a post is only allowed within 24 hours after creating it.
You cannot Like this post because the topic is closed.
Copy the URL below to share a direct link to this post.
This post cannot be edited using the classic forums editor.
To edit this post, please enable the "New forums experience" in your settings.
Vinny Vent:
Thank you for the detailed step by step!
A few questions if I may…
- Do you find DBE superior to GraXpert? Thus far I have been using GraXpert for background extraction.
- Is there a specific reason to running DBE after separating the channels and doing it on them independently vs DBE and then channel separation?
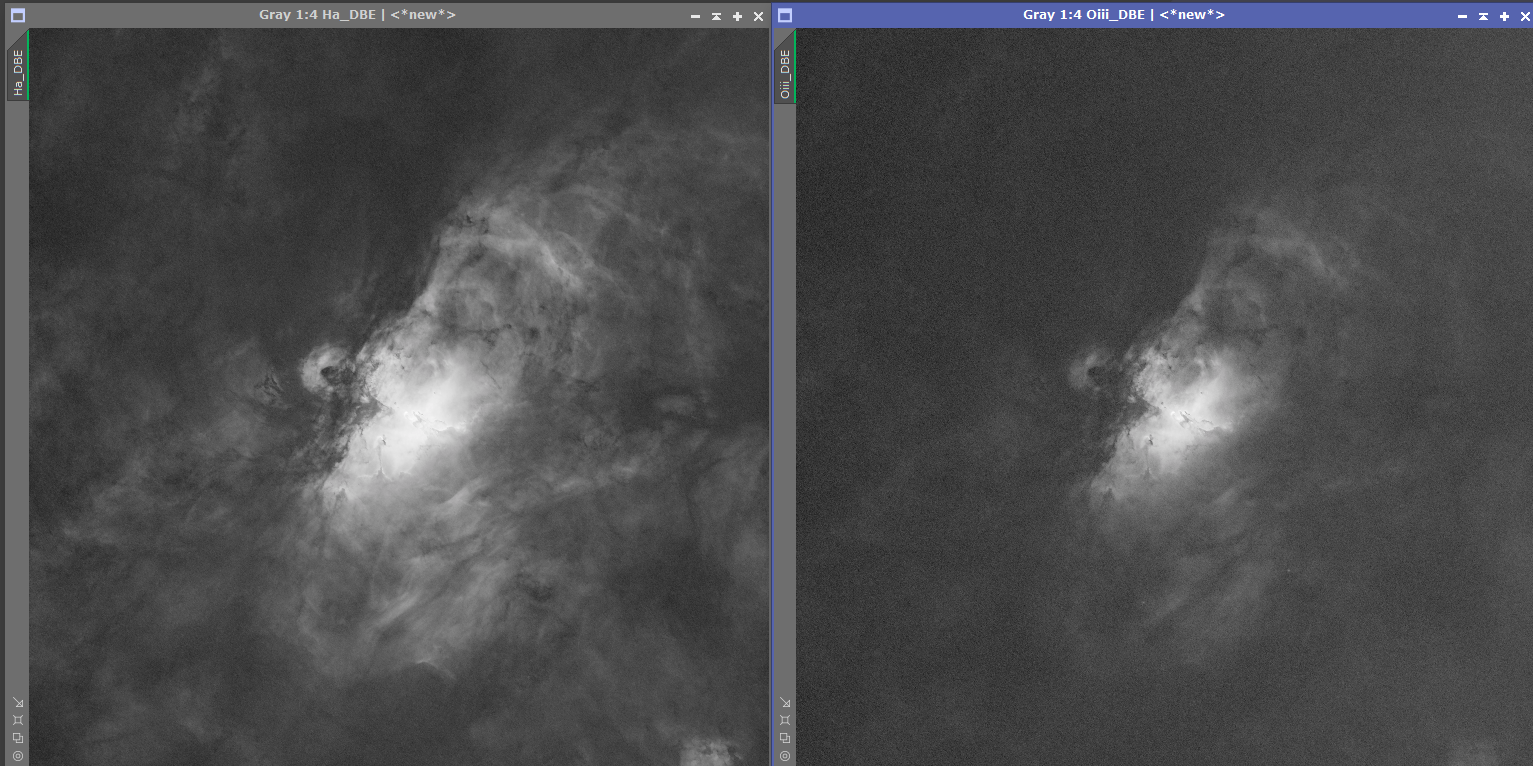
- Guessing NBColorMapper is a downloadable script as I don’t seem to have it in my PI? DBE is far superior to GraXpert, no contest IMO. GraXpert more often than not destroys faint signal. If you like to use it make sure to crop any edges out first though as that would throw it off it's scales. It can be useful in certain scenarios, but I've never liked it much. Sometimes you may need to repeat the process a bit, which I did on the Oiii image in this case. Simply because the signal overall is fainter and there was some gradients towards one of the edges. DBE, even on standard settings, works pretty well in comparison. You could probably do both as there isn't any definite right or wrong. I usually work with mono data so I'm used to doing this per channel. I find it easier to locate large scale gradients, thus removing them more efficiently and better by doing it per channel. In combined images some of these gradients may seem fine as they get obscured/clean background signal. I don't copy the DBE instance between images though, they will of course be different as the gradients shift. Yes, you could do the same in PS as well as it's basically the same principle as using some of the channel tools available there, but you can find it here: https://pixinsight.com/forum/index.php?threads/new-script-nbcolourmapper.21673/ |
You cannot like this item. Reason: "ANONYMOUS".
You cannot remove your like from this item.
Editing a post is only allowed within 24 hours after creating it.
You cannot Like this post because the topic is closed.
Copy the URL below to share a direct link to this post.
This post cannot be edited using the classic forums editor.
To edit this post, please enable the "New forums experience" in your settings.
Vinny Vent:
Thank you for the detailed step by step!
A few questions if I may…
- Do you find DBE superior to GraXpert? Thus far I have been using GraXpert for background extraction.
- Is there a specific reason to running DBE after separating the channels and doing it on them independently vs DBE and then channel separation?
- Guessing NBColorMapper is a downloadable script as I don’t seem to have it in my PI?
DBE is far superior to GraXpert, no contest IMO. GraXpert more often than not destroys faint signal. If you like to use it make sure to crop any edges out first though as that would throw it off it's scales. It can be useful in certain scenarios, but I've never liked it much. Sometimes you may need to repeat the process a bit, which I did on the Oiii image in this case. Simply because the signal overall is fainter and there was some gradients towards one of the edges. DBE, even on standard settings, works pretty well in comparison.
You could probably do both as there isn't any definite right or wrong. I usually work with mono data so I'm used to doing this per channel. I find it easier to locate large scale gradients, thus removing them more efficiently and better by doing it per channel. In combined images some of these gradients may seem fine as they get obscured/clean background signal. I don't copy the DBE instance between images though, they will of course be different as the gradients shift.
Yes, you could do the same in PS as well as it's basically the same principle as using some of the channel tools available there, but you can find it here:
https://pixinsight.com/forum/index.php?threads/new-script-nbcolourmapper.21673/
Thank you for the explanation and the link!
|
You cannot like this item. Reason: "ANONYMOUS".
You cannot remove your like from this item.
Editing a post is only allowed within 24 hours after creating it.
You cannot Like this post because the topic is closed.
Copy the URL below to share a direct link to this post.
This post cannot be edited using the classic forums editor.
To edit this post, please enable the "New forums experience" in your settings.