ngc3718 Requests for constructive critique · Anderl · ... · 10 · 266 · 2

Anderl 4.52
...
· 
·  1 like
·  Share link
ngc3718.jpg


hallo fellow friends of the night sky, 

i am looking for some critic and ways to improve my processing. 

I took the picture with my esprit 120, imx571m, eq6r pro and antlia lrgb filters. 
it consists out of around 35h of exposure time. 
- around 300 Lum subs at 200sec each
- around 80 rgb subs each of around 300sec

i am having big problems with lrgb approaches. 
my last galaxy image was an rgb only, simply because I am having an hard time dealing with wash out. 

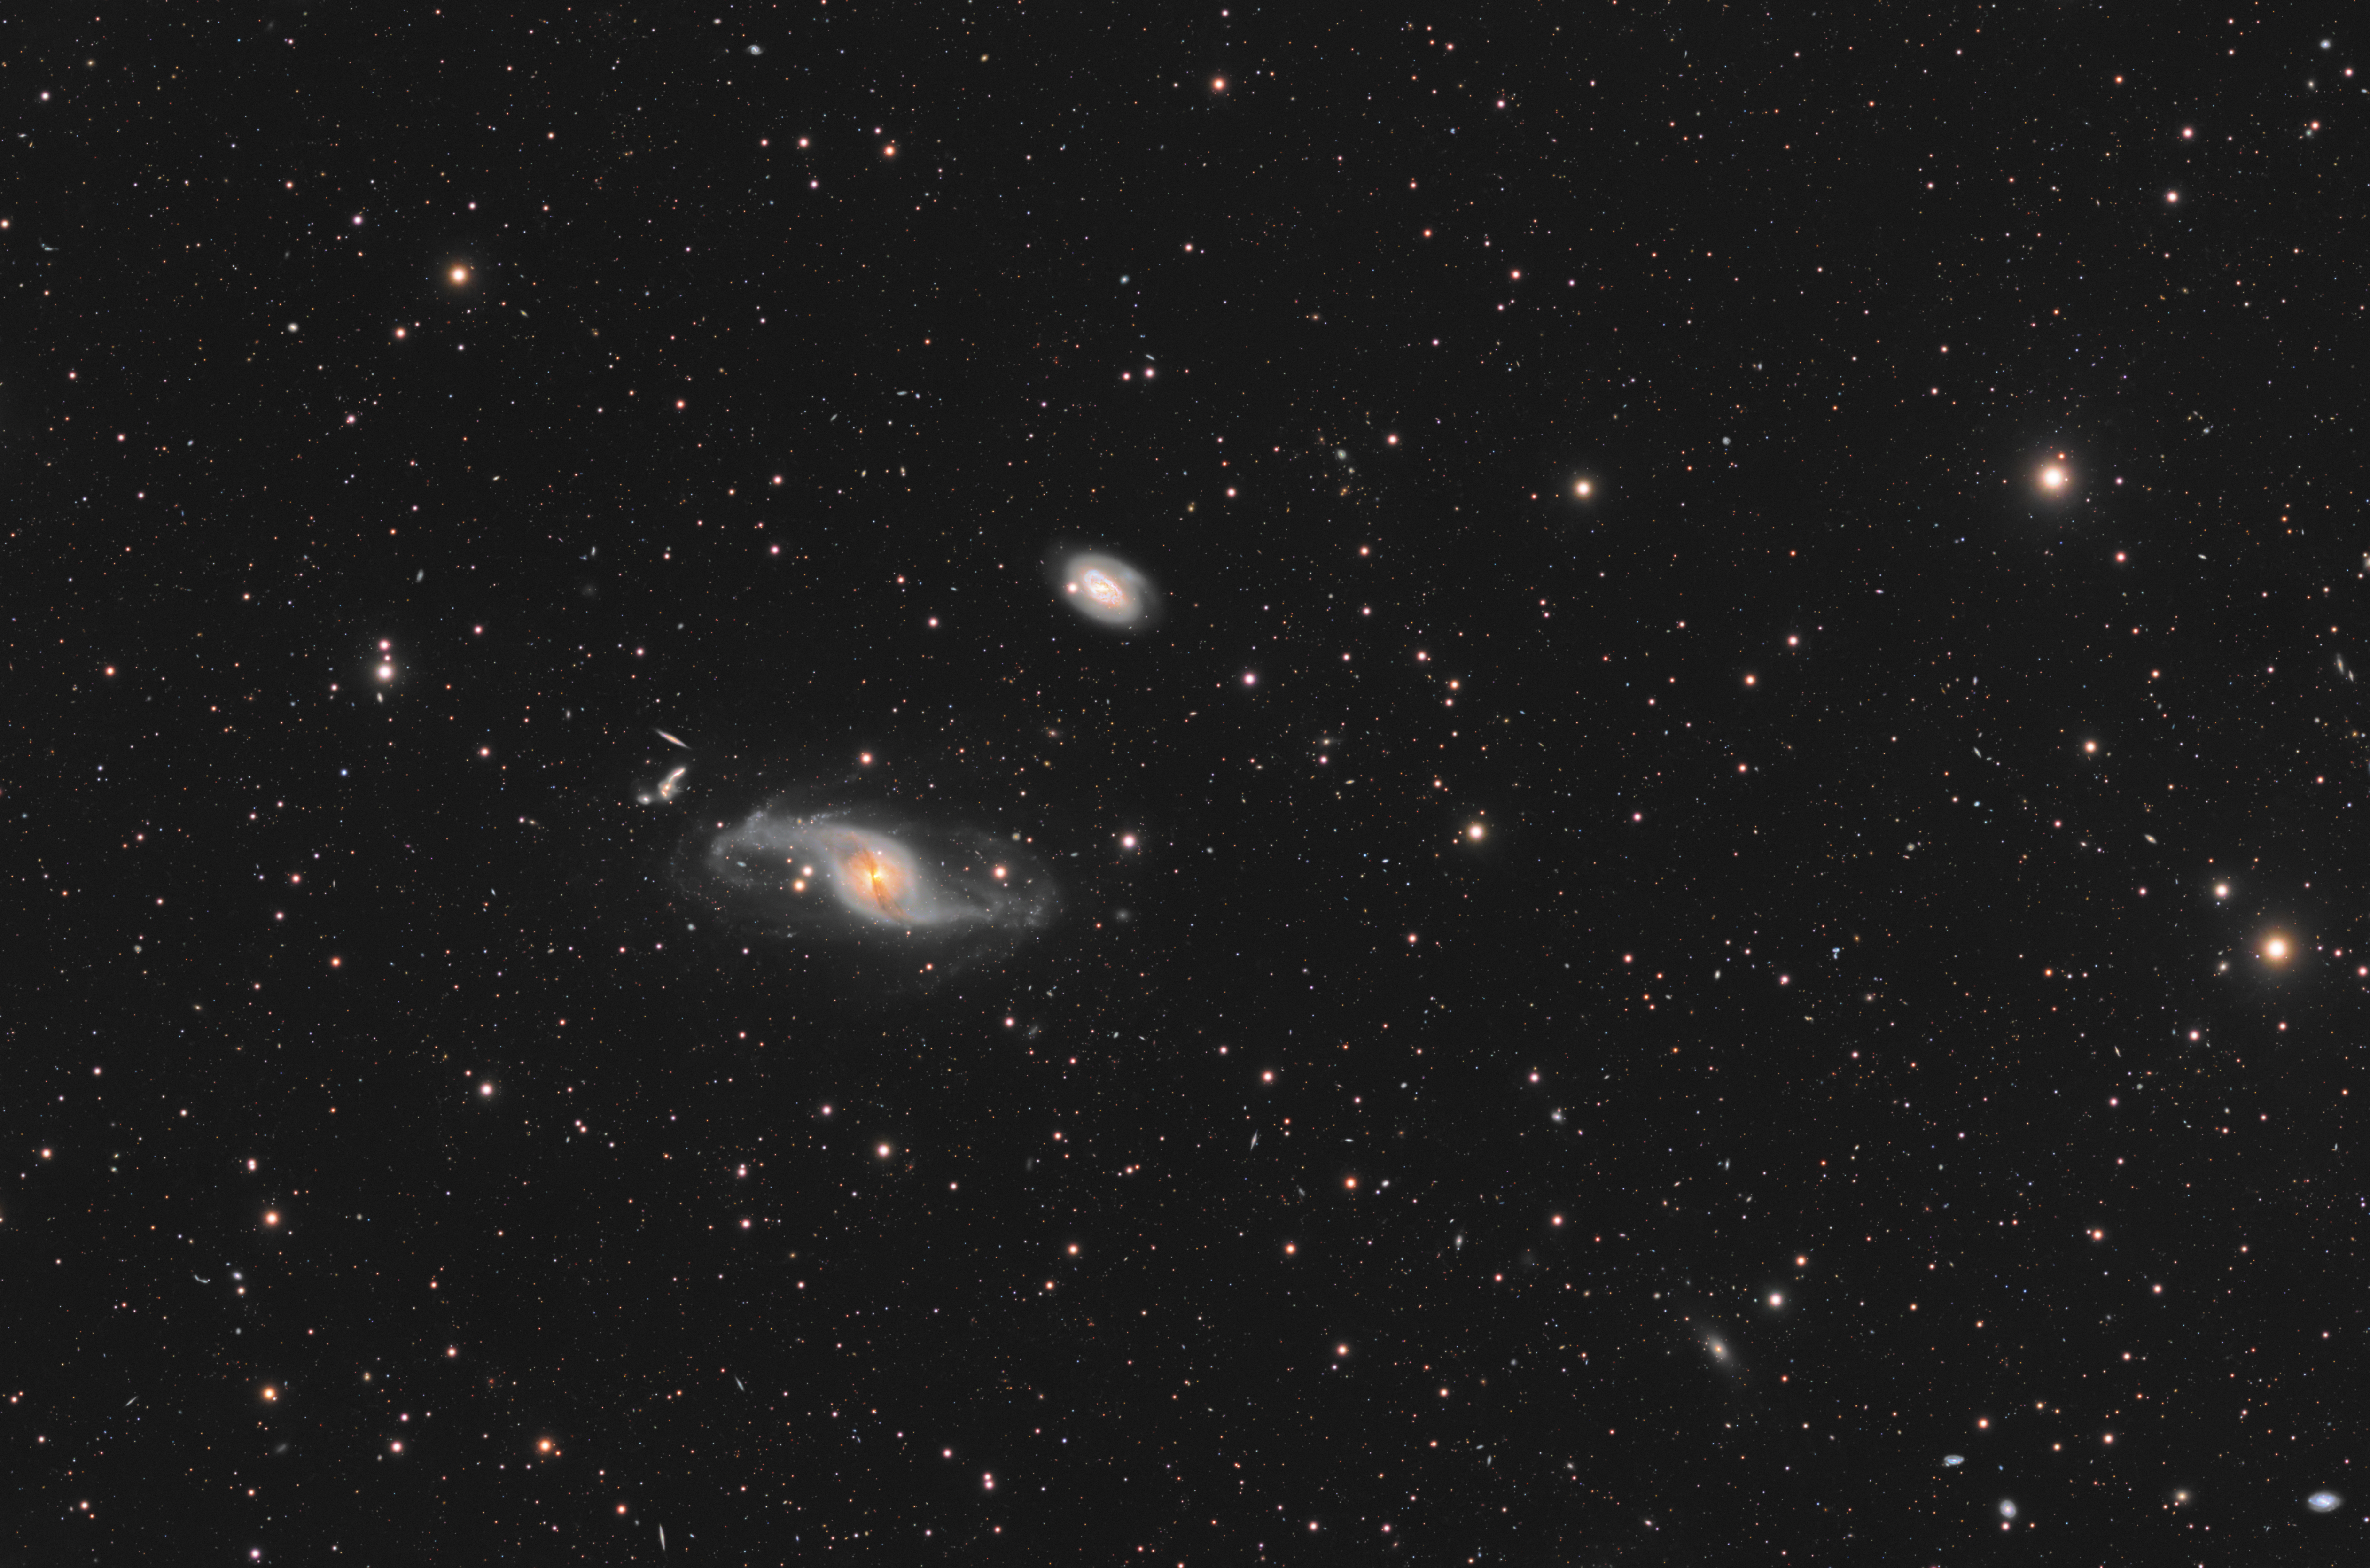
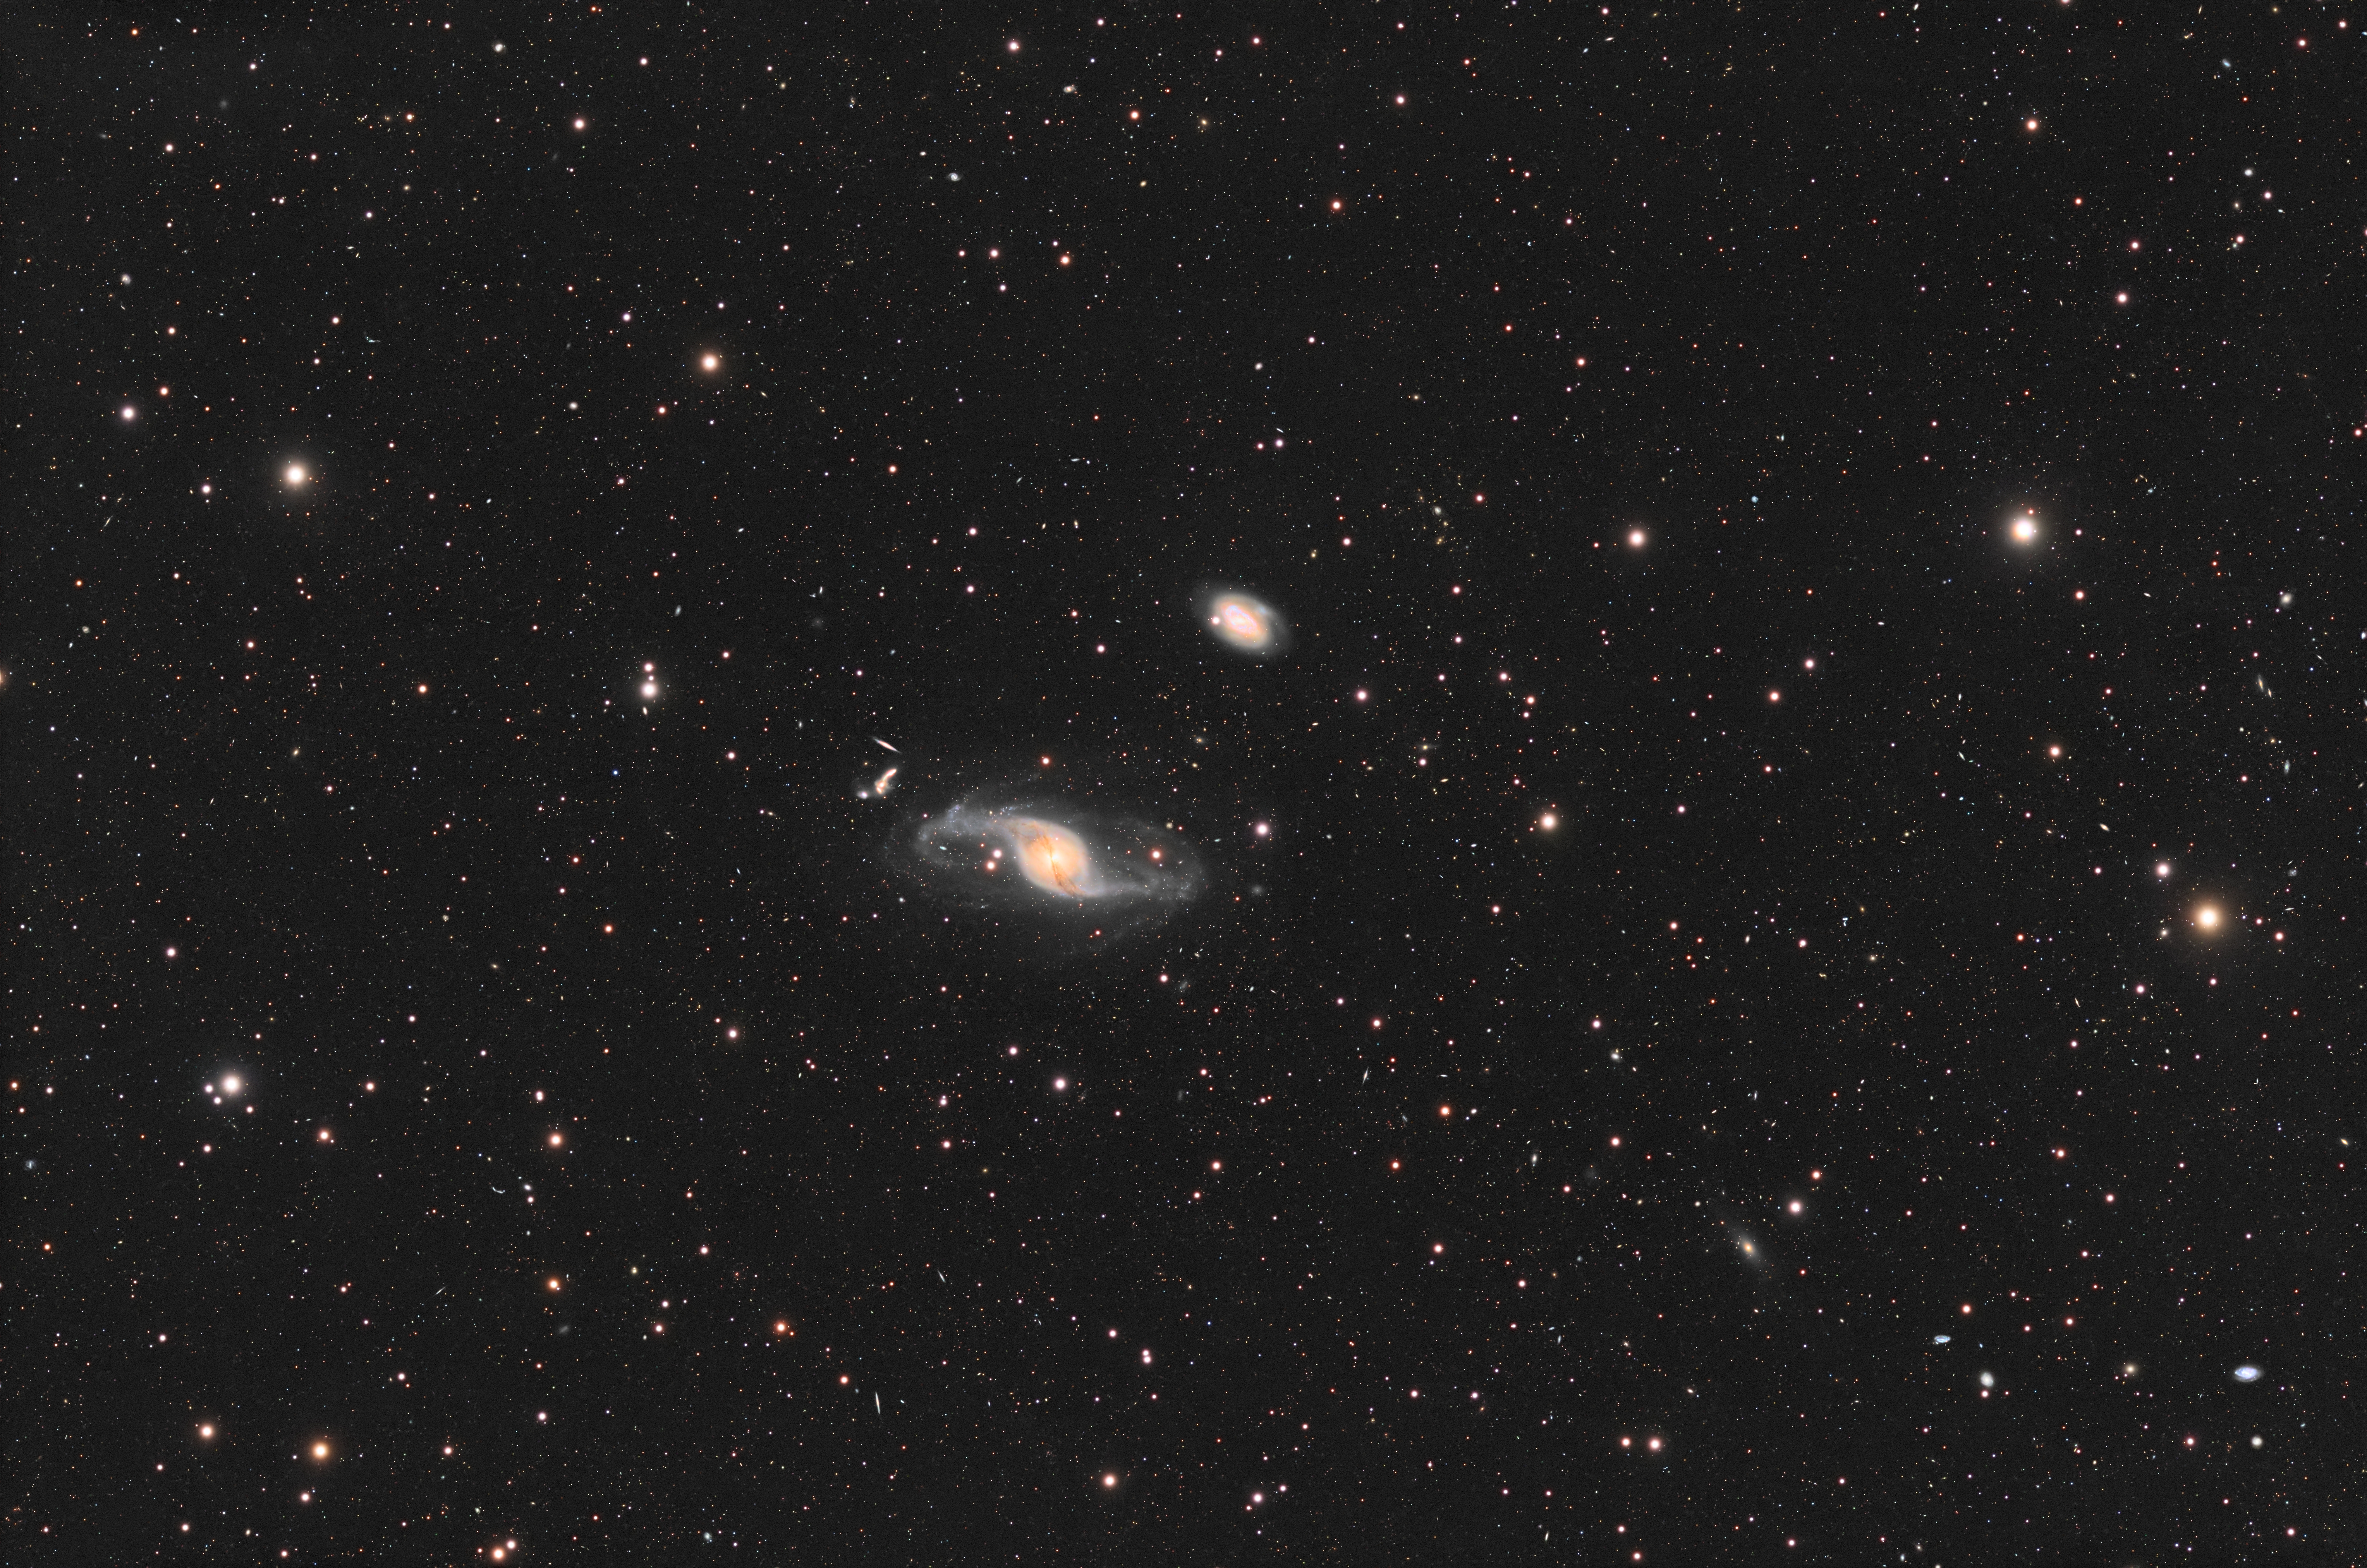
problems I run into with ngc3718 are:

- color wash out. I tried combining a stretched Lum and stretched rgb in pixinsight, photoshop and astro pixel processor
- strong background gradients (which are still somewhat visible) any way to correct them? 

thx in advance
anderl
Edited ...
Like
afd33 9.38
...
· 
·  1 like
·  Share link
There's a lot more noise than I'd expect for that much luminance data. What's your work flow? I see the gradient you're talking about, but I don't think it's too bad. I also would have cropped it slightly more on both of the sides and just a touch off the top, but that's really personal preference since I prefer not cutting brighter stars in half.
Like
Anderl 4.52
Topic starter
...
· 
·  Share link
Quinn Groessl:
There's a lot more noise than I'd expect for that much luminance data. What's your work flow? I see the gradient you're talking about, but I don't think it's too bad. I also would have cropped it slightly more on both of the sides and just a touch off the top, but that's really personal preference since I prefer not cutting brighter stars in half.

hey Quinn, 

I just used the autocrop files that pixinsight produced. 
my workflow is 

- lrgb stacking in pixinsight (2x drizzle 0.9 drop shrink)
- gradient correction of the individual pictures using the gradient correction tool, this time I also tried it with astro pixel processor and graxpert
- blurX on the lum
- resample to the original size
- channel combination of rgb
- spcc
- starX and separate stretching of star and starless layer, as well as a separate saturation of the two. 
- recombining, noiseX on a strong setting on the rgb 
- stretching the Lum, noiseX on low settings
- combination of the two in photoshop 

that should be more or less my whole workflow. lot of back and forth this time.
Like
gnnyman 6.04
...
· 
·  1 like
·  Share link
The core of the galaxies, mainly the smaller ones, are overprocessed - too bright, burnt out.  The overall color impression is IMO too pink. The noise is too much to be OK. These are my three observations for the image here. 
Now my suggestions ( I have same situations very often) - you could the following processing routine: After stracking use the BlurXterminator with a very modest star size reduction setting (e.g. 0,05 or 0,1), then use NoiseXterminator with maybe not more than 0.5 (half or maximum), then StarXterminator. Create a starless and a stars-only image. The stars image combine in LRGB to color linear and stretch it moderately with Seti Astro´s Star stretch - I would use as setting STR4 or 4,5. You have now a properly stretched star image to store.
The starless image, I would use PI´s Masked Stretch with the standard 0.125 setting - and then I would use the Statistic Stretch by Seti Astro and make the final stretch - be careful not to overstretch the bright details - so use the settings from the L channel also for RGB. Combine the stretched mono channels with LRGB to a final starless image and then you could recombine it with the stars in PixelMath by using " combine( xx-starimage, yy-starlessimage, op_screen()) ".
An alternative method would be to use the GHS (Generalized Hyperbolic Stretch) for the starless image - it is a bit tricky but with the proper placement of the stretching point you can very well avoid outburning the cores of the galaxies. Try and experiment with it -you might get frustrated in the beginning (as I was) but after some trial-and-error hours, you like it.
Hope this helps a bit!

CS
Georg
Like
afd33 9.38
...
· 
·  1 like
·  Share link
Seems like a pretty normal workflow. I don't have photoshop, so I combine my L in pix using the LRGB combination tool. Uncheck the boxes by R,G, and B, fill in the L box appropriately, drag the triangle on to the RGB image to apply. The sliders can be a bit confusing on the bottom. Left is more, right is less.

So what I do with that, is I'll stretch my L how I like, and then apply it with LRGB Combination. If I don't like the result for whatever reason, I undo it. Then change how I stretched the L, apply it, and repeat until I get something I like. I have noticed I tend to over do the stretching of the luminance channel simply because it looks fine, until I apply it to the RGB image. It takes some trial and error to get it right.

Now that I think of it I should try the Imageblend script to add my luminance. I've never tried it before, but I don't see why it couldn't work. Then it has some options that would hopefully make it a little less tedious than the way I describe doing it above. Repository for that script if you want to try it: https://www.cosmicphotons.com/pi-scripts/imageblend/
Like
Emission 2.11
...
· 
·  1 like
·  Share link
Anderl:
- color wash out. I tried combining a stretched Lum and stretched rgb in pixinsight, photoshop and astro pixel processor
- strong background gradients (which are still somewhat visible) any way to correct them?


If you run into problems with washed out colors the reason might be that the stretched lum is not matched with your stretched rgb image. Stretch your LUM and RGB as you like but in the end the histogram "mountain tops" should be at the same position on the X axis for both images. Then you can combine them and the background noise (luminance/chrominance noise) should smooth out greatly. The galaxy will look "washed out" at first but you should have enough headroom to increase saturation. 

For the background gradients did you try GraXpert with smoothing at zero (for a rather aggressive correction?)
- recombining, noiseX on a strong setting on the rgb

Caution, if you are reducing the color noise in a MUCH greater amount than the luminance noise it will "enhance" the visual perception of the luminance noise in the final image. Me personally I use NoiseX only when L and RGB are already stretched, matched and combined. The luminance and chrominance noise in the matched LRGB image should be around the same level and I test different noise reduction levels. You can reduce the color noise more aggressively than luminance noise because in the human eye color noise appears more "unpleasant" than the colorless luminance noise. For me a small amount of "graininess" in the background is natural and allowed in the final image, much better than the waxy & blotchy background of images processed with NoiseX on 0.9 and greater. 

CS
Tobi

Edit: Sorry, I forgot to add that it is still a beautiful capture! Congratulations. I like it very much and wish you good luck on your processing.
Edited ...
Like
Anderl 4.52
Topic starter
...
· 
·  Share link
Quinn Groessl:
Seems like a pretty normal workflow. I don't have photoshop, so I combine my L in pix using the LRGB combination tool. Uncheck the boxes by R,G, and B, fill in the L box appropriately, drag the triangle on to the RGB image to apply. The sliders can be a bit confusing on the bottom. Left is more, right is less.

So what I do with that, is I'll stretch my L how I like, and then apply it with LRGB Combination. If I don't like the result for whatever reason, I undo it. Then change how I stretched the L, apply it, and repeat until I get something I like. I have noticed I tend to over do the stretching of the luminance channel simply because it looks fine, until I apply it to the RGB image. It takes some trial and error to get it right.

Now that I think of it I should try the Imageblend script to add my luminance. I've never tried it before, but I don't see why it couldn't work. Then it has some options that would hopefully make it a little less tedious than the way I describe doing it above. Repository for that script if you want to try it: https://www.cosmicphotons.com/pi-scripts/imageblend/

the image blend script is great! thanks for pointing me at it
Like
Anderl 4.52
Topic starter
...
· 
·  1 like
·  Share link
ngc3781.jpg

this is a version done with the image blend script, a more similar noise reduction and a more subtle galaxie processing. looking it at in comparison I probably still cranked up the galaxy cores a bit to much. 
ghs is a great tip!
Edited ...
Like
dalebush 0.00
...
· 
·  1 like
·  Share link
Nice image.  Have you tried to pull down the highlights using the highlights tool in Photoshop.  I suspect doing so would bring out the details in your galaxies.
Like
Alexn 12.25
...
· 
·  1 like
·  Share link
Honestly I have nothing of value to add - I think the image is pretty amazing as is.

As was mentioned in another post above, if you pulled down the highlights a little, you'd get some of the core detail back in the galaxies, and applying a bit of a saturation boost (masked to those brighter galactic cores) you'd find you'll get a nice colour boost too, but as mentioned, these are all subjective things and I find the image to be VERY nice as it is.

Alex.
Like
AstroRBA 4.98
...
· 
·  1 like
·  Share link
It looks like you've nailed this one !! Well done !
Like
 
Register or login to create to post a reply.